|
|
Posted By RCI,
Tuesday, March 22, 2022
Updated: Wednesday, April 13, 2022
|
How do you like your eggs?
And by that, we mean Easter eggs? April 17 will be here before we know it, but there’s still time to introduce some fresh ideas when it comes to chocolate Easter eggs. This week, we’re featuring EGGS-tra Easter eggs to help spark your imagination.
Smash Eggs
Say “goodbye” to hot cocoa bombs and “hello” to smash eggs! Many chocolatiers already have a hollow Easter egg mould in their toolkit, but what do you fill it with? Depending on the size of your mould, you may want to fill your smash egg with jelly beans, miniature foiled chocolates, truffles, chocolate-covered mini pretzels, chocolate-covered nuts and/or berries, etc.
Some other unique ideas we’ve seen are eggs filled with tiny white chocolate chicks (cue “aww!”) and the more unexpected mini chocolate dinosaurs (cue gasp!). For even more dramatic effect, don’t forget the sprinkles, which will undoubtedly go flying upon impact between the egg and the mallet!
We love how RCI members Anderson’s Candies and Sarris Candies displayed their colorful smash eggs on their Facebook pages!
Easter Egg Overflow
There’s no surprise what you’re getting with Aldi’s Curious Inventions Easter Eggs! These Easter eggs are so packed with flavor, the contents are bursting through the chocolate shell. Although this does create a nice visual effect, the flavor combinations are just as intriguing.
There are six different varieties, such as banoffee (banana, caramel and butterscotch flavors); salted pretzel and orange; cookies and cream; popping candy; strawberries and cream (with real freeze-dried strawberry pieces) and the Billionaire egg, featuring chocolate and caramel fudge, white chocolate covered cookies and honeycomb candy.
Easter Egg Bark
Who says Easter eggs have to be three-dimensional? Here’s two examples of eggs that, despite their shape, don’t fall flat on the delivery!
It’s eggs-on-eggs-on-eggs with this chocolate bark by the LittleSugar Snaps blog that features loads of popular egg-themed candies. We love the swirls of color on the eggs by the Chocolate Pizza Company, plus the addition of a beautifully scribed name is an extra special touch.
Fruity Follies
These fruity lookalikes will have you doing a double-take! With a little imagination, Melt London transforms a standard three-dimensional egg into a strawberry filled with a chocolate strawberry cake.
Fruit lovers will undoubtedly fall for these lifelike pomegranate and lemon-shaped moulded chocolates sold by British grocery retailer, Waitrose. The pomegranate is made with caramelized white chocolate and real pomegranate, while the lemon version features white chocolate infused with zesty lemon flavors.
Animal-Themed Eggs
Take a walk on the wild side when pulling your inspiration from this barnyard bunch by Australian chocolatier,
Cacao or try a more abstract approach with the animal prints created for fashion designer Roberto Cavalli’s Italian coffee shop.
No matter if you like your chocolate Easter eggs more traditional or if you prefer a more unconventional approach, we hope this week’s post offers plenty of sweet inspiration this season!
Crave more?C
lick here to subscribe and start receiving weekly tips, like this, delivered straight to your email inbox. RCI's blog is just one of the many resources we offer to help candy makers refine their craft and build upon their business and marketing practices.
Follow us on Facebook for even more sweet inspiration.
Not a member? Click here to learn how RCI can help you build your sweet business
.
Tags:
Bark
Chocolate
Creative
Easter
Easter Eggs
Fruit
Holidays
Moulds
Permalink
| Comments (0)
|
|
|
Posted By RCI,
Wednesday, January 26, 2022
|

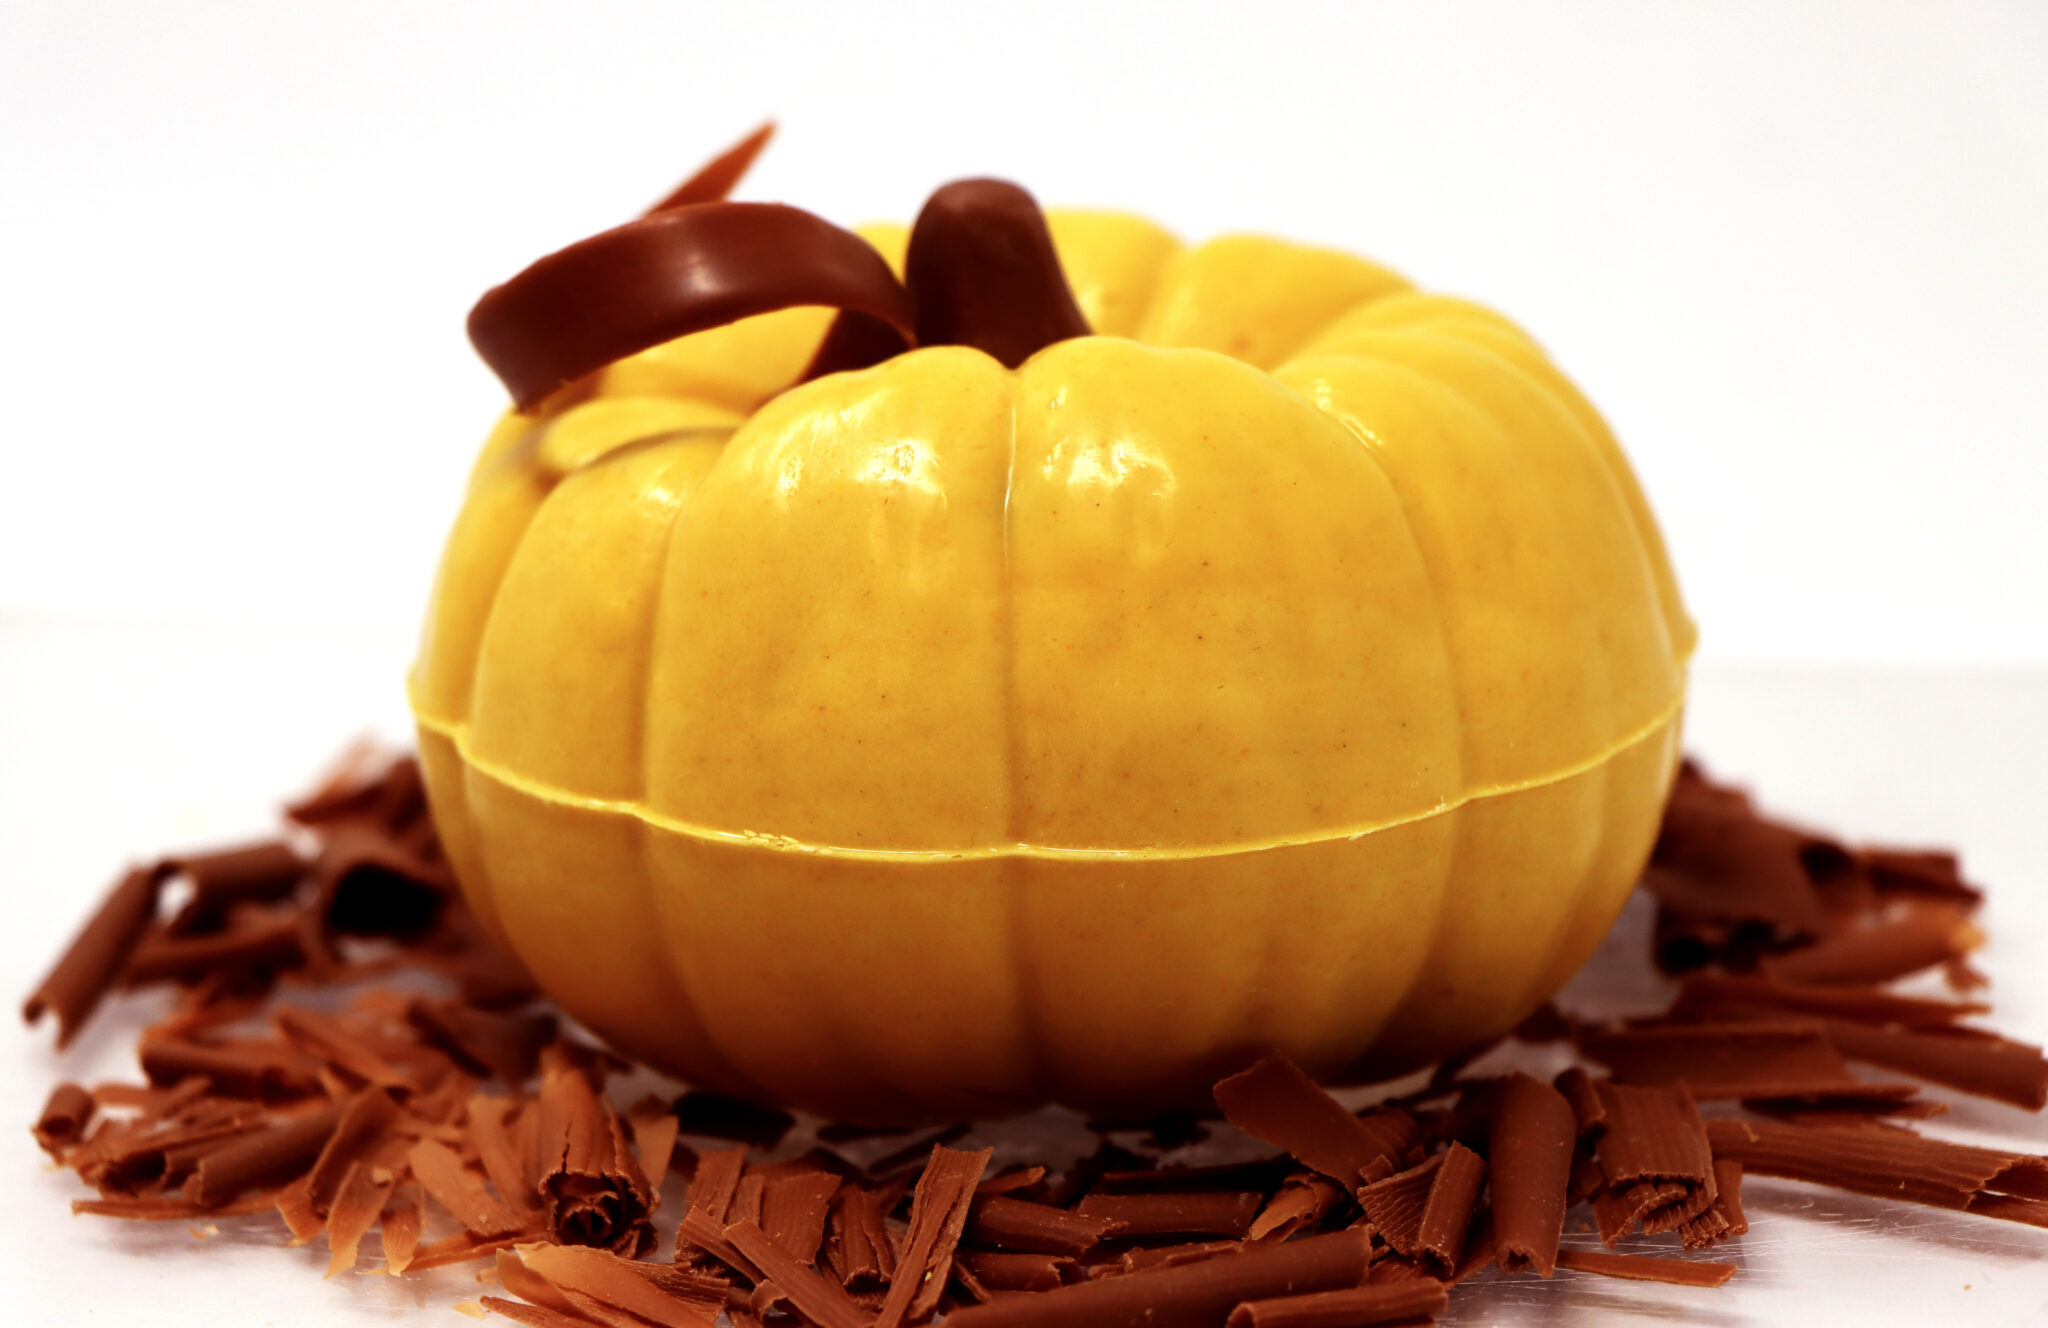
This sweet idea from RCI partner, Tomric Chocolate Systems, combines two of the hottest trends this fall—pumpkin spice and a hot cocoa bomb all in one unmistakably fall package. Unless you’ve been living under a rock recently, you’re likely well aware last year’s hot cocoa bomb trend is just as hot as ever. Stand out from the literal hundreds, if not thousands, of cocoa bombs on the market these days by offering something more unexpected, a pumpkin spice hot cocoa bomb, in the shape of—you guessed it—a pumpkin! Click here for detailed instructions on how to recreate this exact look using Tomric’s H-855 mould and their recipe for pumpkin spice hot cocoa to fill your pumpkins! Although today is National Pumpkin Day—this concept can be celebrated throughout November and can be marketed to customers as a fall holiday hostess gift or even as centerpieces for the Thanksgiving table. If this cute little gourd has you feeling inspired, look at your inventory of hollow moulds that could also be converted into unique hot cocoa bombs like this. Crave more?Click here to subscribe and start receiving weekly tips, like this, delivered straight to your email inbox. RCI's blog is just one of the many resources we offer to help candy makers refine their craft and build upon their business and marketing practices. Follow us on Facebook for even more sweet inspiration. Not a member? Click here to learn how RCI can help you build your sweet business.
Tags:
Fall
Hot Cocoa
Moulds
Pumpkin Spice
Recipe
Thanksgiving
Permalink
| Comments (0)
|
|
|
Posted By RCI,
Tuesday, May 18, 2021
Updated: Friday, August 20, 2021
|

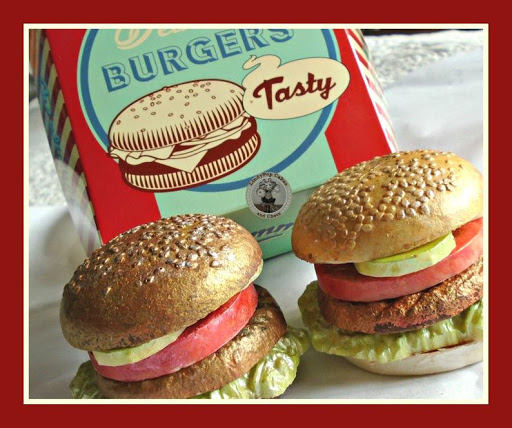
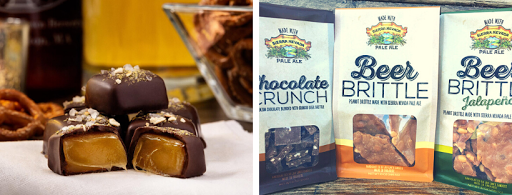
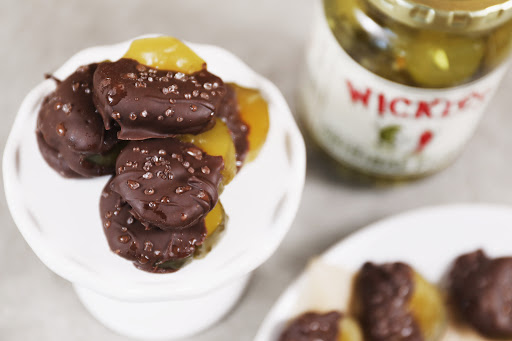
Don’t miss the opportunity to celebrate dads in a big way this year! Father’s Day is June 20th and we’re sharing sweet gift ideas that appeal to just about every dad and grandpa out there! Mr. Fix It For the dad who likes to tinker and fix things. He may have a toolbox full of tools and gadgets, but does he have a toolkit made completely of chocolate? The Fisherman Give Dad a fish story he’ll never forget. How about a life-sized chocolate-moulded fish, so sweet his pals will have to believe he’s telling another tall tale! Looking for tips to perfect your moulding techniques? Read this past blog post. The Executive Give hard-working dads and grandfathers a tie they’ll actually love. Click here to check out a tutorial on how to create shirt-and-tie treat holders as ready-to-give gifts. The Foodie Have some fun with the foodie dad by faking him out with a sweet twist on his favorite foods. The only way to improve on a good, old-fashioned hamburger would be to make it all out of chocolate, of course. The Beer Enthusiast For the beer-enthusiasts out there, RCI members like Joy Lyn’s Candies and Hilliard’s Chocolates have found that confections like brittle and caramel really do pair well with beer. The Wine Connoisseur Since a bottle of wine would be too predictable, why not dip the whole bottle in fine chocolate? Sure, wine is fine, but wine and chocolate is even better! The Daring Dad These treats aren’t for the faint of heart, but for the thrill-seekers and daring dads who have ever wondered, “what does a chocolate-covered jalapeno/pickle/cricket taste like?” It can’t be too bad, after all, it is covered in chocolate! Host a “Pin-to-Win Dad’s Sweet Dreams” Contest If you're looking for an opportunity to increase your exposure on Pinterest, consider hosting a "Pin-to-Win Dad's Sweet Dreams" contest. Start by asking participants to create a Pinterest board full of their dad's favorite treats from your website. Require entrants to include your company name in the description (for brand awareness purposes) and email you the URL to their board or post a link to your Facebook page (Check out this Pinterest contest for ideas of how to communicate the idea to your followers). Appeal to shoppers by offering gift ideas they can’t get from big box stores. We hope you find at least a couple ideas to apply to your business and are inspired to dream up a few more of your own. Crave more? If you like what you read here, look for the "Subscribe now" box on the right to enter your email address and start receiving weekly tips, like this, delivered straight to your email inbox. RCI's blog is just one of the many resources we offer to help candy makers refine their craft and build upon their business and marketing practices. Follow us on Facebook for even more sweet inspiration.
Tags:
Beer
Contests
Father's Day
Gift Ideas
Marketing
Moulds
Pinterest
Permalink
| Comments (0)
|
|
|
Posted By RCI,
Tuesday, March 2, 2021
Updated: Friday, August 20, 2021
|
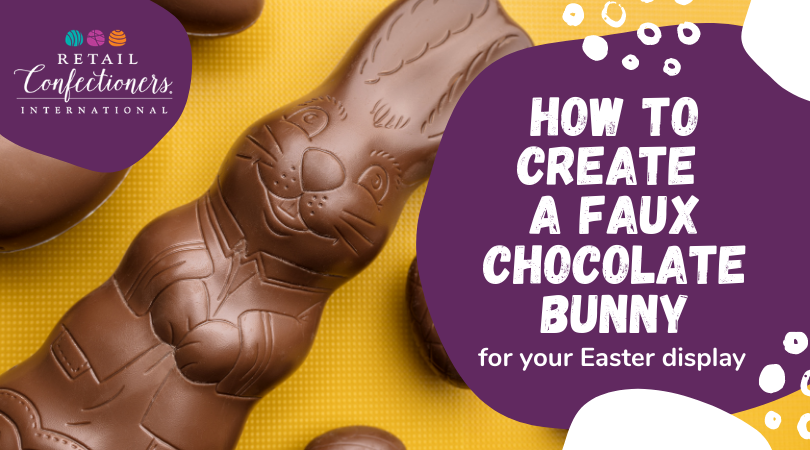
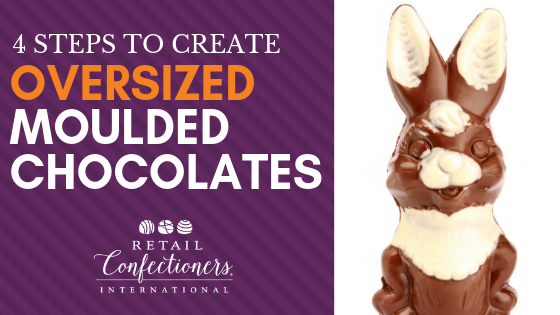
If you’re looking to create an impressive holiday display in your candy shop, many would agree large moulded chocolates make great showpieces. However, working with chocolate as your medium certainly presents enough challenges to cause you to look for another subject to be the center of attention. Whether for fear of the potential effects of exposure to sunlight, humidity, curious customers, or ____________ (you fill in the blank), you may have decided long ago that even a sprightly, three-foot-tall chocolate bunny in all its glory is not worth the investment of time and resources every year, especially leading up to a busy holiday. This week’s tip will allow you to deliver the same impact only a large chocolate Easter bunny could, but with eventually the same effort as takes to do some light dusting. Simply follow the steps below to create a chocolate look-alike Easter bunny (or turkey, life-size football, snowman, Santa, etc.) out of Plaster of Paris. Step-By-Step Instructions for Chocolate Bunny Look-Alike
By RCI member, Marie’s Candies of West Liberty, Ohio Marie's Candies has made plaster Easter bunnies so realistic, it's hard to tell the difference. Materials needed: - Plaster of Paris
- Mixing bowl
- Popsicle stick (or other mixing utensil)
- Access to water
- Brown acrylic paint or spray paint
- Paint brush
- Glue gun (optional)
- Icing eyes (optional)
Instructions: - Make sure your favorite chocolate bunny mould is clean. The great thing about using moulds you already have is the Easter bunny in your display will look just like the real chocolate bunnies you want to sell.
- Follow the mixing instructions on a package of Plaster of Paris.
- Wet the inside of the mould, so the Easter bunny can be removed easily. Fill the mould a quarter at a time, tapping it to remove air.
- Remove the bunny from the mould after one hour and let it dry for 24 hours.
- Wash the mould and any other tools immediately after use.
- Once the bunny is dry, use spray paint or a brush to paint it chocolate brown.
- Use a glue gun to add icing eyes (optional).
After following these simple steps, you will have an impressive moulded chocolate so realistic, you’ll want to display it year after year! As far as we can tell, the only downside here is that you might have to perform a lick test if you get your look-alikes mixed up with actual chocolate. Have your real moulded chocolate displays ever met their untimely demise due to curious customers or exposure to the elements? Share your story in the comments below. Crave more? If you like what you read here, look for the "Subscribe now" box on the right to enter your email address and start receiving weekly tips, like this, delivered straight to your email inbox. RCI's blog is just one of the many resources we offer to help candy makers refine their craft and build upon their business and marketing practices. Follow us on Facebook for even more sweet inspiration.
Tags:
Chocolate bunny
Displays
Easter
Moulds
Retail
Tutorial
Permalink
| Comments (0)
|
|
|
Posted By RCI,
Tuesday, June 9, 2020
Updated: Thursday, July 30, 2020
|
Impress your customers all year around with 3D moulded chocolates. RCI member, Chef Brian Donaghy with Tomric Systems shares step-by-step instructions for working with both solid and hollow moulds, plus important considerations when it comes to tempering and cooling. Start with Good Temper It seems fairly basic, but before we dive into moulding chocolate, I feel compelled to note that proper moulding techniques all start with chocolate in good temper. Good temper leads to appropriate viscosity (90˚F/32˚c or below for 3D moulding), which ultimately leads to better finished pieces, whether that be your three-foot hollow bunny, your solid chocolate Santa pop or the shell to that beautifully decorated artisan-style praline. We are always looking for bubble-free chocolate, of even thickness throughout the moulded piece with the beautiful shine and snap that will delight our customer. How can we get there? Solid Moulds Many 3D moulds are designed as an open or closed format. The open format allows the mould to be made hollow or solid, while the closed format only allows for hollow manufacturing. Solid forming is fairly straight forward; clip the two (or more pieces) together, fill with chocolate, (bubble-free is easier to achieve, if you vibrate the mould while filling) and set filled mould in a cool space with air flow—I prefer 50˚F/10˚C for my refrigeration temperature. Leave the mould there until you can see the chocolate pulling away from the inside of the plastic. If the chocolate piece experiences breakage during this time, I will often remove some of the clips and turn the mould onto its base to finish the crystallization process. Once the piece is ready to be unmoulded, I remove it from the cool space and allow it to return to room temperature before I unmould. Waiting this little bit, helps to prevent sugar bloom or condensation on the piece. If the mould has flash (chocolate on the seam that slipped between the plastic sides), cut it off with a utility knife or sharp paring knife and then use compressed air or a badger-style brush to remove the excess chocolate. Hollow Moulds The process for creating hollow moulded chocolates is similar to the solid, but after filling it while vibrating the mould, set the mould aside at room temperature for a couple minutes. Next, pour the chocolate from the mould back into the temperer. Repeat this process until the piece is the appropriate weight or thickness. Create the bottom of the piece, by pouring tempered chocolate onto a lined sheet pan, slightly bigger than the base of the mould. Stand the mould into that pool of chocolate and place the mould and sheet pan in a cool space. Like the solid piece, remove clips early if there is breakage, and bring the piece back to room temperature before unmoulding. The extra chocolate around the base of the mould can be easily removed prior to opening the mould by placing a knife between the mould and the chocolate, it should just break away if the chocolate is finished crystallizing. Cooling Time What amount of time is best to store chocolates in a cool space before removing the mould? This will depend on a few factors; the size of the mould, how much chocolate the mould uses and the actual temperature of the space. Regardless of these variables, remember that no matter the size, amount of chocolate or room temperature, you will get more consistent results if that space has moving air, because moulding chocolate that has been properly tempered requires heat exchange created by airflow. Follow this expert advice to achieve bubble-free moulded chocolates with a beautiful shine and snap. Crave more? If you like what you read here, look for the "Subscribe now" box on the right to enter your email address and start receiving weekly tips, like this, delivered straight to your email inbox. RCI's Tip of the Week blog is just one of the many resources we offer to help candy makers refine their craft and build upon their business and marketing practices. Not a member? Click here to learn how RCI can help you build your sweet business.
Tags:
Moulds
temper
Permalink
| Comments (0)
|
|
|
Posted By RCI,
Tuesday, May 12, 2020
Updated: Thursday, May 28, 2020
|
Don’t miss the opportunity to celebrate dads in a big way this year! Father’s Day is June 21st and we’re sharing sweet gift ideas that appeal to just about every dad and grandpa out there!
Mr. Fix It
For the dad that likes to tinker and fix things. He may have a toolbox full of tools and gadgets, but does he have a toolkit made completely of chocolate?
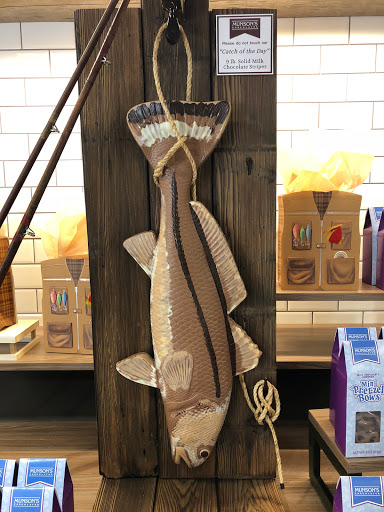
The Fisherman
Give Dad a fish story he’ll never forget. How about a life-sized chocolate-moulded fish so sweet his pals will have to believe he’s telling another tall tale! Looking for tips to perfect your moulding techniques? Read this past blog post.
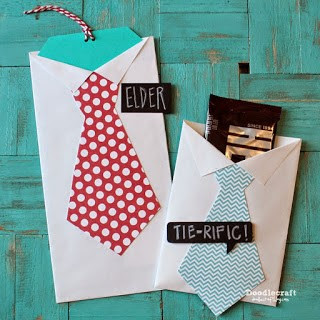
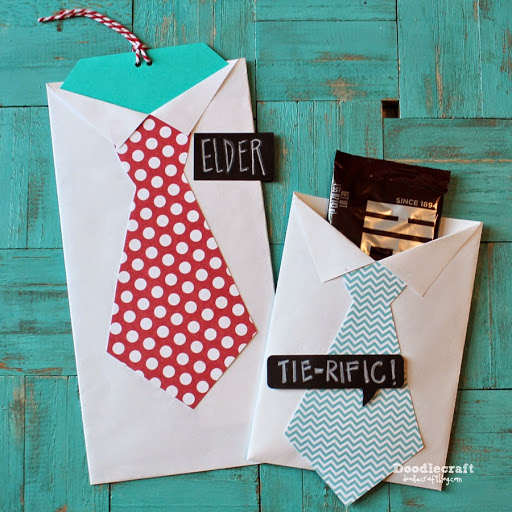
The Executive
Give hard-working dads and grandfathers a tie they’ll actually love. Click here to check out a tutorial on how to create shirt-and-tie treat holders as ready-to-give gifts.
The Foodie
Have some fun with the foodie dad by faking him out with a sweet twist on his favorite foods. The only way to improve on a good, old-fashioned hamburger would be to make it all out of chocolate, of course.
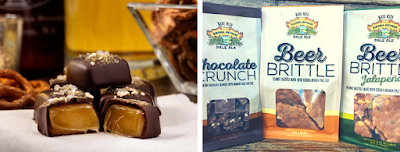
The Beer Enthusiast
For the beer-enthusiast dads out there, RCI members like Joy Lyn’s Candies and Hilliard’s Chocolates have found that confections like brittle and caramel really do pair well with beer.
The Wine Connoisseur
Since a bottle of wine would be too predictable, why not dip the whole bottle in fine chocolate? Sure, wine is fine, but wine and chocolate is even better!
The Daring Dad
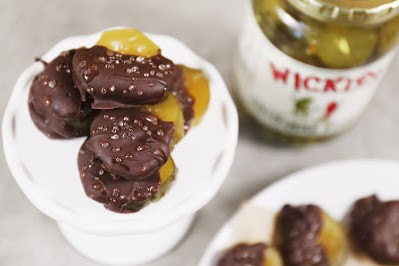
These treats aren’t for the faint of heart, but for the thrill-seekers and daring dads who have ever wondered, “what does a chocolate-covered jalapeno/pickle/cricket taste like?” It can’t be too bad, after all, it is covered in chocolate!
Host a “Pin-to-Win Dad’s Sweet Dreams” Contest
If you're looking for an opportunity to increase your exposure on Pinterest, consider hosting a "Pin-to-Win Dad's Sweet Dreams" contest. Start by asking participants to create a Pinterest board full of their dad's favorite treats from your website. Require entrants to include your company name in the description (for brand awareness purposes) and email you the URL to their board or post a link to your Facebook page (Check out this Pinterest contest for ideas of how to communicate the idea to your followers).
Appeal to shoppers by offering gift ideas they can’t get from big box stores. We hope you find at least a couple ideas to apply to your business and are inspired to dream up a few more of your own. We invite you to share your creative Father’s Day gift ideas in the comments below.
Crave more? If you like what you read here, look for the "Subscribe now" box on the right to enter your email address and start receiving weekly tips, like this, delivered straight to your email inbox. RCI's Tip of the Week blog is just one of the many resources we offer to help candy makers refine their craft and build upon their business and marketing practices.
Not a member? Click here to learn how RCI can help you build your sweet business.
Tags:
Beer
Contests
Father's Day
Gift Ideas
Marketing
Moulds
Pinterest
Permalink
| Comments (0)
|
|
|
Posted By RCI,
Wednesday, September 11, 2019
Updated: Monday, April 27, 2020
|
Impress your customers during the holidays and year around with 3D moulded chocolates. Brian Donaghy of Tomric Systems shares step-by-step instructions for working with both solid and hollow moulds, plus important considerations when it comes to tempering and cooling.
Start with Good Temper
It seems fairly basic, but before we dive into moulding chocolate, I feel compelled to note that proper moulding techniques all start with chocolate in good temper. Good temper leads to appropriate viscosity (90 or below for 3D moulding), which ultimately leads to better finished pieces, whether that be your three-foot hollow bunny, your solid chocolate Santa pop or the shell to that beautifully decorated artisan-style praline. We are always looking for bubble-free chocolate, of even thickness throughout the moulded piece with the beautiful shine and snap that will delight our customer. How can we get there?
Solid Moulds
Many 3D moulds are designed as an open or closed format. The open format allows the mould to be made hollow or solid, while the closed format only allows for hollow manufacturing. Solid forming is fairly straight forward; clip the two (or more pieces) together, fill with chocolate, (bubble-free is easier to achieve, if you vibrate the mould while filling) and set filled mould in a cool space with air flow—I prefer 50˚F for my refrigeration temperature. Leave the mould there until you can see the chocolate pulling away from the inside of the plastic. If the chocolate piece experiences breakage during this time, I will often remove some of the clips and turn the mould onto its base to finish the crystallization process. Once the piece is ready to be unmoulded, I remove it from the cool space and allow it to return to room temperature before I unmould. Waiting this little bit, helps to prevent sugar bloom or condensation on the piece. If the mould has flash (chocolate on the seam that slipped between the plastic sides), cut it off with a utility knife or sharp paring knife and then use compressed air or a badger-style brush to remove the excess chocolate.
Hollow Moulds
The process for creating hollow moulded chocolates is similar to the solid, but after filling it while vibrating the mould, set the mould aside at room temperature for a couple minutes. Next, pour the chocolate from the mould back into the temperer. Repeat this process until the piece is the appropriate weight or thickness. Create the bottom of the piece, by pouring tempered chocolate onto a lined sheet pan, slightly bigger than the base of the mould. Stand the mould into that pool of chocolate and place the mould and sheet pan in a cool space. Like the solid piece, remove clips early if there is breakage, and bring the piece back to room temperature before unmoulding. The extra chocolate around the base of the mould can be easily removed prior to opening the mould by placing a knife between the mould and the chocolate, it should just break away if the chocolate is finished crystallizing.
Cooling Time
What amount of time is best to store chocolates in a cool space before removing the mould? This will depend on a few factors; the size of the mould, how much chocolate the mould uses and the actual temperature of the space. Regardless of these variables, remember that no matter the size, amount of chocolate or room temperature, you will get more consistent results if that space has moving air, because moulding chocolate that has been properly tempered requires heat exchange created by airflow.
Follow this expert advice to achieve bubble-free moulded chocolates with a beautiful shine and snap.
Crave more? If you like what you read here, look for the "Subscribe now" box on the right to enter your email address and start receiving weekly tips, like this, delivered straight to your email inbox. RCI's Tip of the Week blog is just one of the many resources we offer to help candy makers refine their craft and build upon their business and marketing practices.
Tags:
Chocolate
Cooling
Moulds
Production
temper
Permalink
| Comments (0)
|
|
|
Posted By RCI,
Tuesday, March 5, 2019
Updated: Monday, April 27, 2020
|
Many confectioners create showpieces or “attention grabbers” for their retail storefronts. RCI member, Wilbur’s of Maine Chocolate Confections started making a three-foot tall rabbit, affectionately known as “BFB” (Big Friendly Bunny), about 20 years ago to grab everyone’s attention, and along the way we have learned a few tricks to making this work seamlessly.
THE WARM UP
Start with a warm mould, 85-90 degrees Fahrenheit, to allow for easier mould release. If your production area is cooler, warm the mould with a hair dryer for a moment before filling. This tip also seems to reduce the amount of cocoa butter left behind on the mould and yield a better shine, since fat migration doesn’t occur where the mould meets the chocolate.
FILLING THE MOULD
A book-mould with an open bottom is a popular choice for creating large moulded chocolates. At Wilbur’s, they bolt two sides together and start filling the mould from the tempering kettle, a little at a time. Utilizing skewers and a shaker table will help ensure all crevices are filled and air bubbles are release. Many larger operations have mould spinners that can make this step easier, but spinners require a closed mould.
COOLING TIME
To create a hollow moulded piece, turn it over on parchment paper to set. The chocolate that is still liquid will move to the bottom and create a base. Time in the cool closet needs to be watched carefully with a piece as large and as time consuming as this one. Regularly rotate the mould to evenly cool the chocolate and then start to loosen the wing nuts on the bolts as it nears release. Great caution is vital during this step since cracking means starting over. Wilbur’s clocks in about an hour of time to complete each large mould, but agree the time is worth it.
FINISHING TOUCHES
After release, it’s time to trim and brush off the trimmings before transporting the moulded chocolate piece to the retail shop. To protect your large and delicate the large and delicate chocolates from getting banged up, Wilbur’s recommends placing the chocolate back in the mould, loosely bolted together.
Even though it takes about an hour for Wilbur’s to create their three-foot tall rabbit, they agree the time is worth it. “We have sold a few of the BFBs over the years, but he serves primarily as a decoration, a conversation starter and a selfie opportunity,” said Andy Wilbur, owner of Wilbur’s of Maine Chocolate Confections. “Using him as a promotion or a raffle is a great bonus. We have found that even customers reluctant to sign up for email lists are eager to share if they have a chance at winning a large specialty item such as the BFB.”
Making an oversized moulded chocolate can be intimidating, but with practice these tips will help you create showstopping chocolate centerpieces for your retail displays. Hoppy moulding!
Crave more? If you like what you read here, look for the "Subscribe now" box on the right to enter your email address and start receiving weekly tips, like this, delivered straight to your email inbox. RCI's Tip of the Week blog is just one of the many resources we offer to help candy makers refine their craft and build upon their business and marketing practices.
Tags:
Chocolate
Holidays
Marketing
Moulds
Permalink
| Comments (0)
|
|
|
Posted By RCI,
Tuesday, January 22, 2019
Updated: Monday, April 27, 2020
|
With a pinch of moisture and a dash of heat, you’ve got the recipe to ruin perfectly good chocolate. But we’re not looking to ruin chocolate here! It may not be easy, but as a chocolatier, you are expected to craft delicious chocolate with a glossy sheen and perfect snap every time, without fail. However, thanks to a myriad of factors that can negatively affect your chocolate at any given point, even the most skilled chocolatiers can have off days in the kitchen. To help, we’ve created this quick-reference guide to pinpoint common mishaps that can occur when working with chocolate so they can be easily corrected.
Chocolate is dry and powdery
When you rub chocolate and it feels dry and powdery, say “hello” to sugar bloom. Sugar bloom is caused by moisture. Dew forms on chocolate and gets absorbed by the sugar, leaving a dusty layer of crystals.
Causes:
- High humidity (50% humidity or less is best)
- Cooling temperature was too low (below 50° F)
- Chocolates with a moist center were stored in a high-temperature room.
Chocolate feels greasy
If your chocolate feels greasy, you've got fat bloom. Fat bloom is caused when cocoa butter separates and moves to the surface of chocolate.
Causes:
- Centers made with soft fats. Many nut centers can also cause fat bloom when in contact with incompatible fats.
- Proper storage temperature was not maintained.
Chocolate doesn't release properly from mould
Are your chocolate moulds putting up a good fight? Learn how to fight back with common causes for sticky moulds.
Causes:
- Mould was too cold or too warm, causing chocolate in contact with the mould to lose temper.
- Mould was not clean.
- Too much or too little seed when tempering.
- Sugar bloom (see above)
- Center was too cool. Center must be close to the temperature of the chocolate.
Cracks in finished product
Sure, that chocolate bunny with a crack down the middle can still taste good, but it doesn't exactly send the right message to customers. Learn what's causing the problem below, so you can avoid it in the future.
Causes:
- Cooling temperature was too low (below 50° F)
- Chocolate was in the cooler too long.
- Low viscosity of the chocolate
Other considerations
If you've covered all the bases above and are still unsure what's wreaking havoc in your candy kitchen, here's a few other common culprits you may have overlooked.
- Local climate conditions can greatly affect the environment of your candy kitchen and, in turn the results of your finished products. Take care to create an ideal environment for working with chocolate.
- Chocolate picks up and holds odor. Be careful when using products with a strong odor near chocolate, such as mint and even cleaning products.
- Be mindful of where air vents are blowing. Avoid air vents blowing directly on product.
- Keep moisture far from your chocolate making areas. A dishwasher giving off a bit of steam can have a negative effect on any product that is near it.
- Do not cook near chocolate. If you make caramel, for example, it should be made in a separate area.
Mistakes happen. Learn from your mistakes and the mistakes of others through education and talking with fellow candy makers. By understanding what could go wrong and how to avoid or correct mistakes, you can avoid a great deal of unnecessary costs and frustration.If you have questions that are not addressed in this post, RCI members can login to pose questions to fellow members on RCI’s online forum, List Serve.
RCI's Tip of the Week blog is just one of the many resources we offer to help candy makers refine their craft and build upon their business and marketing practices. Review past blog posts for quick and actionable tips to apply to your business. Look for the "Subscribe now" box on the right to enter your email address and start receiving weekly tips, like this, delivered straight to your email inbox.
Not a member? Click here to learn how RCI can help you build your sweet business.
Tags:
bloom
Chocolate
Cracks
List Serve
Moulds
Tempering
troubleshooting
Permalink
| Comments (0)
|
|
|
Posted By RCI,
Tuesday, November 13, 2018
Updated: Monday, April 27, 2020
|
If you’re looking to create an impressive holiday display in your candy shop, many would agree large moulded chocolates make great showpieces. However, working with chocolate as your medium certainly presents enough challenges to cause you to look for another subject to be the center of attention. Whether for fear of the potential effects of exposure to sunlight, humidity, curious customers, or ____________ (you fill in the blank), you may have decided long ago that even a jolly, three-foot-tall chocolate Santa in all his glory is not worth the investment of time and resources every year, especially during holiday season.
This week’s tip will allow you to deliver the same impact only a large chocolate Santa could, but with eventually the same effort as takes to do some light dusting. Simply follow the steps below to create a chocolate look-alike Santa (or snowman, Easter bunny, turkey, etc.) out of Plaster of Paris.
Step-By-Step Instructions for Chocolate Santa Look-Alike
By RCI member, Marie’s Candies of West Liberty, Ohio
Materials needed:
 |
Marie's Candies has made plaster Easter
bunnies sorealistic it's hard to tell the difference. |
- Plaster of Paris
- Mixing bowl
- Popsicicle stick (or other mixing utensil)
- Access to water
- Brown acrylic paint or spray paint
- Paint brush
- Glue gun (optional)
- Icing eyes (optional)
Instructions:
- Make sure your favorite chocolate Santa mould is clean. The great thing about using moulds you already have is the Santa in your display will look just like the real chocolate Santas you want to sell.
- Follow the mixing instructions on a package of plaster of Paris.
- Wet the inside of the mould, so the Santa can be removed easily. Fill the mould a quarter at a time, tapping it to remove air.
- Remove Santa from the mould after one hour and let it dry for 24 hours.
- Wash the mould and any other tools immediately after use.
- Once Santa is dry, use spray paint or a brush to paint it chocolate brown.
- Use a glue gun to add icing eyes (optional).
After following these simple steps, you will have an impressive moulded chocolate so realistic, you’ll want to display it year after year! As far as we can tell, the only downside here is that you might have to perform a lick test if you get your look-alikes mixed up with actual chocolate. Have your real moulded chocolate displays ever met their untimely demise due to curious customers or exposure to the elements? Share your story in the comments below.
RCI's Tip of the Week blog is just one of the many resources we offer to help candy makers refine their craft and build upon their business and marketing practices. Review past blog posts for quick and actionable tips to apply to your business. Look for the "Subscribe now" box on the right to enter your email address and start receiving weekly tips, like this, delivered straight to your email inbox.
Not a member? Click here to learn how RCI can help you build your sweet business.
Tags:
Hacks
Holidays
Merchandising
Moulds
Plaster of Paris
Tutorial
Permalink
| Comments (0)
|
|