|
|
Posted By RCI,
Tuesday, July 9, 2019
Updated: Monday, April 27, 2020
|
Just like chocolate, colored cocoa butter must be properly tempered. Otherwise, poorly tempered cocoa butter will stick to chocolate moulds and appear dull or foggy. Keep reading for pro tips for applying colored cocoa butter to your chocolate confections and ensuring bright colors and a perfect glossy finish.
Colored cocoa butter should be tempered in the same way chocolate is tempered. RCI member, Brian Donaghy with Tomric Systems, Inc., says although colored cocoa butter usually arrives tempered, it is important to heat it slowly and then hold the cocoa butter in a 90℉ environment. Brian recommends using a yogurt maker to retain the temperature over time and help ensure the cocoa butter doesn't lose temper.
As shared by Tomric Systems, Inc. during RCI’s Chocolate Boot Camp, there are many uses for colored cocoa butters. Two of the more popular techniques included hand application and airbrushing colors.
HAND APPLICATION
Hand application works well when a textured, mixed color is the desired look. It allows you to mix the colors directly in the mould cavity to achieve a rich, “painterly” appearance.
How to apply Colored Cocoa Butters by hand:
1. Warm colored cocoa butter to approximately 92˚F. or until in a liquid state.
2. Place desired colors in small plastic cups.
3. Wearing gloves, dip finger into colors. (shown)
4. Swipe inside of mould with finger to apply color (shown). Set aside and cool.
5. When colored cocoa butter is nearly completely crystallized, create shells using tempered chocolate.
Hint: Layer colors to achieve “painterly” effect, or combine with airbrushing technique for an interesting contrast.
AIRBRUSHING COLORS
Successful airbrushing techniques require special attention to temperature at which you spray; different temperatures will allow you to achieve different effects.
How to airbrush Colored Cocoa Butters:
1. Warm colored cocoa butter to approximately 92˚F.
2. Use airbrush to lightly spray color on inside of mould cavity (shown).
3. Set aside and cool.
4. When colored cocoa butter is nearly completely crystallized, create shells using tempered chocolate.
Hint: Colored cocoa butter can also be applied after the moulded piece is complete. When applied on a chilled piece, the colored cocoa butter will take on a soft, fuzzy appearance. Ideal for display pieces, this technique is not recommended for pieces intended for eating, as the colors can easily smudge.
When used properly, colored cocoa butters can transform chocolate confections into incredible works of art. Like chocolate, there are a myriad of factors that can negatively affect cocoa butter at any given point. If you run into problems, click here to check out our post “How Not To Ruin Chocolate,” for a quick-reference troubleshooting guide to pinpoint common problems and make corrections.
Crave more? If you like what you read here, look for the "Subscribe now" box on the right to enter your email address and start receiving weekly tips, like this, delivered straight to your email inbox. RCI's Tip of the Week blog is just one of the many resources we offer to help candy makers refine their craft and build upon their business and marketing practices.
Tags:
Airbrush
Colored Cocoa Butter
Tempering
Permalink
| Comments (0)
|
|
|
Posted By RCI,
Tuesday, June 4, 2019
Updated: Monday, April 27, 2020
|
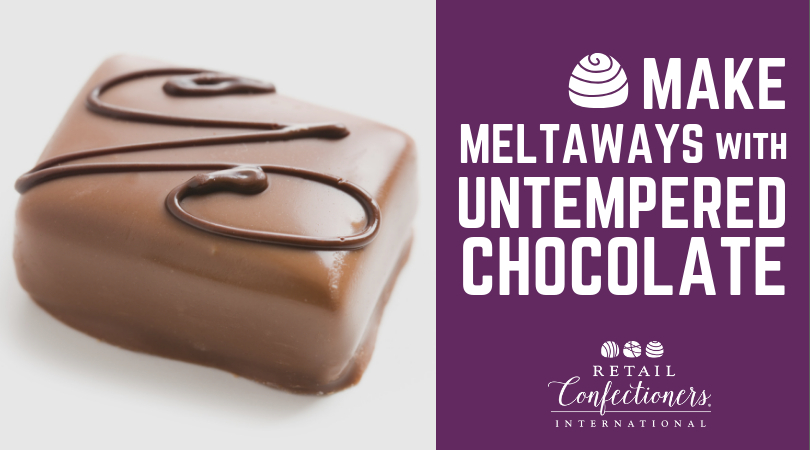
The most common way to make a meltaway is to combine tempered chocolate with melted coconut oil until it is smooth. Because coconut oil is a lauric fat, it must be added at a lower temperature so not to throw the chocolate out of temper. If the chocolate becomes untempered (or was never tempered to start with) the nice, smooth texture of the meltaway will eventually be replaced with an unpleasant mouthfeel due to the formation of fat globules.
Mixing Things Up
Consider this alternative method to making stable, smooth-textured meltaways with untempered chocolate. Instead of adding fat to tempered chocolate, combine untempered chocolate and coconut oil in a mixer. Mix at a slow speed until the temperature is below 78º F and has visibly thickened. Referred to as the “mixer method” in curriculum shared at RCI’s Chocolate Boot Camp®, it achieves the same desired stability and texture the meltaway is revered for, without the hassle of keeping temper.
If you live in the Connecticut area, it’s not too late to register for RCI’s Annual Convention & Industry Expo in Hartford, Connecticut June 3-7, 2019 at the Connecticut Convention Center. Attend RCI’s two-day Industry Expo for only $5 with promo code RCIHigh5. Click here to register online today!
As always, attending RCI’s Industry Expo is free to members! Extend your stay and we’ll extend the early-bird discount to offer you the best value! Register now and save $100 on the Convention Pass or 3-Day Pass when you use the promo code SAVE100.
Crave more? If you like what you read here, look for the "Subscribe now" box on the right to enter your email address and start receiving weekly tips, like this, delivered straight to your email inbox. RCI's Tip of the Week blog is just one of the many resources we offer to help candy makers refine their craft and build upon their business and marketing practices.
Tags:
Chocolate Boot Camp
Meltaways
Tempering
Permalink
| Comments (0)
|
|
|
Posted By RCI,
Tuesday, February 19, 2019
Updated: Monday, April 27, 2020
|
So, it’s February! And how are those New Year’s resolutions coming along?
Whether you made a resolution to improve your business this year or not, now is a great time to evaluate the goals you do have and measure your progress since setting those goals. Experts agree measuring your progress on an ongoing basis is a vital part of successfully attaining goals.
If you aspire to learn more about chocolate and expand your candy making skills, we’ve pulled sample questions from RCI’s Chocolate Boot Camp® “School of Knowledge” quiz, as a way to help you take a pulse of your chocolate knowledge.
1. Which of the following steps of cocoa bean processing must take place within the growing country?
A. Conching
B. Winnowing (shell removal)
C. Fermentation
D. All of the above
2. When tempering chocolate, what percentage of solid fat crystals is desired when process is complete?
A. 0.1 - 1.0%
B. 1.5 - 4.0%
C. 5.0 - 8.0%
3. Which of the following will contribute to bloomed bottoms?
A. Cold belt temperatures
B. Using chocolate in bottomer
C. High-viscosity chocolate
D. All of the above
4. When removing confections from freezer storage, typical temperature profile is:
A. 0°F - 30°F - 70°F
B. 0°F - 40°F - 70°F
C. 0°F - 50°F - 70°F
Now that you've completed the sample quiz, ask yourself, how confident do you feel in your answers? Would you qualify for master chocolatier status or could you use a refresher on the subject? See post #295 for the answers.
Warren Buffet once said, “The best investment you can make is an investment in yourself, the more you learn the more you’ll earn.” Whether you're a veteran chocolatier or a newcomer to the industry, if you aspire to learn more and expand your candy making skills, consider ways to invest in your education. Thankfully education is more accessible than ever before! Education is available in all different formats; print, webinars, podcasts, seminars and workshops, certifications and courses, even in-person meetings such as trade shows or local networking events. Experiment with different learning formats to find out what works best for you.
Want to learn more about RCI’s upcoming events and education? Click here to receive notifications about when registration opens for events and education courses, like RCI’s Chocolate Boot Camp and Annual Convention & Industry Expo.
Crave more? If you like what you read here, look for the "Subscribe now" box on the right to enter your email address and start receiving weekly tips, like this, delivered straight to your email inbox. RCI's Tip of the Week blog is just one of the many resources we offer to help candy makers refine their craft and build upon their business and marketing practices.
Tags:
Candy Making
Chocolate
Chocolate Boot Camp
Education
Enrobing
Shelf Life
Tempering
Permalink
| Comments (0)
|
|
|
Posted By RCI,
Tuesday, February 12, 2019
Updated: Monday, April 27, 2020
|
Checking your temper is an important step to ensure you aren’t surprised by unsightly bloom or dull or tacky chocolates.
Chocolates that have a dull appearance may be over tempered, while rapid bloom or a tacky, greasy surface are indicators that chocolate is under tempered. Quit guessing and rest assured your chocolate is always in good temper with these two methods for checking your temper.
The Blade Test: This method is quick, easy and budget friendly; however, the results could vary on the temperature of the room.
Simply dip a metal spatula or knife blade into the chocolate and leave a small film on the blade. At room temperature (65-68° F), well-tempered chocolate should be firm, not tacky, after just five minutes.
Tempermeter: Although more costly, this method will most accurately measure the degree of tempering, indicating the quality and quantity of stable crystals that have been formed.
Tempermeters produce a temperature-versus-time curve, resulting from uniform cooling of a chocolate sample over a specified period of time.
It may be easy to assume your chocolate is well tempered and ready to move into the assembly line, however, skipping this step could result in a costly mistake.
Choose a testing method that works best for you and put a plan in place to ensure your chocolate is being checked on a regular basis. Many of our candy maker members have a system in place to verify their chocolate’s temper every hour.
Next week: Check your chocolate knowledge and stay tuned for details on RCI’s 2019 Chocolate Boot Camp®!
Crave more? If you like what you read here, look for the "Subscribe now" box on the right to enter your email address and start receiving weekly tips, like this, delivered straight to your email inbox. Plus, review past blog posts for quick and actionable tips to apply to your business. RCI's Tip of the Week blog is just one of the many resources we offer to help candy makers refine their craft and build upon their business and marketing practices.
Tags:
Chocolate
Chocolate Boot Camp
Tempering
Permalink
| Comments (0)
|
|
|
Posted By RCI,
Tuesday, January 22, 2019
Updated: Monday, April 27, 2020
|
With a pinch of moisture and a dash of heat, you’ve got the recipe to ruin perfectly good chocolate. But we’re not looking to ruin chocolate here! It may not be easy, but as a chocolatier, you are expected to craft delicious chocolate with a glossy sheen and perfect snap every time, without fail. However, thanks to a myriad of factors that can negatively affect your chocolate at any given point, even the most skilled chocolatiers can have off days in the kitchen. To help, we’ve created this quick-reference guide to pinpoint common mishaps that can occur when working with chocolate so they can be easily corrected.
Chocolate is dry and powdery
When you rub chocolate and it feels dry and powdery, say “hello” to sugar bloom. Sugar bloom is caused by moisture. Dew forms on chocolate and gets absorbed by the sugar, leaving a dusty layer of crystals.
Causes:
- High humidity (50% humidity or less is best)
- Cooling temperature was too low (below 50° F)
- Chocolates with a moist center were stored in a high-temperature room.
Chocolate feels greasy
If your chocolate feels greasy, you've got fat bloom. Fat bloom is caused when cocoa butter separates and moves to the surface of chocolate.
Causes:
- Centers made with soft fats. Many nut centers can also cause fat bloom when in contact with incompatible fats.
- Proper storage temperature was not maintained.
Chocolate doesn't release properly from mould
Are your chocolate moulds putting up a good fight? Learn how to fight back with common causes for sticky moulds.
Causes:
- Mould was too cold or too warm, causing chocolate in contact with the mould to lose temper.
- Mould was not clean.
- Too much or too little seed when tempering.
- Sugar bloom (see above)
- Center was too cool. Center must be close to the temperature of the chocolate.
Cracks in finished product
Sure, that chocolate bunny with a crack down the middle can still taste good, but it doesn't exactly send the right message to customers. Learn what's causing the problem below, so you can avoid it in the future.
Causes:
- Cooling temperature was too low (below 50° F)
- Chocolate was in the cooler too long.
- Low viscosity of the chocolate
Other considerations
If you've covered all the bases above and are still unsure what's wreaking havoc in your candy kitchen, here's a few other common culprits you may have overlooked.
- Local climate conditions can greatly affect the environment of your candy kitchen and, in turn the results of your finished products. Take care to create an ideal environment for working with chocolate.
- Chocolate picks up and holds odor. Be careful when using products with a strong odor near chocolate, such as mint and even cleaning products.
- Be mindful of where air vents are blowing. Avoid air vents blowing directly on product.
- Keep moisture far from your chocolate making areas. A dishwasher giving off a bit of steam can have a negative effect on any product that is near it.
- Do not cook near chocolate. If you make caramel, for example, it should be made in a separate area.
Mistakes happen. Learn from your mistakes and the mistakes of others through education and talking with fellow candy makers. By understanding what could go wrong and how to avoid or correct mistakes, you can avoid a great deal of unnecessary costs and frustration.If you have questions that are not addressed in this post, RCI members can login to pose questions to fellow members on RCI’s online forum, List Serve.
RCI's Tip of the Week blog is just one of the many resources we offer to help candy makers refine their craft and build upon their business and marketing practices. Review past blog posts for quick and actionable tips to apply to your business. Look for the "Subscribe now" box on the right to enter your email address and start receiving weekly tips, like this, delivered straight to your email inbox.
Not a member? Click here to learn how RCI can help you build your sweet business.
Tags:
bloom
Chocolate
Cracks
List Serve
Moulds
Tempering
troubleshooting
Permalink
| Comments (0)
|
|
|
Posted By RCI,
Tuesday, November 27, 2018
Updated: Monday, April 27, 2020
|
If you temper chocolate in small-batch tempering machines, save yourself the headache this holiday season with this week’s quick and easy tip.
Are you using chocolate wafers as seed for your tempering unit? Before putting them in the feed of the tempering machine, quickly (don’t overheat!) use a heat gun on them to form one large clump or block of wafers. By doing this, you will help keep the wafers from sneaking through the blade and over-tempering your chocolate.
See? Quick and easy!
Want more game-changing tips like this?
Register now for RCI’s Truffles+More course February 20-22, 2019 in Elk Grove Village, Illinois (just outside Chicago). Visit retailconfectioners.org/events to stay up-to-date with all RCI’s educational offerings in the coming year.
RCI's Tip of the Week blog is just one of the many resources we offer to help candy makers refine their craft and build upon their business and marketing practices. Review past blog posts for quick and actionable tips to apply to your business. Look for the "Subscribe now" box on the right to enter your email address and start receiving weekly tips, like this, delivered straight to your email inbox.
Not a member? Click here to learn how RCI can help you build your sweet business.
Tags:
Chocolate
Chocolate Production
Education
Seeding
Tempering
Permalink
| Comments (0)
|
|