|
|
Posted By RCI,
Tuesday, November 5, 2024
Updated: Friday, December 13, 2024
|
 With the holiday season approaching, shoppers will come to your store in search of the perfect gifts. To enhance their shopping experience and boost your sales, consider optimizing your point of sale (POS) strategy. A simple yet effective tactic is to offer small, enticing items right at the checkout counter. A sleeve of beautifully decorated chocolate-covered sandwich cookies or a charming little bag of foil-wrapped chocolates can easily be added to a customer's purchase. Presenting small, eye-catching treats by the register, perhaps tied with a festive bow or ribbon, creates a visually appealing display that encourages impulse buys. This not only enhances the shopping experience but also prompts customers to treat themselves or grab a quick gift. Positioning and Pricing for Success To make this strategy effective, consider the placement and pricing of your POS items. Items should be easily visible and within arm's reach of customers as they wait in line. Keep the price reasonable—around $3 to $5—so customers feel comfortable adding these small extras to their purchase. Highlight Seasonal Favorites Offering seasonal items can add to the holiday spirit and draw customers in. For instance, a pair of holiday-themed chocolate truffles or a square of peppermint bark can create a festive atmosphere and resonate with customers looking for something special. Encourage Shoppers to Treat Themselves A small sign saying something like, “You deserve a treat!” can remind shoppers to enjoy a little pick-me-up. After a long day of holiday shopping, many people appreciate a small indulgence. Before the holiday rush, take a look at your checkout area. Make sure it’s stocked with fun, affordable items that make great little gifts or quick treats. By adding these festive extras, you can increase sales and make your customers’ holiday shopping experience more enjoyable. Crave more?Click here to subscribe and start receiving weekly tips, like this, delivered straight to your email inbox. RCI's blog is just one of the many resources we offer to help candy makers refine their craft and build upon their business and marketing practices. Follow us on Facebook for even more sweet inspiration. Not a member? Click here to learn how RCI can help you build your sweet business.
Tags:
Christmas
Displays
Holidays
Increase Sales
Marketing
Merchandising
Retail
Permalink
| Comments (0)
|
|
|
Posted By RCI,
Tuesday, April 23, 2024
Updated: Thursday, September 26, 2024
|
We all know a beautiful bow can be the perfect finishing touch to any gift. Crafting enough bows to keep up with needs during a busy holiday season can seem like a daunting task. We recommend getting a head start on making your holiday bows during the slower summer months. Some candy makers make hundreds and even thousands of bows for the Christmas season alone, so tackling this task ahead of time is essential. But what do you do with your inventory of bows in the meantime? Storing them in boxes and totes can take up valuable space, while resulting in smashed bows that take more time to fix. As a solution to this problem, Dietsch Brothers of Findlay, Ohio uses 16-gauge steel wire, to create round wire frames to serve as “bow wreaths” and strips of wire to form what we call “bow garland.”  Photos courtesy of Dietsch Bros. Photos courtesy of Dietsch Bros. A single bow wreath can hold 40-60 wire-ribbon bows, which Dietsch Brothers hangs in between aisles and at the end of shelving units in back rooms that are unoccupied during the summer. For the wire-ribbon bows, they keep an extra roll of ribbon to make the ribbon tails. Once it’s all assembled, they cut the tails and add finishing touches to make each ribbon perfect. The bow garland is utilized for more delicate bows made of sheer ribbon. Their team can string 90-100 sheer-ribbon bows across the wire “garland,” which hangs from the drop ceiling. Each garland is labeled based on what product the ribbon is intended for. For as little as $5, you can purchase 100-feet of steel wire at a local home improvement store. Carving out small chunks of time to craft beautiful holiday bows throughout the summer helps save Dietsch Brothers precious time and this innovative way of storing bows not only saves space it also means time isn’t wasted with re-shaping bows during the heart of the bustling holiday season. Want more ideas like this? Attend RCI’s 2024 Annual Convention & Industry Expo to meet industry suppliers and candy makers! Register now to join us in Buffalo, New York June 17-21, 2024! Save with early-bird rates available through April 26, 2024. Crave more?Click here to subscribe and start receiving weekly tips, like this, delivered straight to your email inbox. RCI's blog is just one of the many resources we offer to help candy makers refine their craft and build upon their business and marketing practices. Follow us on Facebook for even more sweet inspiration. Not a member? Click here to learn how RCI can help you build your sweet business.
Tags:
Bows
Christmas
gifts
Holidays
Packaging
Retail
Permalink
| Comments (0)
|
|
|
Posted By RCI,
Tuesday, February 28, 2023
Updated: Tuesday, September 5, 2023
|
As Easter approaches, candy shops can soon expect shoppers looking to build custom Easter baskets for loved ones. For some, creating and selling custom Easter baskets can be a time-consuming process that requires detailed staff training and complicated pricing structures. This week we’re sharing a simple solution from RCI member, Juliet Chocolate Factory, that can save candy shops time and effort while still offering customers the opportunity to create custom Easter baskets.  Pictured: Juliet Chocolate Factory shared their idea for "Load & Go" Custom Easter Baskets at Candy Clinic during RCI's 2022 Annual Convention & Industry Expo. Pictured: Juliet Chocolate Factory shared their idea for "Load & Go" Custom Easter Baskets at Candy Clinic during RCI's 2022 Annual Convention & Industry Expo.
Near the register at Juliet Chocolate Factory in Romeo, Michigan customers can take their pick from a selection of pre-assembled Easter baskets—three different sizes of themed baskets serve as the base. Each basket is filled with paper shreds and a coordinating bow (with tie) which is packaged inside a clear cello bag that is closed with a twist tie. The baskets are empty, representing a blank canvas of sorts for customers to shop your store for the perfect mix to fit the intended recipient. Once shoppers are done selecting the contents of their custom Easter baskets, staff at the register can simply stuff the basket while ringing up each individual item, along with the gift basket, itself, which has its own product code/price. This approach to offering custom Easter baskets can help you save time and effort this Easter. It’s a win-win solution that allows candy shops to focus on delivering quality products and excellent customer service while still providing customers with the opportunity to create their own unique Easter baskets. Crave more?Click here to subscribe and start receiving weekly tips, like this, delivered straight to your email inbox. RCI's blog is just one of the many resources we offer to help candy makers refine their craft and build upon their business and marketing practices. Follow us on Facebook for even more sweet inspiration. Not a member? Click here to learn how RCI can help you build your sweet business.
Tags:
Easter
Easter Baskets
Holidays
Operations
Owning a Business
Retail
Save Time
Spring
Permalink
| Comments (0)
|
|
|
Posted By RCI,
Tuesday, November 1, 2022
Updated: Friday, January 20, 2023
|
 This week’s post is a must read for candy retailers looking for a merchandising refresh as holiday shopping and festivities begin to pick up speed. Past RCI President Adele Malley and founder of Malley’s School of Merchandising shares expert merchandising quick tips designed to sell more product and maximize your retail space. - Go up, use the air. Make each column of boxes higher than ever before, however, do not display every collection in columns—it is boring.
- Break up displays by arranging the boxes differently. Plan for low stacks; vertical boxes sloping next to each other; boxes leaning against the high stacks of the same kind and size; put a strong twist on boxes.
- Place gift bags in a stand or container to give them more stability.
- Arrange boxes, around or off-center, from a sample box or picture.
- Present a jumble of smaller, same content boxes in a massive bowl with low sides. The bowl will add depth, dimensions, and the juxtaposition of round versus boxes adds fun and eye interest.
- Intermix different size boxes, for example, half-pound boxes with one-pound boxes, to prevent needing a dedicated space for each.
- If displayed items have the dual purpose of showing and selling, make a run of the look by using two or three boxes as backing for the two or three leaning small boxes placed in front. The expanse will tempt the eye; it will be attractive and very sellable. In front of those boxes, if room, slope boxes on each other for easy selecting.
- Breakup expanses of horizontal views to interest the eye and increase storage and display space. Go up!
- Use shelving to get additional vertical height. One deep shelf will help and can be effective in a short section.
- Create bump-outs to help relieve the eye and create drama. Create a simple, custom display table by cutting a wooden board into a quarter of a half-circle and attach table legs.
- Use cake stands to create elevation in displays. Display a box sample sitting on one or two actual wrapped boxes. The tabletop below surrounds with boxes.
 Recreate this look: Give boxes in a column a slight twist and make them easier to pick up. Decide how to use the display. Copy the setup as shown; stretch out the whole presentation or take ideas from it. The round frame, being a different shape, calls attention to itself and brings softness in contrast to the hard box edges. Recreate this look: Give boxes in a column a slight twist and make them easier to pick up. Decide how to use the display. Copy the setup as shown; stretch out the whole presentation or take ideas from it. The round frame, being a different shape, calls attention to itself and brings softness in contrast to the hard box edges. If you are used to nice and neat stacks of product and clean rows, these tips may seem counterintuitive to you. Adele explained during a Candy Clinic presentation on merchandising that sometimes techniques that look too neat and orderly can actually deter interested buyers, because they don’t want to disrupt the display. Adele recommends giving boxes a “strong twist” makes them easier to pick up and more inviting to shoppers. We love that most of these quick tips could be easily incorporated into your retail display today. You could start by incorporating one tip at a time and easily have a totally refreshed retail space in no time at all! Consider devoting some time to watching customers shop your refreshed displays. Involve your staff, by asking their opinions of the changes and to make note of customer behaviors to observe their effectiveness. We’d love to hear what tips you’ve incorporated into your retail space and how well they’ve worked for you on Facebook, by sharing and tagging us @retailconfectioners. Crave more?Click here to subscribe and start receiving weekly tips, like this, delivered straight to your email inbox. RCI's blog is just one of the many resources we offer to help candy makers refine their craft and build upon their business and marketing practices. Follow us on Facebook for even more sweet inspiration. Not a member? Click here to learn how RCI can help you build your sweet business.
Tags:
Displays
Increase Sales
Merchandising
Retail
Tip
Permalink
| Comments (0)
|
|
|
Posted By RCI,
Tuesday, May 31, 2022
Updated: Tuesday, October 11, 2022
|
In this five-week series, retail strategists and instructors at RCI’s Merchandising Boot Camp, Rich Kizer and Georganne Bender, of KIZER & BENDER, share important areas of your retail space that can either set your business up for sales success or failure. As the last part of this series, we’re sharing how slowing shoppers down can increase sales. In a previous post, we learned about the “decompression zone,” which is the space within a five-foot radius of the entrance. Just beyond this space, front and center on your sales floor, is where you should position your “speed bump” displays. Speed bumps are used to slow customers down and refocus them on shopping. These displays can also be used to set the stage for what shoppers can expect to see while browsing the rest of the store. Use a single, small table or cluster a few together for a bigger impact. Add product from different departments to create fun-to-shop, “I have to have that!” displays. Change your speed bumps once a week, whether they need it or not. Remember, this display is a BIG part of your store’s ambiance. Overall, it is important to keep your sales floor fresh. Get a blank calendar and preplan your merchandising moves. Check your 10-second impression daily, again, change your speed bumps at least once a week, tweak your lake-front property frequently and change your window displays on a monthly basis. Refresh your entire sales floor at least once every quarter, making changes to customer flow as necessary. And have fun! Crave more?Click here to subscribe and start receiving weekly tips, like this, delivered straight to your email inbox. RCI's blog is just one of the many resources we offer to help candy makers refine their craft and build upon their business and marketing practices. Follow us on Facebook for even more sweet inspiration. Not a member? Click here to learn how RCI can help you build your sweet business.
Tags:
Increase Sales
Layout
Merchandising
Planning
Retail
Permalink
| Comments (0)
|
|
|
Posted By RCI,
Tuesday, May 24, 2022
Updated: Tuesday, October 11, 2022
|
In this five-week series, retail strategists and instructors at RCI’s Merchandising Boot Camp, Rich Kizer and Georganne Bender, of KIZER & BENDER, share important areas of your retail space that can either set your business up for sales success or failure. This week we’re covering another variation to the store layout which Kizer and Bender like to refer to as “Lake Front Property.” Learn if this approach applies to your store layout and what to display in this space to capture more sales. Ninety percent of people enter a store and look or turn to the right. This space is prime real estate, otherwise known to as “Lake Front Property.” Too many retailers use this area as just another space to house merchandise, or worse, it’s where you find the checkout counter (ideally, the checkout belongs in the center or on the left side of the store, at the natural end of the shopping experience). If the front right does not work for your sales floor just reverse the flow, making the left side your lake front property. Use your lake front property to feature new items; tell product stories and display high-demand, high-profit items. Kizer and Bender recommend changing this display frequently to keep your sales floor fresh. Stay tuned for more retail therapy next week to learn about a sales tactic known as a “speed bump” and how it can set the tone of your whole store. Crave more?Click here to subscribe and start receiving weekly tips, like this, delivered straight to your email inbox. RCI's blog is just one of the many resources we offer to help candy makers refine their craft and build upon their business and marketing practices. Follow us on Facebook for even more sweet inspiration. Not a member? Click here to learn how RCI can help you build your sweet business.
Tags:
Displays
Increase Sales
Layout
Merchandising
Retail
Permalink
| Comments (0)
|
|
|
Posted By RCI,
Tuesday, May 17, 2022
Updated: Tuesday, October 11, 2022
|
In this five-week series, retail strategists and instructors at RCI’s Merchandising Boot Camp, Rich Kizer and Georganne Bender, of KIZER & BENDER, share important areas of your retail space that can either set your business up for sales success or failure. This week we’re covering an important consideration for maximizing the free-flow store layout. Once shoppers are on your sales floor, where they go is up to you. If you are like most independent retailers, you probably utilize a free-flow layout, because it offers you unlimited opportunities to highlight merchandise and create display vignettes. A free-flow layout has no set aisles so shoppers roam the sales floor freely, guided by how you plan the fixtures. When arranging fixtures, avoid straight lines when you can. Instead angle your fixtures so shoppers are unconsciously directed through the store. The more they see, the more opportunity they have to buy. Stay tuned for more retail therapy next week, when we’ll share KIZER & BENDER’s tips for maximizing a “lake front property” store layout. Crave more?Click here to subscribe and start receiving weekly tips, like this, delivered straight to your email inbox. RCI's blog is just one of the many resources we offer to help candy makers refine their craft and build upon their business and marketing practices. Follow us on Facebook for even more sweet inspiration. Not a member? Click here to learn how RCI can help you build your sweet business.
Tags:
Displays
Increase Sales
Layout
Merchandising
Retail
Permalink
| Comments (0)
|
|
|
Posted By RCI,
Tuesday, May 10, 2022
Updated: Tuesday, October 11, 2022
|

In this five-week series, retail strategists and instructors at RCI’s Merchandising Boot Camp, Rich Kizer and Georganne Bender, of KIZER & BENDER, share important areas of your retail space that can either set your business up for sales success or failure. Just inside your front door is a space called the decompression zone; an area customers breeze right through without stopping. You can expect they will miss everything you place in this zone of the store. You may wonder why no one is reading that big sign just inside the door—it’s because people are not focused on shopping yet. In fact, they are unlikely to notice anything until they are at least five-feet inside the door. Anything in the decompression zone is essentially invisible, including shopping baskets. The placement of your shopping baskets alone, may be costing you sales. There is a direct correlation between the percentage of shoppers using a basket/cart and the size of the average transaction. Want customers to spend more money? Make sure your shopping basket is at least five-feet away from the entrance. Stay tuned for more retail therapy next week, when we’ll share KIZER & BENDER’s tips for maximizing a free-flow store layout. Crave more?Click here to subscribe and start receiving weekly tips, like this, delivered straight to your email inbox. RCI's blog is just one of the many resources we offer to help candy makers refine their craft and build upon their business and marketing practices. Follow us on Facebook for even more sweet inspiration. Not a member? Click here to learn how RCI can help you build your sweet business.
Tags:
Increase Sales
Layout
Merchandising
Retail
Permalink
| Comments (0)
|
|
|
Posted By RCI,
Tuesday, May 3, 2022
Updated: Tuesday, October 11, 2022
|
 Shopping today is all about experience. People can buy what you sell in any number of places, so a visit to your retail store has to entice them to make a purchase once they arrive. This requires constant reinvention, so shoppers are thrilled each time they visit. In the next five weeks, retail strategists and instructors at RCI’s Merchandising Boot Camp, Rich Kizer and Georganne Bender, of KIZER & BENDER, share five important areas of your retail space that can either set your business up for sales success or failure. Upon entering, shoppers make a value judgement about your store in 10 seconds or less. In those 10 seconds they are unconsciously determining whether it’s a good place to be. What does your store say to shoppers in the first 10 seconds? Is the sales floor interesting? Do your displays invite shoppers to touch the product? Stand inside your front door and take an objective look. Like the saying goes, you never get a second chance to make a first impression. By taking a few seconds to observe your store from the lens of a new shopper, you just might identify quick fixes to make your space more inviting to shoppers. Although this week’s tip is intended for a physical store, it could also be applied to your website. In today’s retail environment, it’s important you put just as much effort into your website. Stay tuned for more retail therapy next week, when we’ll address the decompression zone. For more information about KIZER & BENDER, contact them at info@kizerandbender.com or 630-513-8020. Crave more?Click here to subscribe and start receiving weekly tips, like this, delivered straight to your email inbox. RCI's blog is just one of the many resources we offer to help candy makers refine their craft and build upon their business and marketing practices. Follow us on Facebook for even more sweet inspiration. Not a member? Click here to learn how RCI can help you build your sweet business.
Tags:
Marketing
Merchandising
Retail
sales
Permalink
| Comments (0)
|
|
|
Posted By RCI,
Tuesday, May 11, 2021
Updated: Friday, August 20, 2021
|
Want packaging that will help you rule the retail scene?! Keep reading for 3 fresh tips from CEO of Pearl Resourcing
, Emily Page, to help your brand capture consumer attention and gain more sales.
Define Your Brand and Stick to it
Higher margins and customer loyalty is about defining your business as different and valuable among the competition through your product and the visual cues in stores and on packaging that help a customer identify you.
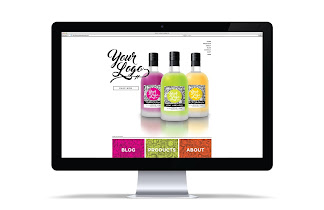
It’s important to utilize a brand guide, so every year and season your packaging stays within the visual guidelines. A brand guide will also make your brand recognizable over time and build brand equity. Don’t design in a vacuum on a computer without considering the existing line-up, and don’t design a single product alone. If you do, you may not realize its compromise on your brand image or store aesthetic.
Brand value comes when customers recognize your brand quickly through visuals, so you must be consistent to increase your value. Consistent color pallets in a store are soothing and attractive to the eye, yet contrast attracts attention. It’s a delicate art form, best advised on by a talented brand director to set the tone. Ask your art director to create a brand guide for all packaging design and store merchandising to follow. Then your whole team will be clear how to keep consistent in their independent projects.
Design with In-Store Merchandising in Mind When selecting packaging, consider how it will all display in store before you buy. People buy gifts for themselves or others to feel special—packaging adds to their “special” experience. Take customers on a journey by curating the in-store display with themed colors and shapes. When consumers are in your store, contrasting colors grab more attention than you realize, so even contrasting colors must be in harmony within a similar color family.
Take the time before you embark on a new design and consider what is working in your store. What items sell out? What do your employees say your customers are always asking for? Design with customer requests in mind. Pick complimentary and contrasting colors to use across your entire product line to create consistency. Display products to create visual variety, with a focus on unique shapes or colors, for giftable items to result in higher perceived value and acceptable price.
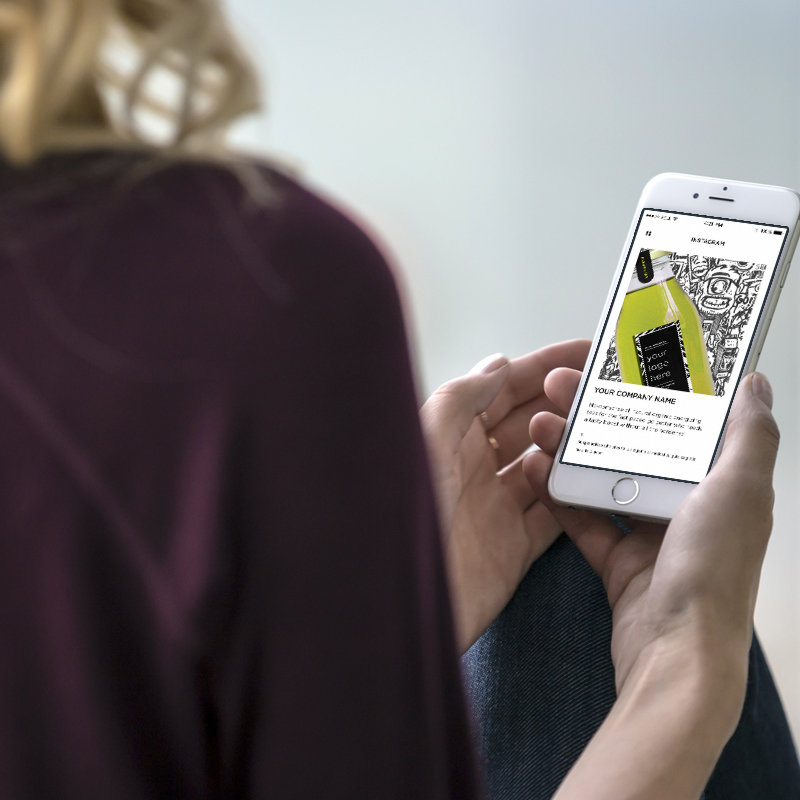
Drive Customers Back to Your Online Community
You want every first-time buyer to not only love your product, but also buy from you again. Make it easy for them to find you by including your website and exact social media handles on your packaging (
don’t just use the social media icons, this creates opportunities for spelling errors). Focus on a maximum of two or three social media platforms for customers to engage with you. They can learn more on your website.
Recapturing existing customers is always less expensive than acquiring new ones. Offer a coupon code to first-time buyers to encourage return online orders, allow them to familiarize themselves with your products and memorize their favorites. One sale can easily turn into two with very little investment.
Be sure to curate your e-commerce and social media experiences, so the brand story continues to impact their minds and hearts. You don’t need to post a lot, but it should be professional. The easiest and least expensive way to curate great content is to re-post fan content on social media. Encourage high-quality photo sharing by giving a discount code or free product to fans with the best photos. Or send free samples to influencers with an already clear fan following in your region, in exchange for a set number of high-quality photos you can use to get the best both diversity and social proof.
Understanding the unique elements of the retail shopping experience will help you make better branding decisions when ordering or designing packaging for your products.
By utilizing these tips, you can make a difference in how consumers view and engage with your products, allowing you to achieve even better sales.
Crave more? If you like what you read here, look for the "Subscribe now" box on the right to enter your email address and start receiving weekly tips, like this, delivered straight to your email inbox. RCI's blog is just one of the many resources we offer to help candy makers refine their craft and build upon their business and marketing practices.
Follow us on Facebook for even more sweet inspiration.
Not a member? Click here to learn how RCI can help you build your sweet business
.
About Emily Page: Emily has managed and launched multiple 7-figure product brands in Costco, Williams-Sonoma, Kroger, and Amazon as a Business Growth Consultant and CEO of Pearl Resourcing. She’s bringing you the expertise, resources, and mentors you need so that you can develop products and make them sell in her blog articles and her START TO SOLD YouTube channel and blog.
http://emilyannepage.com
http://pearlresourcing.net
http://youtube.com/c/starttosold/
Tags:
branding
Merchandising
Packaging
Retail
sales
Permalink
| Comments (0)
|
|