|
|
Posted By RCI,
Tuesday, June 14, 2022
Updated: Tuesday, October 11, 2022
|

Brittle is a great summer treat, because it can stand up to warm summer temps all while satisfying the need for sweet, salty and whole lot of crunch! This week we’re sharing 5 quick tips from RCI members who are known for their brittles, among their other delightful treats, Joy Lyn’s Candies of Paradise, California. Keep reading as we troubleshoot common problems faced when making brittle and how to resolve them. - Crystallization can be caused by an incomplete wash-down of the kettle, mixing blade and other utensils used while making brittle. This means not all sugars have dissolved which will create a grainy texture.
- Sticky brittle could be the result of undercooking the batch, creating higher than desired moisture content.
- Alternatively, cooking brittle at too high of a temperature can lead to a scorched or bitter flavor.
- Butter your table top before pouring the batch to prevent it from sticking to the table.
- Brittle that is too hard and thick can happen if you use a fan to cool your mixture, allowing it to set too quickly. Avoid the use of a fan to cool mixture and work quickly to thin and spread brittle.
Joy Lyn's Glenn Hartley works quickly to create crisp, buttery peanut brittle. Game Changing Tools for Working with Brittle
Sometimes even perfect formulations can only get you so far, here’s a couple of Joy Lyn’s favorite tools for crafting drool-worthy brittles with consistency. As seen in the series of photos above, Glenn Hartley uses Tucker BurnGuard safety gloves and a heavy-duty scraper fashioned from the lid of a food-grade bucket. Finding the right heat-resistant gloves will not only protect your skin from burns, they allow you to spread hot brittle thinly and quickly. Joy Lyn’s wears high-temperature Tucker BurnGuard® safety gloves over white cotton gloves to lessen the heat. Sometimes a standard scraper is just not enough for confections, like brittle, that require a high-level of heat. Joy Lyn’s repurposes the lid of a food-grade corn syrup bucket to fashion their own heavy-duty scrapers, perfect for scraping the kettle and spread the hot brittle mixture after it’s poured. With the use of a bandsaw, they cut the bucket’s lid in half to achieve the desired shape. The result is a scraper that is thicker, larger and can better withstand high heat. Hopefully these tips will not only help you to identify and correct problem areas with brittle, but also achieve thinner, flavorful brittle with just the right amount of crunch! Crave more?Click here to subscribe and start receiving weekly tips, like this, delivered straight to your email inbox. RCI's blog is just one of the many resources we offer to help candy makers refine their craft and build upon their business and marketing practices. Follow us on Facebook for even more sweet inspiration. Not a member? Click here to learn how RCI can help you build your sweet business.
Tags:
Brittle
Gloves
Heat Tolerant Candy
Peanut Brittle
Production
Scraper
Summer
tips
Permalink
| Comments (0)
|
|
|
Posted By RCI,
Tuesday, November 10, 2020
Updated: Thursday, January 21, 2021
|
The call for safety is at an all-time high. Many things need to be taken into consideration when it comes to the safety of our products. One of the most dangerous, yet furthest in the back of people’s mind, is metal detection. We all work with surfaces of either stainless steel or copper. These surfaces have the ability to be chipped, scraped and gouged, producing minute particles of metal that can be dangerous to human consumption. In this excerpt from an article in RCI’s Kettle Talk magazine, Caleb Ramm with Candy House Gourmet identifies four considerations when adding a metal detector to your facility. Purchasing When purchasing a metal detector, make sure to buy from a company that supplies ample training and support to ensure you get the most out of your investment. For a metal detector to be truly effective, constant observation and calibration are key. Placement Another consideration when purchasing a metal detector for your facility, is to determine the best placement based on your needs. Companies that only enrobe candies or produce on a line may want to place a metal detector at the end of the line, so that the product will pass through before packaging. Others run their packaged products through the metal detector, which will detect metal that may be in or on the box itself. Placing the metal detector away from the enrober, in its own designated area may make it easier to access it at all times. Calibration When you set up a new product, you are given test cards that have ferrous, non-ferrous and stainless-steel samples to use to calibrate your machine. The smaller the particle you calibrate to, the smaller the particle the machine has the ability to detect. Elimination When a product is identified as contaminated, it is recommended to pull the entire batch and re-test it until all particle have been located and removed from the finished product. We all want the best for our customers, and look for any way to improve upon this. Safety in confectionery doesn’t just stop in production. Pass on the safety to your customers as well. Crave more? If you like what you read here, look for the "Subscribe now" box on the right to enter your email address and start receiving weekly tips, like this, delivered straight to your email inbox. RCI's Tip of the Week blog is just one of the many resources we offer to help candy makers refine their craft and build upon their business and marketing practices. Follow us on Facebook for even more sweet inspiration.
Tags:
Food Safety
Metal Detector
Owning a Business
Production
Permalink
| Comments (0)
|
|
|
Posted By RCI,
Wednesday, May 27, 2020
Updated: Thursday, May 28, 2020
|
Looking to improve the efficiency of your candy kitchen? Rethinking the layout of your kitchen is a great place to start. RCI member Greg Power with Las Olas Confections and Snacks shares tips, plus which areas to focus on for the most impact in this week’s post.
Visualize
When reviewing your production layout, first, take measurements of your equipment and space. Draw a diagram of your space on paper; create scale cut outs of equipment and other movable items so you can move the items around easily. This will allow you to visualize the best placement of your equipment and help with layout options to maximize production and product flow.
Your production space should be enclosed and it should not open directly to outside areas; this will help with security and reduce exposure to outside elements. Smooth, walls, tile cove base and sealed concrete floors or tile flooring are all preferred for ease of cleaning and washing down. Storage racks should be off the ground and away from the walls (check for local health codes for how far off the ground and how far away from the walls is required). Any non-food contact equipment that can be stored or installed out of the production area is preferred and may open up additional kitchen space if stored elsewhere. Air compressors, boilers, cleaning equipment, etc. should all be stored away from production.
Production
The kitchen production area is the beginning of your entire process; which is why outflow from the kitchen should be smooth and effortless as the product moves to your production lines. If space permits, your kitchen should be separated, but adjacent to your slabbing or table room. This setup is the most efficient process for getting product off of the tables and on your production lines. If your tables are water-jacket cooled and you have a temperature-controlled cooling room available (at least 60˚F/15˚C), this will offer the most efficiency for cooling your products as quickly as possible from batch to production. You want to remove the heat from the product as fast as possible without sweating it.
Flow
From slabbing, product should go straight into enrobing or coating. This area should be as close to the slabbing or cutting area as possible. If you are hand dipping, multiple stations can be set up adjacent to the slabbing area. From enrobing or coating, products should flow straight into cooling tunnels then into the packing area. After packing, product may be stored in a cool, dry place for several days at 65˚ F/18˚C before transport.
Equipment
If space permits, avoid turns and curves within the process. Fewer transitions and handling of product will reduce labor. All equipment should be on legs, stands or wheels off the floor and away from walls; it should be easily accessible from all sides for easy cleaning and maintenance.
Production space should be limited to items needed for a specific run, excess equipment, cooling racks and raw materials. Work-in-process can reduce your ability to run efficiently and cause increased labor inefficiencies. Fine tuning some of these areas could have a surprising impact on the efficiency of your team.
Crave more? If you like what you read here, look for the "Subscribe now" box on the right to enter your email address and start receiving weekly tips, like this, delivered straight to your email inbox. RCI's Tip of the Week blog is just one of the many resources we offer to help candy makers refine their craft and build upon their business and marketing practices.
Not a member? Click here to learn how RCI can help you build your sweet business.
Tags:
Efficiency
Layout
Production
Productivity
Permalink
| Comments (0)
|
|
|
Posted By RCI,
Tuesday, May 19, 2020
Updated: Thursday, May 28, 2020
|
The mention of freezing chocolate products not too long ago was looked upon by candy makers as taboo. The two main concerns were bloom and loss of flavor.
Today, with new freezing systems and a better understanding of how to freeze products, it has become more common in the industry. Some of the largest manufacturers freeze products to keep up with seasonal demands. Keep reading for pro tips for successfully freezing and thawing chocolate in just a few simple steps, plus maximum storage times for both filled pieces and solid chocolates.
Freezing
1. Prepare the product
- Shrink wrap or wrap as tight as possible, making the package air tight.
- If you use stock boxes, it is best to double-shrink wrap them.
- Don’t have a shrink wrapper? A double layer of plastic wrap will work as well.
2. Maintain a stable freezing and thawing process.
- Most household or small commercial freezers can consistently maintain temperatures with short thaw cycles, if any.
- Opening and closing freezers increases humidity in the units, thus the need for defrosting.
- Larger operations should utilize freezers that have defrosting cycles.
- Proper freezer drainage and regular maintenance is key to ensuring stability.
- Evaluate defrosting time regularly. If this process takes too long, the packaging could get wet. If it is too short, the cost of freezing will increase due to the use of power.
Thawing*
*This may be the most important part of freezing.
1. Remove product from the freezer
- When removed from the freezer, product should be stored at 60˚ F/ 15˚ C, with limited humidity.
2. Create air movement around the thawing package
- Smaller operations can remove a stock box from the freezer and place it on a counter with a small fan blowing on the package.
- Larger operations can put a pallet on a rack with a fan blowing on one end.
- Do not open the package or remove the wrap until the product temperature rises up to room temperature.
- When opened at room temperature, the product will look and taste the same as it did before freezing.
For best results, thaw and sell frozen products within the recommended times below.
- Filled pieces and truffles should be 3-4 months.
- Solid chocolate pieces should be 6-8 months.
Freezing may not make sense for every company, as it is a major part of planning and operations for the companies that practice this method. You cannot hurry this process, but when executed properly it will increase shelf life by a few months and will not harm your products.
Crave more? If you like what you read here, look for the "Subscribe now" box on the right to enter your email address and start receiving weekly tips, like this, delivered straight to your email inbox. RCI's Tip of the Week blog is just one of the many resources we offer to help candy makers refine their craft and build upon their business and marketing practices.
Not a member? Click here to learn how RCI can help you build your sweet business.
Tags:
Chocolate
Freeze
Production
Shelf Life
Permalink
| Comments (0)
|
|
|
Posted By RCI,
Tuesday, March 31, 2020
Updated: Friday, April 17, 2020
|
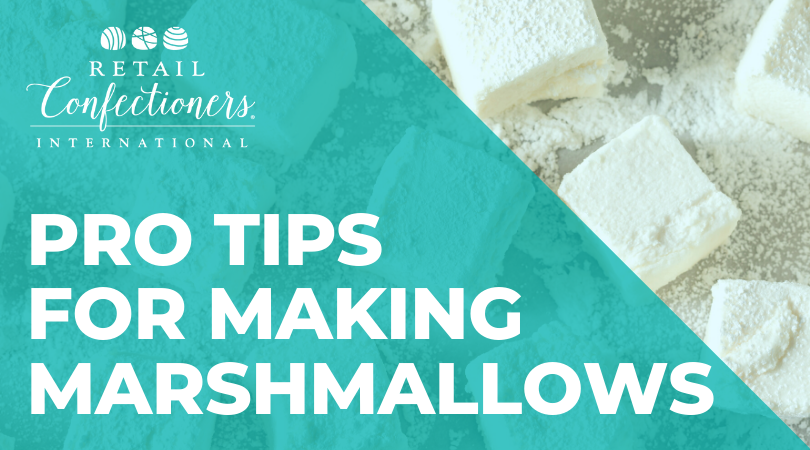
If things have slowed down for your business, take advantage of any downtime by refining your craft of candy making. If you don’t make your own marshmallow, this is a great product to work towards perfecting.
There’s nothing quite like homemade marshmallow. If you don’t make your own marshmallow, now is the time to experiment with recipes and techniques. This week, we’re offering expert tips for cutting, dusting, enrobing and packaging marshmallows. Plus, a bonus marketing idea!
Boiling Corn Syrup
This tip will help prevent chocolate-covered marshmallows from cracking. Here’s why: most 42 DE (dextrose equivalent) corn syrup contains a small amount of yeast bacteria. This is a common problem with marshmallows, because the corn syrup is added to the sugar slurry (or bob) after it has been removed from heat, so it doesn’t get warm enough to eliminate any yeast found in the corn syrup.
The solution, bring corn syrup to a very low boil. Just as it begins to boil, remove it from heat. Do this step early in the day, allowing it to cool to room temperature before adding it to the cooked portion of the marshmallow. A fellow candy maker did this and never had a cracked Easter egg again.
Cutting
When cutting small batches of marshmallow, RCI members have recommended the following ways to be most efficient:
- A guitar cutter works, but it really depends on how soft your marshmallow recipe is. As an alternative, a sharp pizza cutter works well too. – J. Sofia, Cargill Cocoa & Chocolate
- We use a lightly buttered, sharp, thin-bladed knife. [We re-apply the butter] every 2 or 3 rows. It's a bit slow, but eliminates the need for corn starch, which I found made the marshmallows difficult to coat. –W. Spence, Spence Candies
Dusting
Dusting marshmallows is an important step to preserve that soft and pillowy texture that we desire. Traditionally candy makers use powdered sugar or corn starch to keep marshmallows from drying out and becoming hard. Aside from the cloud of dust they leave everywhere, a coating of powdered sugar can make your already sweet marshmallows too sweet and corn starch can make it difficult for chocolate to stick to the marshmallow.
As an alternative to the traditional corn starch and powdered sugar, try replacing them with dextrose or fondant sugar (such as Amerfond® Fondant Sugar). Both products will help you achieve the desired affect and with less the mess. For marshmallows bound for the enrober, adding a little dextrose to the top and bottom will also help the chocolate stick.
Enrobing
If air bubbles are a problem when enrobing square confections, like marshmallows, send them through your enrober corner first. Your products will receive better chocolate coverage from the fountains on the enrober and you will decrease the chance for bubbles to appear on the tops.
Packaging
Have you ever noticed condensation (or worse, mold) on the inside of your marshmallow packaging? If so, you may be cutting and packaging your marshmallows too soon. Of course, you want your marshmallows to be as fresh as possible, but marshmallow needs to breathe for a while or else the warmth may create moisture and you may experience mold on your product. A general rule of thumb is to let marshmallow sit overnight before cutting, dusting and storing it.
Marketing Your Mallows
While people are spending more time at home, share ideas for gourmet s’more recipes that your social followers can make at home with your products. Click here for 5 creative s’more ideas. Package your fresh, homemade marshmallows, along with your chocolates and graham crackers, and sell as a fun, family activity to make together at home.
If you’ve ever questioned whether making your own marshmallow is worth the hassle, these expert tips will not only make your job easier, they will leave your customers wanting more of these fluffy confectionery wonders!
Crave more? If you like what you read here, look for the "Subscribe now" box on the right to enter your email address and start receiving weekly tips, like this, delivered straight to your email inbox. RCI's Tip of the Week blog is just one of the many resources we offer to help candy makers refine their craft and build upon their business and marketing practices.
Tags:
Cracks
Enrobing
Marketing
Marshmallow
Packaging
Production
Permalink
| Comments (0)
|
|
|
Posted By RCI,
Wednesday, September 11, 2019
Updated: Monday, April 27, 2020
|
Impress your customers during the holidays and year around with 3D moulded chocolates. Brian Donaghy of Tomric Systems shares step-by-step instructions for working with both solid and hollow moulds, plus important considerations when it comes to tempering and cooling.
Start with Good Temper
It seems fairly basic, but before we dive into moulding chocolate, I feel compelled to note that proper moulding techniques all start with chocolate in good temper. Good temper leads to appropriate viscosity (90 or below for 3D moulding), which ultimately leads to better finished pieces, whether that be your three-foot hollow bunny, your solid chocolate Santa pop or the shell to that beautifully decorated artisan-style praline. We are always looking for bubble-free chocolate, of even thickness throughout the moulded piece with the beautiful shine and snap that will delight our customer. How can we get there?
Solid Moulds
Many 3D moulds are designed as an open or closed format. The open format allows the mould to be made hollow or solid, while the closed format only allows for hollow manufacturing. Solid forming is fairly straight forward; clip the two (or more pieces) together, fill with chocolate, (bubble-free is easier to achieve, if you vibrate the mould while filling) and set filled mould in a cool space with air flow—I prefer 50˚F for my refrigeration temperature. Leave the mould there until you can see the chocolate pulling away from the inside of the plastic. If the chocolate piece experiences breakage during this time, I will often remove some of the clips and turn the mould onto its base to finish the crystallization process. Once the piece is ready to be unmoulded, I remove it from the cool space and allow it to return to room temperature before I unmould. Waiting this little bit, helps to prevent sugar bloom or condensation on the piece. If the mould has flash (chocolate on the seam that slipped between the plastic sides), cut it off with a utility knife or sharp paring knife and then use compressed air or a badger-style brush to remove the excess chocolate.
Hollow Moulds
The process for creating hollow moulded chocolates is similar to the solid, but after filling it while vibrating the mould, set the mould aside at room temperature for a couple minutes. Next, pour the chocolate from the mould back into the temperer. Repeat this process until the piece is the appropriate weight or thickness. Create the bottom of the piece, by pouring tempered chocolate onto a lined sheet pan, slightly bigger than the base of the mould. Stand the mould into that pool of chocolate and place the mould and sheet pan in a cool space. Like the solid piece, remove clips early if there is breakage, and bring the piece back to room temperature before unmoulding. The extra chocolate around the base of the mould can be easily removed prior to opening the mould by placing a knife between the mould and the chocolate, it should just break away if the chocolate is finished crystallizing.
Cooling Time
What amount of time is best to store chocolates in a cool space before removing the mould? This will depend on a few factors; the size of the mould, how much chocolate the mould uses and the actual temperature of the space. Regardless of these variables, remember that no matter the size, amount of chocolate or room temperature, you will get more consistent results if that space has moving air, because moulding chocolate that has been properly tempered requires heat exchange created by airflow.
Follow this expert advice to achieve bubble-free moulded chocolates with a beautiful shine and snap.
Crave more? If you like what you read here, look for the "Subscribe now" box on the right to enter your email address and start receiving weekly tips, like this, delivered straight to your email inbox. RCI's Tip of the Week blog is just one of the many resources we offer to help candy makers refine their craft and build upon their business and marketing practices.
Tags:
Chocolate
Cooling
Moulds
Production
temper
Permalink
| Comments (0)
|
|
|
Posted By RCI,
Tuesday, August 13, 2019
Updated: Monday, April 27, 2020
|
The mention of freezing chocolate products not too long ago was looked upon by candy makers as taboo. The two main concerns were “the product will bloom” or “the taste will be lost.”
Today, with new freezing systems and a better understanding of how to freeze products, it has become commonplace in the industry. Some of the largest manufacturers freeze products to keep up with seasonal demands.
In this excerpt from a past RCI regional conference, RCI member Mike Koch, of Morely Candy Makers/ Sanders Candy, offers 4 simple steps for successfully freezing and thawing chocolate, plus maximum storage times for both filled pieces and solid chocolates.
Freezing:
1. Prepare the product
· Shrink wrap or wrap as tight as possible, making the package air tight.
· Double shrink wrapping stock boxes is the best method if you use that type of packaging.
· If you don’t have a shrink wrapper, a double layer of plastic wrap will work.
2. Maintain a stable freezing and thawing process.
· Most household or small commercial freezers can consistently maintain temperatures with short thaw cycles, if any.
· Opening and closing freezers increases humidity in the units, thus the need for defrosting.
· Larger operations should utilize freezers that have defrosting cycles.
· Proper freezer drainage and regular maintenance is key to ensuring stability.
· Evaluate defrosting time regularly. If this process takes too long, product packaging could get wet. If it is too short, the cost of freezing will increase due to the use of power.
Thawing:
This may be the most important part of freezing.
1. Remove product from the freezer
· When removed from the freezer, product should be stored at 60 degrees Farenheit, with limited humidity.
2. Create air movement around the thawing package
· Smaller operations can remove a stock box from the freezer and place it on a counter with a small fan blowing on the package.
· Larger operations can put a pallet on a rack with a fan blowing on one end.
· Do not open the package or remove the wrap until the product temperature rises up to the room temperature.
· When opened at room temperature, the product will look and taste the same as it did before freezing.
For best results, thaw and sell frozen products within the recommended times below.
· Filled pieces and truffles should be 3-4 months.
· Solid chocolate pieces should be 6-8 months.
Freezing is not for everyone, but for the companies that do freeze and do it right, it is a major part of their planning and operations. You cannot cut corners or hurry this process. It is a way for smaller confectioners to purchase products and reach the minimum manufacturer requirement. It will increase your shelf life a few months and will not harm the products.
Crave more? If you like what you read here, look for the "Subscribe now" box on the right to enter your email address and start receiving weekly tips, like this, delivered straight to your email inbox. RCI's Tip of the Week blog is just one of the many resources we offer to help candy makers refine their craft and build upon their business and marketing practices.
Tags:
Chocolate
Freeze
Production
Permalink
| Comments (0)
|
|
|
Posted By RCI,
Tuesday, August 6, 2019
Updated: Monday, April 27, 2020
|
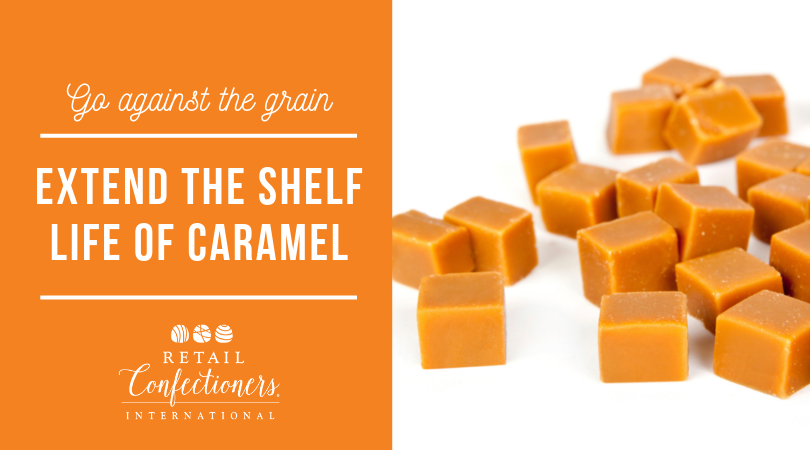
Caramels are one of the most popular candies, usually characterized by a smooth, chewy texture. In an excerpt for RCI’s Kettle Talk magazine, Randy Hofberger of R&D Candy Consultants shares how to avoid common problems like grainy texture or hardening that can develop as caramel ages.
1. CORN SYRUP SOLIDS>SUCROSE SOLIDS
When formulating your caramel recipe, the most common rule of thumb is to use more corn syrup solids than sucrose solids. This should be on a solids basis, for example, you need at least 1.25 pounds of corn syrup in your formula for every pound of sugar (sucrose).
2. DISSOLVE SUGARS
All of the sugars have to be dissolved before the completion of the cooking cycle or they will become nuclei or "seed" for graining to start. To have all of the sugar crystals dissolved, there has to be sufficient moisture in the formula—at least 20% moisture in your caramel premix to properly dissolve sugar crystals. One of the best ways to ensure a fully dissolved caramel premix is to heat it to 160˚F–180˚F while agitating and before starting the cooking process.
3. ADD SCRAP AT THE RIGHT TIME
If reworking scrap caramel, it is best to add it to the premix at the beginning of the cook cycle with sufficient moisture (remember the 20% moisture premix rule). If you have fresh scrap that is free of grain, this can be added at any time of the cooking process.
4. ADD MILK BEFORE COOK CYCLE IS COMPLETE
Different caramels procedures and recipes may require you to add milk during the cooking cycle. Make sure all of the milk is added before the end of the cooking process. Adding milk after the cook cycle may not allow the lactose in the milk to dissolve and this will promote caramel graining.
5. WASH SIDES OF KETTLE
If you have a gas-fired cooking kettle, you will want to wash down the sides of the kettle after a full rolling boil has been established. This is essential to, once again, dissolve any sugar crystals that may be on the sides on the kettle. Also make sure that the boiling level of the caramel is above the scrapers or sugar crystallization will occur.
6. AVOID EXCESSIVE AGITATION
After the cooking procedure is finished, stop the agitators in the cook kettle. Continuous agitation or excessive handling of the caramel will cause it to grain.
7. MANAGE MOISTURE
Hardened caramels are a common texture concern, which can happen when the product loses moisture. Ways to manage moisture and maintain shelf life include; adding humectants, coating the caramel in chocolate and using good, sealed barrier packaging.
8. COLDER STORAGE
As a general rule, lowering storage temperature by 18º F will double shelf life of caramel.
9. USE CHOCOLATE AS A MOISTURE BARRIER
Caramel hardening and moisture migration can occur when a drier inclusion comes in contact with a higher moisture caramel. Adding crisped rice or pretzels to the caramel will eventually cause these inclusions to get soggy and the caramel to become hard. A simple solution, if your operation permits, is to put the dry inclusion, such as crisped rice, in the chocolate that enrobes the caramel center. Chocolate acts as a moisture barrier to keep the crisped rice crunchy and the caramel soft. Putting a chocolate or specialty fat layer between caramel and a cookie base will, likewise, help keep the two components with their original texture.
Great caramels require great effort. With these tips, you can ensure your caramels stay great and your efforts aren't wasted.
Crave more? If you like what you read here, look for the "Subscribe now" box on the right to enter your email address and start receiving weekly tips, like this, delivered straight to your email inbox. RCI's Tip of the Week blog is just one of the many resources we offer to help candy makers refine their craft and build upon their business and marketing practices.
Tags:
Caramel
Formulations
Grain
Hardening
Production
Shelf Life
Permalink
| Comments (0)
|
|

.png)