|
|
Posted By RCI,
Tuesday, October 8, 2019
Updated: Monday, April 27, 2020
|
Do you celebrate Sweetest Day? A favorite candy holiday in the Great Lakes region (more specifically Buffalo, Cleveland and Detroit), it originated in 1922 when Herbert Birch Kingston, a Cleveland candy maker, decided to give candy and small gifts to the city’s orphans and shut-ins, all who are often forgotten and neglected. With the help of friends and neighbors, he distributed these small remembrances on a Saturday in October. For years to follow, other Clevelanders began to participate in the tradition, which came to be known as "Sweetest Day.”
 |
Al Herz, RCI Board President, treats local orphans with
chocolates and entertainment from
the Little Rascals on Sweetest Day in 1928. |
In time, the idea of spreading cheer to the underprivileged broadened to include everyone from family and significant others to coworkers and acquaintances with a kind act or a small remembrance. With a little help from movie stars in the 1930s, the idea quickly spread to other cities all over the country.
For many people, remembering takes the form of gift giving. For this reason, Sweetest Day offers a unique opportunity to offer all kinds of gift items. Falling midway between Father's Day in June and Christmas in December, Sweetest Day provides an occasion for the opening of fall merchandising programs and the promotion of various products, not the least of which is candy and boxed chocolate.
Although Sweetest Day does present commercial opportunity, it is also a great opportunity to set aside time to show members of your community that you care. Consider organizing a group volunteer opportunity for your team, such as serving meals at a local shelter or visiting with the elderly at a senior living facility. Not only are these great opportunities to serve your community, they can help to foster a positive company culture.
Other Ideas to Promote Sweetest Day
- Remind your customers of Sweetest Day through social media, email and in-store signage. Click here to download our free graphic.
- Send press releases about Sweetest Day to your local media and let them know of ways your business can help customers celebrate. Click here for more information about the holiday on RCI’s website.
- Be prepared to explain Sweetest Day and to make suggestions regarding appropriate gifts, keeping in mind that the possibilities are limitless.
- Create a prominent display of merchandise for Sweetest Day.
Gaining in popularity throughout the country every year, some RCI members have reported sales from Sweetest Day exceeding Mother’s Day. This year, Sweetest Day will take place October 19, the third Saturday in October.
Crave more? If you like what you read here, look for the "Subscribe now" box on the right to enter your email address and start receiving weekly tips, like this, delivered straight to your email inbox. RCI's Tip of the Week blog is just one of the many resources we offer to help candy makers refine their craft and build upon their business and marketing practices.
Tags:
Holidays
Marketing
Sweetest Day
Volunteer
Permalink
| Comments (0)
|
|
|
Posted By RCI,
Tuesday, October 1, 2019
Updated: Monday, April 27, 2020
|
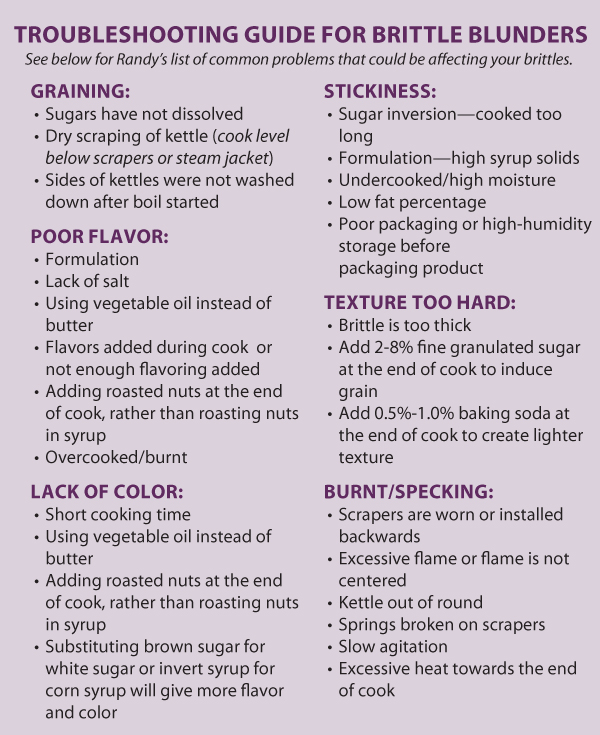
Brittles are a popular confection, with formulations that can be adjust to feature any variety of nuts, seeds and even dried fruit. In an excerpt from RCI’s Kettle Talk magazine, Randy Hofberger of R&D Candy Consultants shares how to achieve great tasting product with consistency.
This hard, glassy candy is not typically coated with chocolate, which makes it great for consumers to enjoy year around! There is no standard of identity for brittles (also known as butter crunch, nut crisps, etc.), but they generally contain sugar, corn syrup, butter, nuts, salt, flavorings and often bicarbonate of soda (baking soda).
While there are many formulas to make brittles, some typical values are:
- Sugar/corn syrup ratio of 2:1
- Milk fat: 1-15%
- Nuts: 20-30%
- Salt: 0.2-1.0%
- Emulsifiers: lecithin 0.25%, mono and diglycerides 0.5-1.5%
- Bicarbonate of soda: 0.5-1.0% (if used)
- Sufficient water to dissolve the sugars
The basic procedure to make brittles is to combine the sugar, corn syrup, emulsifier and water and bring to a boil, washing down the sides of the kettle to prevent premature graining. If your formula has a high percentage of fat/butter (such as with a butter crunch), you will want to add this at the beginning of the cook to ensure it is well incorporated. At approximately 240ºF, raw nuts are added to be roasted in the boiling syrup. Adding the nuts at this time will provide the necessary amino acids to start the Maillard reaction, which will contribute to the color and flavor of the brittle.
As the temperature approaches 280ºF, the flame is lowered if there is evidence of scorching. When the final cook temperature (usually 295–310ºF) is reached, flavoring, low levels of butter, salt and baking soda may be added. The cooked candy is taken to a warm cooling table to be stretched and cooled. Thin pieces of brittle will give a bite that is more tender. When cooled, the product must be properly packaged to maintain the crunchy texture, since brittles will absorb moisture.
Brittles can be a popular and profitable part of your candy portfolio due to their flavor, texture and resistance to heat. Like all confections, consistency is key. Consistent product requires consistent ingredients added in a consistent manner, cooked to the same temperature and for the same amount of time. Processes for cooling, transferring, packaging and storage should also be consistent.
Crave more? If you like what you read here, look for the "Subscribe now" box on the right to enter your email address and start receiving weekly tips, like this, delivered straight to your email inbox. RCI's Tip of the Week blog is just one of the many resources we offer to help candy makers refine their craft and build upon their business and marketing practices.
Tags:
Brittle
Formulations
troubleshooting
Permalink
| Comments (0)
|
|
|
Posted By RCI,
Tuesday, September 24, 2019
Updated: Monday, April 27, 2020
|
You do it every day. When you see your co-workers on Monday morning, at dinner on Friday night, even when you're trying to convince your kids that green beans are good for them.
You tell stories to make your case and to make connections. That's what we do as human beings. In fact, we're hardwired for it.
If storytelling comes naturally to us, then it seems natural that we would use this skill in business—to attract customers, persuade partners and rally employees.
Here are a few key points to keep in mind as you build your storytelling skills. To be persuasive and productive, the stories we tell at work need to be built with attention paid to: emotion, craft and action.
Emotion
 No one needs to tell you that most of our decisions—whether in business or in life—are pushed along by our emotions. They also help us feel engaged in a story or a transaction. But how do you find and engage the right emotions? No one needs to tell you that most of our decisions—whether in business or in life—are pushed along by our emotions. They also help us feel engaged in a story or a transaction. But how do you find and engage the right emotions?
Entrepreneurs can learn from fiction writers who have long known that the success of a story rests in finding "the significant details,” as Eudora Welty once wrote. In good stories, it's the details that captivate us, that allow us to "see" the story, and that invite the reader to get involved in the conversation.
If I tell you my first bicycle was pink with training wheels, that's not much to go on. But if I tell you my first bike was built by the boy down the street who added training wheels and ribbons, and then jogged down the sidewalk with me, holding the banana seat with one hand while I learned how to pedal...now I've given you enough details to "see" the image. I've gotten you involved in my story. You're probably already starting to think about when you learned to ride a bike.
In business, the same is true. Just as you focus on the details of your ingredients and processes, attending to the details in your marketing—even if you're just greeting someone who has walked into your store—can mean the difference between a customer who feels unwanted and one who feels like he is now a participant in the “conversation.”
Even if you're not in full story mode, using clear details in your conversations will guarantee you a better relationship.
Craft
 I like to tell my students that masterpieces are not written; they are rewritten. I like to tell my students that masterpieces are not written; they are rewritten.
Even though we are all able to toss off a great story in the middle of a cocktail party, the stories you use at work should be crafted. Just like a house is built with bricks or wooden beams, stories are built on details and images and rhythm and voice, and so much more. Key among these craft elements is the idea of tension and conflict.
I know. You may be running from the room when you see these two words. While most of us don't like conflict in our lives, we must have it in our stories. Think about it this way: in a story, tension and conflict can be either a threat or an opportunity.
In business we usually refer to this as creating a sense of urgency. "If you pay now you can save five percent." That's the opportunity. The threat: "If you don't pay now, you'll be charged an additional five percent."
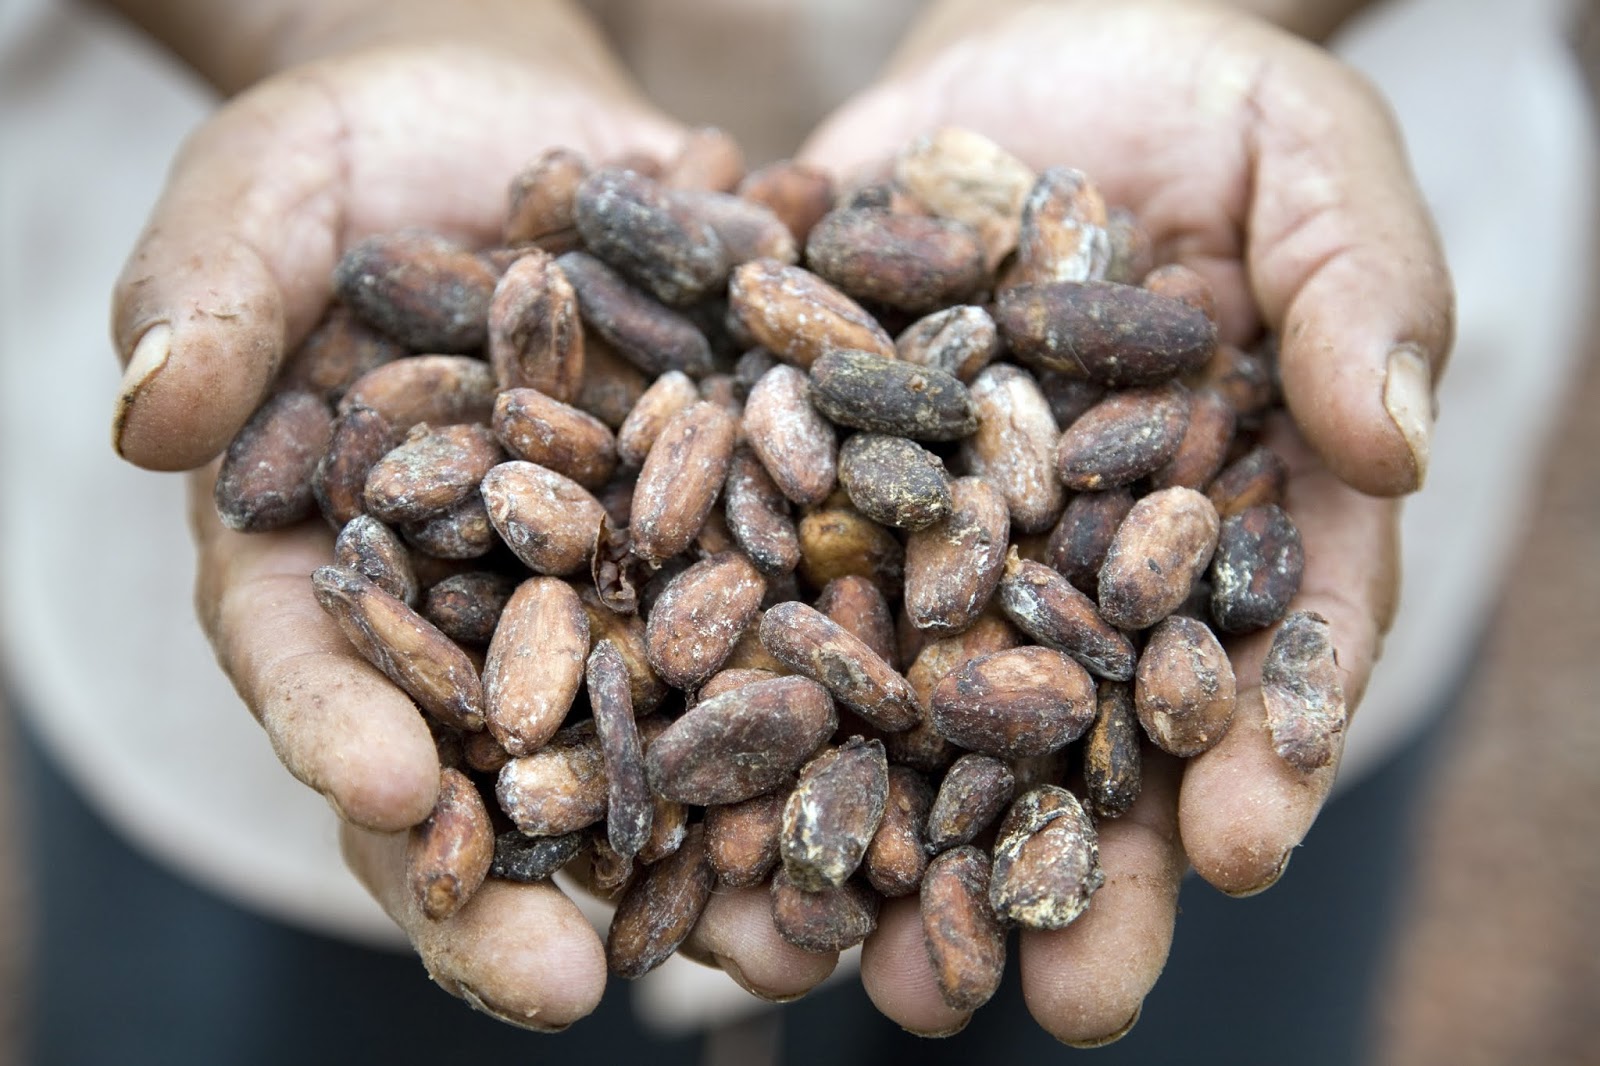
In stories, this concept works in a slightly different way. We create tension by sharing obstacles that may have been in our path. For instance, your signature chocolate relies on cocoa nibs from Ghana. But your sources have dried up and now you have to find the right quality beans somewhere else. And, you had to beat your competitors to them.
We like our stories to have heroes. Overcoming obstacles, big or small, makes you a hero.
Action
In my opinion, every story is persuasive in some way. Opinion pieces in the newspaper try to convince you to see the news the way the writer does. Novels and movies persuade us that this fictional world is real. Advertisers know they are not selling soap; they are selling us the idea that if we use this soap, we will be beautiful.
To be persuasive, stories need to have a solid structure and a clear call to action. We must want our audience to do something.
Imagine this: you spend 15 minutes explaining the process of developing this unique flavor profile and tell me the story of how you stumbled on to it after you thought you were creating something else. Then you say, "let me know if I can help you find something,” and you walk back behind the counter.
As your customer, I probably found the story intriguing and would like to taste this new flavor, but you didn't ask me if I'd like to try a sample or buy some for dessert this evening. So I say, “that's interesting,” and move on.
Now, imagine this: you stand in front of me with two trays and ask me to choose which one I think is the enhanced flavor. Right away you have gotten me involved in this story.
After I point to the tray in your left hand, you say, “Right! Take a taste and let me tell you how we stumbled upon this extraordinary new flavor. We were in the back room on a cold and snowy Saturday morning…”
Now you have made me a part of your story and because you asked me a question, I am immediately involved in this conversation. In fact, when I serve this candy at my next dinner party, I will tell my guests my story of hearing your story, and then these new people will become a part of that story. And on and on and on.
You can see how powerful this can be.
What Stories Should You Tell?
There's a good chance you are not at a loss for personal stories, but in business we want to make sure the stories we craft will support a sales or relationship building goal. Here are just a few ideas for where to find good stories:
- Why you got started in this business.
- Why you stay in this business.
- How you source your ingredients and materials.
- What makes you different.
- What suppliers you work with and why.
The next time you start telling a story, stop for a moment and realize you are building a chain of connections that have the potential to reach far and wide.
Crave more? If you like what you read here, look for the "Subscribe now" box on the right to enter your email address and start receiving weekly tips, like this, delivered straight to your email inbox. RCI's Tip of the Week blog is just one of the many resources we offer to help candy makers refine their craft and build upon their business and marketing practices.
Tags:
Company Story
Increase Sales
Marketing
Storytelling
Permalink
| Comments (0)
|
|
|
Posted By RCI,
Tuesday, September 17, 2019
Updated: Monday, April 27, 2020
|
The confectionery industry has the special privilege/task of enduring holiday bursts. Hiring a temporary workforce can help your business maintain consistent production levels and product quality. In this excerpt from a Kettle Talk article written by Jan Douglass with Esther Price Candies, Corp., we built upon three practical tips to help you hire smart for the holidays.
#1: Build Relationships with Staffing Agencies
Staffing agencies can be a great resource for filling temporary positions. Building relationships with reputable staffing agencies and other local organizations (e.g., county or state job centers, developmentally disabled adult centers, etc.) can help to source reliable individuals for seasonal work and unforeseen sales bursts. When working with staffing agencies it is important to practice open and honest communication. Start by taking the time to discuss open positions rather than simply providing a job description. If a recommended candidate isn’t a good fit, providing concise feedback on why that was the case will help staffing agencies identify better candidates in the future. These simple steps will ensure the staffing agency feels well equipped to find the right fit, right away.
#2: Training is Key
They may only be with you for a brief time, but a temporary workforce can be vital to keeping with the ebbs and flows of seasonal business and make it less painful when you must reduce your staff at the close of a season. Be aware, however, there can be downsides to a temporary workforce, such as high turnover rates. Increased turnover can result in more training hours, risk of production and packing errors and additional work for human resources. Minimize those risks by having sourcing organizations pre-screen individuals and clearly communicate the job expectations to candidates through digital recordings of the candy making process. Successful training can also lead to the return of seasonal staff year after year.
#3: Stay Current on Labor Laws
Make sure to brush up on federal and state labor laws before hiring for the holidays, as many regulations that apply to full-time employment also apply to part-time and seasonal employment. The U.S. Small Business Administration’s (SBA) Employment and Labor Law Guide is a useful resource when hiring. Be aware of your state’s legal requirements for benefits such as unemployment, social security/medicare and workers’ compensation. Check with your state’s department of labor for exemptions for employers who require temporary staff for periods of 10 weeks or less. You will also want to familiarize yourself on your tax reporting responsibilities according to IRS regulations and state tax laws.
Take advantage of these tips and have a holly jolly hiring season!
Crave more? If you like what you read here, look for the "Subscribe now" box on the right to enter your email address and start receiving weekly tips, like this, delivered straight to your email inbox. RCI's Tip of the Week blog is just one of the many resources we offer to help candy makers refine their craft and build upon their business and marketing practices.
Tags:
Hiring
Holidays
Training
Permalink
| Comments (0)
|
|
|
Posted By RCI,
Wednesday, September 11, 2019
Updated: Monday, April 27, 2020
|
Impress your customers during the holidays and year around with 3D moulded chocolates. Brian Donaghy of Tomric Systems shares step-by-step instructions for working with both solid and hollow moulds, plus important considerations when it comes to tempering and cooling.
Start with Good Temper
It seems fairly basic, but before we dive into moulding chocolate, I feel compelled to note that proper moulding techniques all start with chocolate in good temper. Good temper leads to appropriate viscosity (90 or below for 3D moulding), which ultimately leads to better finished pieces, whether that be your three-foot hollow bunny, your solid chocolate Santa pop or the shell to that beautifully decorated artisan-style praline. We are always looking for bubble-free chocolate, of even thickness throughout the moulded piece with the beautiful shine and snap that will delight our customer. How can we get there?
Solid Moulds
Many 3D moulds are designed as an open or closed format. The open format allows the mould to be made hollow or solid, while the closed format only allows for hollow manufacturing. Solid forming is fairly straight forward; clip the two (or more pieces) together, fill with chocolate, (bubble-free is easier to achieve, if you vibrate the mould while filling) and set filled mould in a cool space with air flow—I prefer 50˚F for my refrigeration temperature. Leave the mould there until you can see the chocolate pulling away from the inside of the plastic. If the chocolate piece experiences breakage during this time, I will often remove some of the clips and turn the mould onto its base to finish the crystallization process. Once the piece is ready to be unmoulded, I remove it from the cool space and allow it to return to room temperature before I unmould. Waiting this little bit, helps to prevent sugar bloom or condensation on the piece. If the mould has flash (chocolate on the seam that slipped between the plastic sides), cut it off with a utility knife or sharp paring knife and then use compressed air or a badger-style brush to remove the excess chocolate.
Hollow Moulds
The process for creating hollow moulded chocolates is similar to the solid, but after filling it while vibrating the mould, set the mould aside at room temperature for a couple minutes. Next, pour the chocolate from the mould back into the temperer. Repeat this process until the piece is the appropriate weight or thickness. Create the bottom of the piece, by pouring tempered chocolate onto a lined sheet pan, slightly bigger than the base of the mould. Stand the mould into that pool of chocolate and place the mould and sheet pan in a cool space. Like the solid piece, remove clips early if there is breakage, and bring the piece back to room temperature before unmoulding. The extra chocolate around the base of the mould can be easily removed prior to opening the mould by placing a knife between the mould and the chocolate, it should just break away if the chocolate is finished crystallizing.
Cooling Time
What amount of time is best to store chocolates in a cool space before removing the mould? This will depend on a few factors; the size of the mould, how much chocolate the mould uses and the actual temperature of the space. Regardless of these variables, remember that no matter the size, amount of chocolate or room temperature, you will get more consistent results if that space has moving air, because moulding chocolate that has been properly tempered requires heat exchange created by airflow.
Follow this expert advice to achieve bubble-free moulded chocolates with a beautiful shine and snap.
Crave more? If you like what you read here, look for the "Subscribe now" box on the right to enter your email address and start receiving weekly tips, like this, delivered straight to your email inbox. RCI's Tip of the Week blog is just one of the many resources we offer to help candy makers refine their craft and build upon their business and marketing practices.
Tags:
Chocolate
Cooling
Moulds
Production
temper
Permalink
| Comments (0)
|
|
|
Posted By RCI,
Tuesday, September 3, 2019
Updated: Monday, April 27, 2020
|
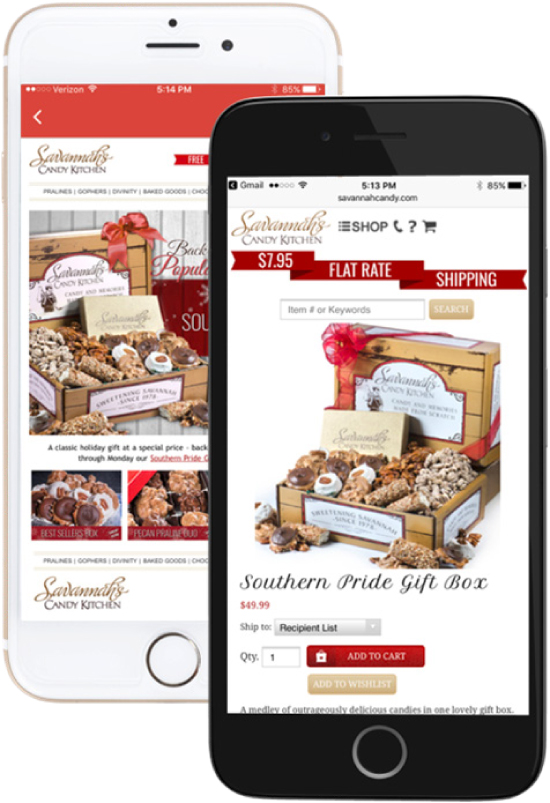
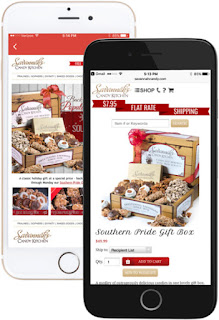
When it comes to your website, you don't want to get left behind! Blake Ellis, with CommerceV3, shares three steps to make your website mobile friendly and turn mobile shoppers into buyers in the process.
There are almost five billion mobile phones in the world. That’s an amazing number given there are only about seven and a half billion people in the world. Not all of these phones are smartphones, but the trends are clear: there are way more phones than computers, and that gap is just getting wider.
What does this mean for your online store? It means every year more of your customers will be using their phones to shop and order. You may have already seen the majority of your traffic move to mobile devices. So, what can you do to convert all these mobile shoppers to buyers?
Quite a lot actually, and it all starts with developing a “mobile-first” mindset. The next time someone asks you to review a design, a new home page promotion or the next email blast, just pull out your phone and check it out. It’s fast, easy and will get you and your team into a mobile-first mindset. If a team member tells you “that’s not really meant for mobile, we don’t get a lot of orders on mobile yet,” just tell them that’s what you’re trying to fix! Pretty soon you’ll start to see a lift as more efforts start with an eye toward mobile.
Reviewing and optimizing everything at once is a lot.
 Let’s break this down into three simple steps: Let’s break this down into three simple steps:
Step #1: Start with Email
Most people read their emails on their phones first, so this tactic makes sense. Enter your own email into your site and open the welcome message on your phone. Test all your other transactional emails, from order confirmations to abandon cart emails to requests for product reviews. Make sure they all look great, are easy to read and perform correctly.
Then move to marketing emails. Have your team test new designs on their phones, and make it a priority to increase opens and click-throughs from mobile devices. Increasing email opens will confirm that your subject lines and preview texts are effective with customers on the go, and increasing click-throughs will confirm the layout and messaging is also working.
 Step #2: Optimize Shopping Step #2: Optimize ShoppingOnce your inbound email metrics are rising, it’s time to get mobile users adding more product to their carts. During this stage you’re testing all your site designs and layouts on your own phone, and asking others to do the same. Designers need to wow you with beautiful, yet tiny layouts, hero images have to load fast and display well, and product detail pages have to present a lot of info in an easy-to-swipe manner.
Keep a close eye on metrics to guide you through this process. How many mobile visitors tap down through categories versus use the product search box? Can you set up filters and sorting to reduce taps and typing? Do products appear with default options so add-to-cart buttons work without any additional selections?
When in doubt, do some secret shopping at large retailers. They have the budgets to do extensive user testing and accommodate all kinds of neat features. Take a look at what they do and get your team to implement features that make sense for your customers.
Step #3: Streamline Checkout
Now that mobile users are tapping on your emails and adding product to their cart, it’s time to get them through the checkout. The key to securing more checkouts is to minimize the need to type.
Set up payment options that your customers already have stored in their phone like Paypal, ApplePay and Google Wallet. Most of these are easy to configure in most online stores, and mobile users love them because they don’t have to re-enter their credit card details.
If you’re already doing address verification, you can use this service to speed up shipping address entry on mobile. As users start to type their street address, your site starts autocompleting the entire address for them.
Finally, make sure every field in your checkout is absolutely required to fulfill the order, and that it pops up the correct style of keyboard for mobile users (alphanumeric, numeric, etc). An easy way to keep up with this is to place a test order on your own site once a week from your phone, and keep tweaking until the process is as efficient as possible.
There’s a lot you can do to improve revenue from mobile, but it all starts with a mobile-first mindset. When it comes to reviewing your own efforts, turn off your computer and pull out your phone. The more you do this, the faster the transition will occur, and the sooner your order volume on mobile will really start to explode.
Crave more? If you like what you read here, look for the "Subscribe now" box on the right to enter your email address and start receiving weekly tips, like this, delivered straight to your email inbox. RCI's Tip of the Week blog is just one of the many resources we offer to help candy makers refine their craft and build upon their business and marketing practices.
Tags:
email marketing
mobile
online shopping
website
Permalink
| Comments (0)
|
|
|
Posted By RCI,
Tuesday, August 27, 2019
Updated: Monday, April 27, 2020
|
Have you ever wondered if working with a distributor would benefit your candy business? In this week’s post, RCI member, Linnea’s Candy Supplies sheds light on a distributor’s role, as well as some of the ways a good distributor can offer value to confectioners.
HOW DISTRIBUTORS ADD VALUE
Manufacturers are not always able to service every customer as well as they would like and that’s where distributors can help. Whether due to a manufacturer's geographic location in relation to their customers or their ability to help with the administration of sales, customer service, inventory and logistics, having distributors lets a manufacturer do what it does best. Make product. To be successful, a distributor needs to add value to the products it sells.
SPEED
Manufacturer’s lead times can be difficult for confectioners to contend with, especially during holiday seasons. Lead times can be anywhere from several days to several weeks. A distributor usually has product in inventory available for immediate order fulfillment.
PRODUCT BUNDLING
A distributor should have a wide range of products that complement each other and meet the needs of confectioners. Having the ability to combine products from various manufacturers all in one shipment can significantly reduce shipping costs. Product bundling also saves time. Placing one order is much faster than placing several.
LOWER MINIMUMS
For many confectioners having a lower minimum order means they can order the quantities they need, not the quantities they have to. Requirements for precious storage space are reduced and their cash is not tied up in excess inventory.
INVENTORY
The burden of keeping a large inventory is shifted to the distributor allowing confectioners to use just-in-time strategies and smaller orders on a more frequent basis.
COMMON MISCONCEPTIONS
There is a misconception that prices from a distributor will always be higher than buying direct from the manufacturer. Many distributors have prices that are comparable and sometimes lower than buying direct from a manufacturer. Distributors purchase products in large quantities from manufacturers and get discounts based on large volume orders or quantities committed to by contract. With this discount, a distributor can offer products at competitive prices.
Another misconception is that if a customer stops buying from a manufacturer and gets their products through a distributor; they are not as important to the manufacturer and will lose contact with them. While it is true the distributor will be assuming the customer service role, the manufacturer’s technical support, expertise and knowledge will always be available either through the distributor or directly. Manufacturers value their customers and want them to be successful whether they buy direct or through a distributor.
HOW TO MAKE THE MOST OUT OF YOUR RELATIONSHIP WITH A DISTRIBUTOR
Distributors are faced with many challenges. Being able to accurately forecast, not only levels of inventory for thousands of products, but also planning for lead times and the logistics involved in replenishment is critical for a distributor’s success and the success of its customers. Good communication with the manufacturer and the confectioner is vital.
Another challenge is being efficient at getting products to customers fast, especially during the busiest parts of the year. A distributor needs to have a great team working together from the time the order is placed until it reaches the customers door.
In today’s business environment, now more than ever, a distributor creates value for manufacturers and confectioners alike.
Crave more? If you like what you read here, look for the "Subscribe now" box on the right to enter your email address and start receiving weekly tips, like this, delivered straight to your email inbox. RCI's Tip of the Week blog is just one of the many resources we offer to help candy makers refine their craft and build upon their business and marketing practices.
Tags:
Distributors
Save Money
Save Space
Save Time
Permalink
| Comments (0)
|
|
|
Posted By RCI,
Tuesday, August 20, 2019
Updated: Monday, April 27, 2020
|
Rumor has it Starbucks will officially begin serving up their coveted Pumpkin Spice Lattes earlier than ever—August 27, if you’re curious. That’s only a week away! If you choose to go by the “more official” calendar date to mark the first day of fall, you’ve got until September 23 [insert sigh of relief here].
Regardless of when you choose to acknowledge the true arrival of fall, it won’t be long before it’s time to say “goodbye” to cool and refreshing flavors like watermelon and citrus, and “hello” to warm and cozy fall flavors like, well, pumpkin spice. Thanks to Starbucks, you can expect to find pumpkin spice in everything from coffees to cookies, candles to skin care, and, yes, even deodorant. Click here to check out some of RCI’s favorite pumpkin spice ideas.
Even if you draw the line at trading in your favorite deodorant for the seasonal variety, there’s something comforting about fall flavors, but you don’t have to limit yourself to pumpkin. Keep reading for a list of equally craveable flavors to fall in love with this fall.
APPLES
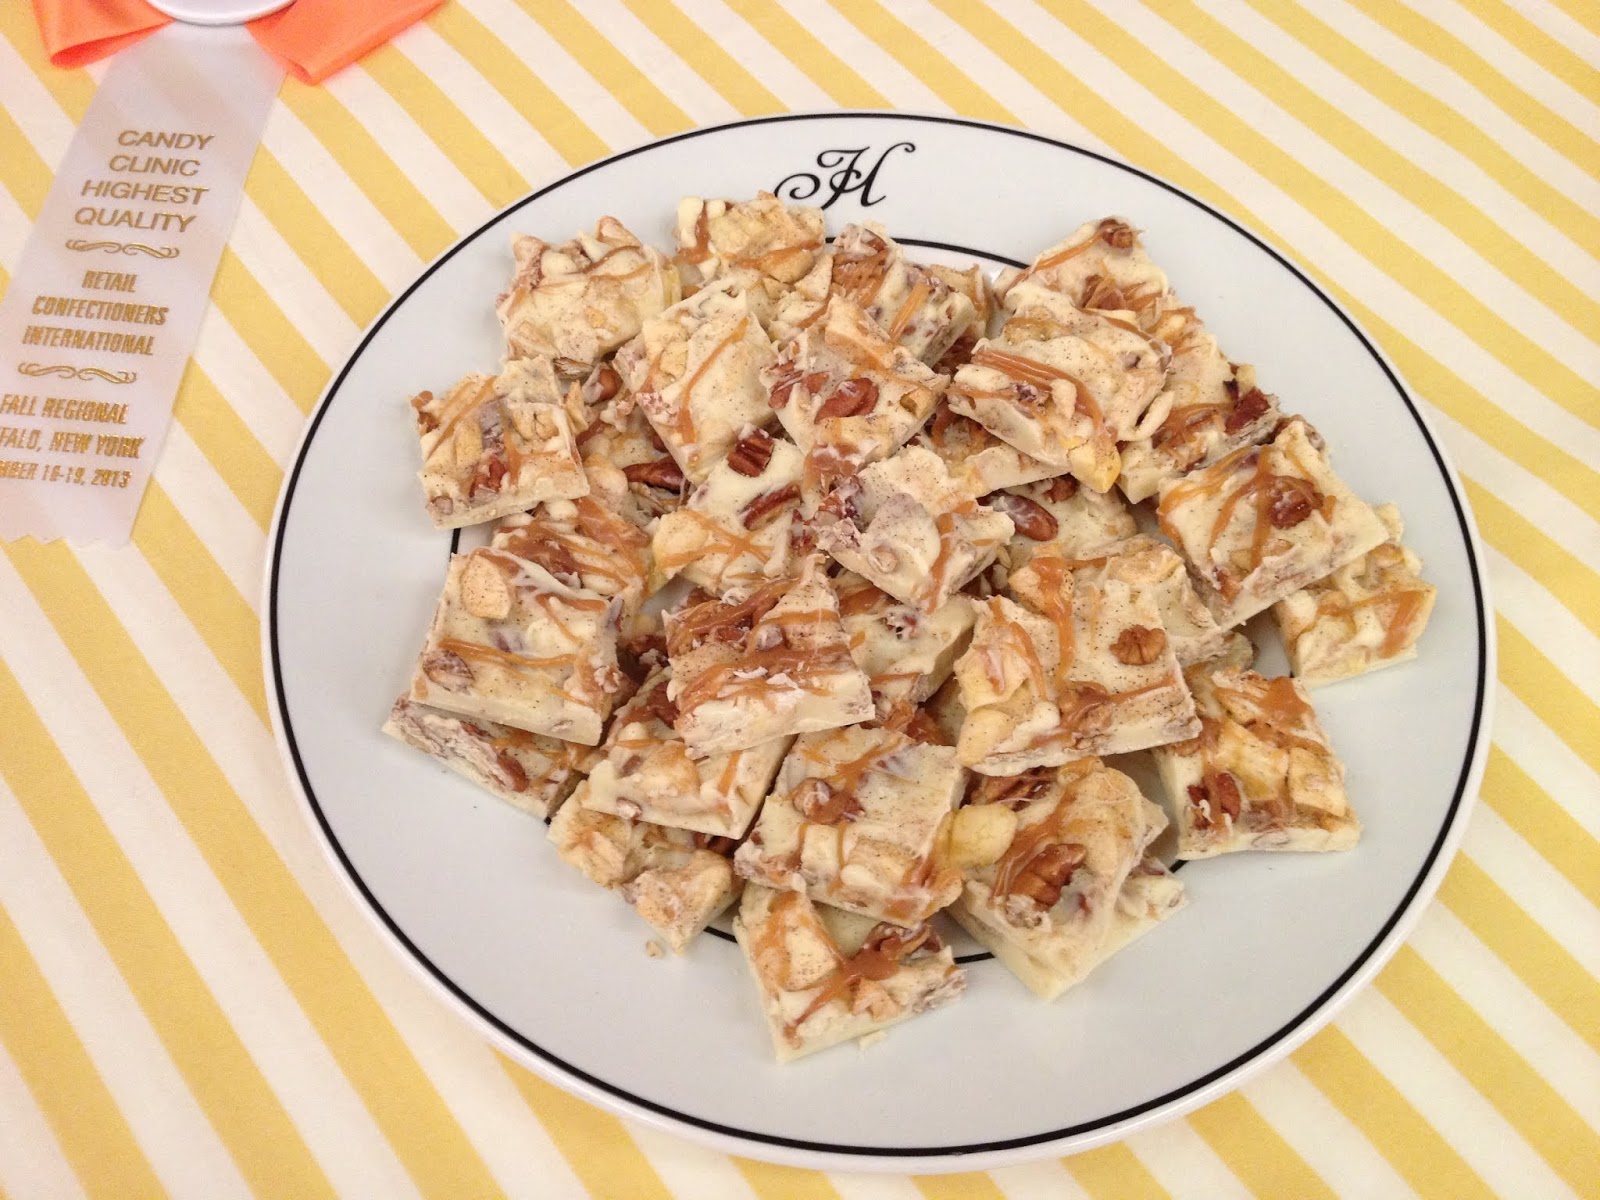
Pumpkin may reign king of fall, but one might say the apple is queen. This certainly isn’t a surprise if you already make caramel apples, but you may consider different ways to incorporate the unofficial fruit of fall, by mimicking the flavors in apple cider or warm apple pie.
RCI member, Hilliard’s Chocolates, evokes all the fall feels with their Apple Pecan Caramel Bark. Presented at a past Candy Clinic, the bark combines white chocolate, cinnamon oil, dried apples, caramel and cinnamon sugar for a welcome fall treat. RCI members: Login at retailconfectioners.org/candyclinic to view past presentations like this one.
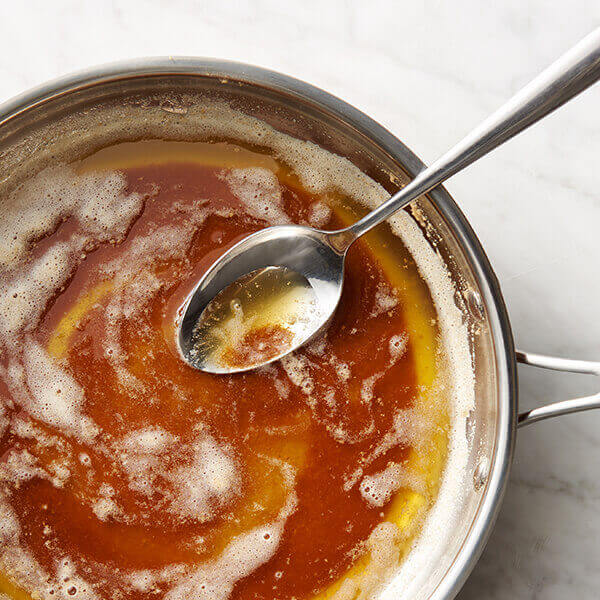
BROWN BUTTER
Take your rich and buttery confections to the next level with brown butter, which is essentially a magical transformation that happens moments before it becomes burnt butter—naturally Martha Stewart has a solution for fixing burnt butter, click here for video. The nutty and complex flavor of brown butter will elevate any recipe. Check out this recipe for Browned Butter Salted Caramel Sauce by TheChunkyChef.com.
CHAI TEA
Quite possibly a distant relative to the pumpkin spice latte, chai tea is a strong-flavored tea with a hint of sweetness. Ginger and pepper add a kick of spice, which is evened out with earthy notes from cardamom and cloves, plus a dash of cinnamon. Why not try this Food Network recipe for Chai Chocolate Truffles, which Giada De Laurentiis compares to a “giant warm hug.”
DARK BEER
Beer is a great addition to any caramel and brittle recipe, but if you’re already incorporating beer into your confections try experimenting with the darker beers of the season. Take note of seasonal beer varieties like porter and stout, which will soon replace the lighter ales of summer.
RCI member, Joy Lyn’s Candies partners with a local brewery to create a peanut brittle made with Sierra Nevada’s Pale Ale. Coined as “Beer Brittle,” this popular confection is made in small batches and offers a subtle hint of hops and malt.
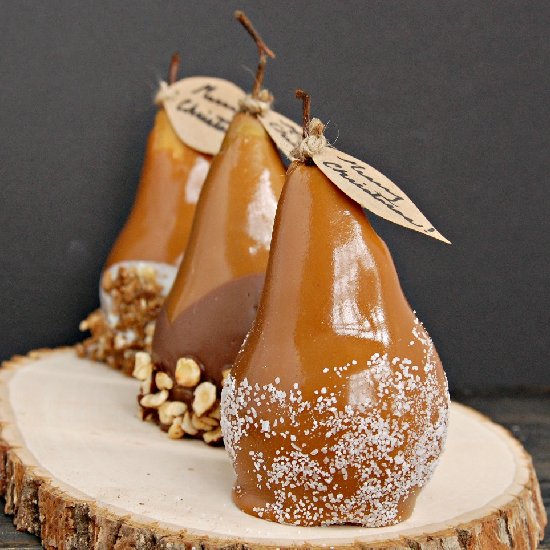
PEARS
If your customers love your caramel apples, get ready to knock their wooly socks off this fall with caramel-dipped pears. Experts agree pears that are not quite ripe with long stems for dipping are best--the most popular varieties being Bosc, Anjou, Comice and Seckel pears. Unlike apples, most pears (Seckel being an exception) don’t take well to having sticks inserted into them, which is why a sturdy stem is important. Check out this recipe for Caramel Dipped Pears from TheKitchenMcCabe.com.
It’s undeniable, the pumpkin spice trend isn’t going anywhere…at least until Starbucks launches their holiday-themed drink menu (enter: Peppermint Mocha), but that doesn’t mean there aren’t plenty of other great fall flavors to peak shoppers’ interest. We want to know, what’s your favorite fall confection? Please share in the comments below.
Crave more? If you like what you read here, look for the "Subscribe now" box on the right to enter your email address and start receiving weekly tips, like this, delivered straight to your email inbox. RCI's Tip of the Week blog is just one of the many resources we offer to help candy makers refine their craft and build upon their business and marketing practices.
Tags:
Apple
Bark
Beer
Brittle
Brown Butter
Caramel
Chai
Fall
Flavors
Pear
Truffles
Permalink
| Comments (0)
|
|
|
Posted By RCI,
Tuesday, August 13, 2019
Updated: Monday, April 27, 2020
|
The mention of freezing chocolate products not too long ago was looked upon by candy makers as taboo. The two main concerns were “the product will bloom” or “the taste will be lost.”
Today, with new freezing systems and a better understanding of how to freeze products, it has become commonplace in the industry. Some of the largest manufacturers freeze products to keep up with seasonal demands.
In this excerpt from a past RCI regional conference, RCI member Mike Koch, of Morely Candy Makers/ Sanders Candy, offers 4 simple steps for successfully freezing and thawing chocolate, plus maximum storage times for both filled pieces and solid chocolates.
Freezing:
1. Prepare the product
· Shrink wrap or wrap as tight as possible, making the package air tight.
· Double shrink wrapping stock boxes is the best method if you use that type of packaging.
· If you don’t have a shrink wrapper, a double layer of plastic wrap will work.
2. Maintain a stable freezing and thawing process.
· Most household or small commercial freezers can consistently maintain temperatures with short thaw cycles, if any.
· Opening and closing freezers increases humidity in the units, thus the need for defrosting.
· Larger operations should utilize freezers that have defrosting cycles.
· Proper freezer drainage and regular maintenance is key to ensuring stability.
· Evaluate defrosting time regularly. If this process takes too long, product packaging could get wet. If it is too short, the cost of freezing will increase due to the use of power.
Thawing:
This may be the most important part of freezing.
1. Remove product from the freezer
· When removed from the freezer, product should be stored at 60 degrees Farenheit, with limited humidity.
2. Create air movement around the thawing package
· Smaller operations can remove a stock box from the freezer and place it on a counter with a small fan blowing on the package.
· Larger operations can put a pallet on a rack with a fan blowing on one end.
· Do not open the package or remove the wrap until the product temperature rises up to the room temperature.
· When opened at room temperature, the product will look and taste the same as it did before freezing.
For best results, thaw and sell frozen products within the recommended times below.
· Filled pieces and truffles should be 3-4 months.
· Solid chocolate pieces should be 6-8 months.
Freezing is not for everyone, but for the companies that do freeze and do it right, it is a major part of their planning and operations. You cannot cut corners or hurry this process. It is a way for smaller confectioners to purchase products and reach the minimum manufacturer requirement. It will increase your shelf life a few months and will not harm the products.
Crave more? If you like what you read here, look for the "Subscribe now" box on the right to enter your email address and start receiving weekly tips, like this, delivered straight to your email inbox. RCI's Tip of the Week blog is just one of the many resources we offer to help candy makers refine their craft and build upon their business and marketing practices.
Tags:
Chocolate
Freeze
Production
Permalink
| Comments (0)
|
|
|
Posted By RCI,
Tuesday, August 6, 2019
Updated: Monday, April 27, 2020
|
Caramels are one of the most popular candies, usually characterized by a smooth, chewy texture. In an excerpt for RCI’s Kettle Talk magazine, Randy Hofberger of R&D Candy Consultants shares how to avoid common problems like grainy texture or hardening that can develop as caramel ages.
1. CORN SYRUP SOLIDS>SUCROSE SOLIDS
When formulating your caramel recipe, the most common rule of thumb is to use more corn syrup solids than sucrose solids. This should be on a solids basis, for example, you need at least 1.25 pounds of corn syrup in your formula for every pound of sugar (sucrose).
2. DISSOLVE SUGARS
All of the sugars have to be dissolved before the completion of the cooking cycle or they will become nuclei or "seed" for graining to start. To have all of the sugar crystals dissolved, there has to be sufficient moisture in the formula—at least 20% moisture in your caramel premix to properly dissolve sugar crystals. One of the best ways to ensure a fully dissolved caramel premix is to heat it to 160˚F–180˚F while agitating and before starting the cooking process.
3. ADD SCRAP AT THE RIGHT TIME
If reworking scrap caramel, it is best to add it to the premix at the beginning of the cook cycle with sufficient moisture (remember the 20% moisture premix rule). If you have fresh scrap that is free of grain, this can be added at any time of the cooking process.
4. ADD MILK BEFORE COOK CYCLE IS COMPLETE
Different caramels procedures and recipes may require you to add milk during the cooking cycle. Make sure all of the milk is added before the end of the cooking process. Adding milk after the cook cycle may not allow the lactose in the milk to dissolve and this will promote caramel graining.
5. WASH SIDES OF KETTLE
If you have a gas-fired cooking kettle, you will want to wash down the sides of the kettle after a full rolling boil has been established. This is essential to, once again, dissolve any sugar crystals that may be on the sides on the kettle. Also make sure that the boiling level of the caramel is above the scrapers or sugar crystallization will occur.
6. AVOID EXCESSIVE AGITATION
After the cooking procedure is finished, stop the agitators in the cook kettle. Continuous agitation or excessive handling of the caramel will cause it to grain.
7. MANAGE MOISTURE
Hardened caramels are a common texture concern, which can happen when the product loses moisture. Ways to manage moisture and maintain shelf life include; adding humectants, coating the caramel in chocolate and using good, sealed barrier packaging.
8. COLDER STORAGE
As a general rule, lowering storage temperature by 18º F will double shelf life of caramel.
9. USE CHOCOLATE AS A MOISTURE BARRIER
Caramel hardening and moisture migration can occur when a drier inclusion comes in contact with a higher moisture caramel. Adding crisped rice or pretzels to the caramel will eventually cause these inclusions to get soggy and the caramel to become hard. A simple solution, if your operation permits, is to put the dry inclusion, such as crisped rice, in the chocolate that enrobes the caramel center. Chocolate acts as a moisture barrier to keep the crisped rice crunchy and the caramel soft. Putting a chocolate or specialty fat layer between caramel and a cookie base will, likewise, help keep the two components with their original texture.
Great caramels require great effort. With these tips, you can ensure your caramels stay great and your efforts aren't wasted.
Crave more? If you like what you read here, look for the "Subscribe now" box on the right to enter your email address and start receiving weekly tips, like this, delivered straight to your email inbox. RCI's Tip of the Week blog is just one of the many resources we offer to help candy makers refine their craft and build upon their business and marketing practices.
Tags:
Caramel
Formulations
Grain
Hardening
Production
Shelf Life
Permalink
| Comments (0)
|
|