|
|
Posted By RCI,
Tuesday, October 6, 2020
Updated: Thursday, January 21, 2021
|
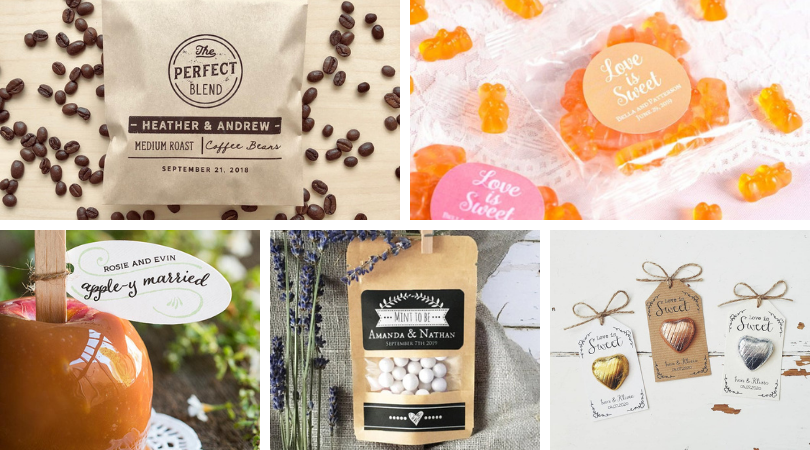
The wedding industry represents a sweet opportunity for confectioners. Offering ready-to-gift wedding favors will help eliminate one more item from the bride’s long list of to-do’s before she says “I do!” By focusing on personalization and packaging, your wedding favors are sure to stand out and WOW the wedding party and their guests.
Sources: The Perfect Blend Coffee Favors; The Paper Shoppe CA/Etsy; Champagne Gummy Bear Favors, Beau Coup; Caramel Apple Favors, Evermine; Mint To Be Favors, The Kraft Moon/Etsy; Sweet Chocolate Heart Favors, Little Indie Studio/Etsy
Personalized
Personalization can help achieve a greater impact without having to spend a fortune on materials. Print directly onto craft paper treats bags or purchase printable labels. Your local craft store will have a variety of paper punches in various shapes and sizes from a 2-inch circle punch to an ornate gift tag punch.
RCI member, Dietsch Brothers, uses a Cricut® cutting machine to create personalized tags to accompany their wedding favors.
Dietsch Brothers offers a simple order form for event tags. The order form includes options for tag shapes and six choices of messages. Clients can further customize their tags by adding their names and/or wedding date, in addition to
choosing between cream or white card stock, as well as the color of text to match their wedding colors.
If you’re not interested in purchasing equipment, Canva is a great alternative for creating professional-looking custom designs even if you have zero graphic design experience. This user-friendly platform offers thousands of custom templates and stock images, as well as easy-to-follow tutorials claiming to make you a “design pro in minutes.” Canva offers free and paid subscriptions.
Sources: Merci Beaucoup gift box, Mon Joli Paquet/Etsy; Hot Chocolate Tube, Custom Favours/Etsy, Mini Popcorn Boxes, Erickson Design/Etsy; Macaron Boxes, Cookiebox Store/Etsy; Chocolate-Covered Coffee Beans Favor, Evermine
Packaging
Even if you offer individually wrapped confections, a winning wedding favor is all about the presentation. The right packaging can help create a memorable way to commemorate the newlyweds and thank their guests for partaking in their nuptial ceremony. From sleek and modern to playful and crafty, there is packaging to fit every couple and every budget.
Sleek folded boxes in matte white or clear acetate tied with a satin bow, offer a luxurious touch. For a more creative and playful approach, hot chocolate mix can be packaged in food-safe tubes. Adding personal touches to ordinary packaging (like the mini popcorn boxes and coffee cups with customized sleeves pictured above) makes it feel elevated and fun.
Together with personalization, classic or creative packaging could help soon-to-be-wed couples fall in love with your wedding favors. Share your creative wedding favor ideas in the comments below.
Crave more? If you like what you read here, look for the "Subscribe now" box on the right to enter your email address and start receiving weekly tips, like this, delivered straight to your email inbox. RCI's Tip of the Week blog is just one of the many resources we offer to help candy makers refine their craft and build upon their business and marketing practices.
Follow us on Facebook.
Tags:
Creative
Custom
Graphic Design
Member Ideas
Packaging
Party Favors
Wedding
Wedding Favors
Permalink
| Comments (0)
|
|
|
Posted By RCI,
Tuesday, June 23, 2020
Updated: Thursday, July 30, 2020
|
Whether you like it or not, tie-dye is one of the biggest fashion trends of 2020—no doubt thanks to quarantined DIYers looking to pass time and upcycle their wardrobes. Oftentimes popular fashion trends find their way into other industries. With all the fun, bright colors and happy vibes it creates, we think the tie-dye trend is a perfect fit for the candy industry. If you’re looking to jump on this psychedelic bandwagon, keep reading for five must-try tie-dye ideas. Tie-Dye S’mores Tie-dye + s’mores! Does it get any better than this? Whip up a batch of these colorful and gooey marshmallows and dare your customers NOT to plaster photos of them all over social media! They won’t be able to resist! Click here for a tutorial from Studio DIY. Tie-Dye Chocolate Bars Create yummy swirls of color on a chocolate bar, then take it a step further by embellishing it with a fun, little moulded chocolate piece—like this ice cream cone—and lots of sprinkles. Tie-Dye Moulded Chocolates You don’t even have to like tie-dye to love this colorful bunny! What other moulded chocolates would look great in tie dye? All of them! Tie-Dye Packaging What goes best with tie-dye? More tie-dye, of course! Complete your collection of tie-dye confections with equally psychedelic packaging. Contact MOD-PAC for more information about these tie-dye boxes. Tie-Dye Merchandise For the truest tie-dye enthusiasts, consider adding branded tie-die merch to your offerings, like these t-shirts from Asher's Chocolates. In the world of tie-dye, the possibilities are seemingly endless! These are just a few of our favorite ways for your business to ride the tie-dye trend. Similar techniques could also be applied to chocolate-covered sandwich cookies, pretzels, fudge and more. What confections would you transform with tie dye? Share in the comments below. Crave more? If you like what you read here, look for the "Subscribe now" box on the right to enter your email address and start receiving weekly tips, like this, delivered straight to your email inbox. RCI's Tip of the Week blog is just one of the many resources we offer to help candy makers refine their craft and build upon their business and marketing practices. Not a member? Click here to learn how RCI can help you build your sweet business.
Tags:
Colors
Creativity
Displays
Fudge
Ideas
Inspiration
Marketing
Marshmallow
Oreo
Oreos
Packaging
S'mores
Spring
Summer
Trends
Permalink
| Comments (0)
|
|
|
Posted By RCI,
Tuesday, March 31, 2020
Updated: Friday, April 17, 2020
|
If things have slowed down for your business, take advantage of any downtime by refining your craft of candy making. If you don’t make your own marshmallow, this is a great product to work towards perfecting.
There’s nothing quite like homemade marshmallow. If you don’t make your own marshmallow, now is the time to experiment with recipes and techniques. This week, we’re offering expert tips for cutting, dusting, enrobing and packaging marshmallows. Plus, a bonus marketing idea!
Boiling Corn Syrup
This tip will help prevent chocolate-covered marshmallows from cracking. Here’s why: most 42 DE (dextrose equivalent) corn syrup contains a small amount of yeast bacteria. This is a common problem with marshmallows, because the corn syrup is added to the sugar slurry (or bob) after it has been removed from heat, so it doesn’t get warm enough to eliminate any yeast found in the corn syrup.
The solution, bring corn syrup to a very low boil. Just as it begins to boil, remove it from heat. Do this step early in the day, allowing it to cool to room temperature before adding it to the cooked portion of the marshmallow. A fellow candy maker did this and never had a cracked Easter egg again.
Cutting
When cutting small batches of marshmallow, RCI members have recommended the following ways to be most efficient:
- A guitar cutter works, but it really depends on how soft your marshmallow recipe is. As an alternative, a sharp pizza cutter works well too. – J. Sofia, Cargill Cocoa & Chocolate
- We use a lightly buttered, sharp, thin-bladed knife. [We re-apply the butter] every 2 or 3 rows. It's a bit slow, but eliminates the need for corn starch, which I found made the marshmallows difficult to coat. –W. Spence, Spence Candies
Dusting
Dusting marshmallows is an important step to preserve that soft and pillowy texture that we desire. Traditionally candy makers use powdered sugar or corn starch to keep marshmallows from drying out and becoming hard. Aside from the cloud of dust they leave everywhere, a coating of powdered sugar can make your already sweet marshmallows too sweet and corn starch can make it difficult for chocolate to stick to the marshmallow.
As an alternative to the traditional corn starch and powdered sugar, try replacing them with dextrose or fondant sugar (such as Amerfond® Fondant Sugar). Both products will help you achieve the desired affect and with less the mess. For marshmallows bound for the enrober, adding a little dextrose to the top and bottom will also help the chocolate stick.
Enrobing
If air bubbles are a problem when enrobing square confections, like marshmallows, send them through your enrober corner first. Your products will receive better chocolate coverage from the fountains on the enrober and you will decrease the chance for bubbles to appear on the tops.
Packaging
Have you ever noticed condensation (or worse, mold) on the inside of your marshmallow packaging? If so, you may be cutting and packaging your marshmallows too soon. Of course, you want your marshmallows to be as fresh as possible, but marshmallow needs to breathe for a while or else the warmth may create moisture and you may experience mold on your product. A general rule of thumb is to let marshmallow sit overnight before cutting, dusting and storing it.
Marketing Your Mallows
While people are spending more time at home, share ideas for gourmet s’more recipes that your social followers can make at home with your products. Click here for 5 creative s’more ideas. Package your fresh, homemade marshmallows, along with your chocolates and graham crackers, and sell as a fun, family activity to make together at home.
If you’ve ever questioned whether making your own marshmallow is worth the hassle, these expert tips will not only make your job easier, they will leave your customers wanting more of these fluffy confectionery wonders!
Crave more? If you like what you read here, look for the "Subscribe now" box on the right to enter your email address and start receiving weekly tips, like this, delivered straight to your email inbox. RCI's Tip of the Week blog is just one of the many resources we offer to help candy makers refine their craft and build upon their business and marketing practices.
Tags:
Cracks
Enrobing
Marketing
Marshmallow
Packaging
Production
Permalink
| Comments (0)
|
|
|
Posted By RCI,
Tuesday, March 3, 2020
Updated: Monday, April 27, 2020
|
Are you using the correct size of gel pack?
What are you doing to prevent condensation from turning your shipping box into a soggy mess?
Shipping chocolate in the summer is tricky, but not impossible with the right supplies. With summer around the corner, we're sharing a list of must-have supplies and important considerations to ensure your precious cargo is properly packaged--thanks to the shipping experts at InsulTote by Innovative Energy, Inc.
SUMMER SHIPPING TOOLBOX
When shipping temperature-sensitive products, like chocolate, frozen gel packs are a given. Maximize the life of your gel packs by equipping yourself with the following summer shipping tools.
- Insulated box liners
- Large frozen gel pack(s)
- Dry ice (for shipping frozen items)
- Shrink wrap
- Absorbent pads
- Packing tape
CHOOSING YOUR GEL PACK
When choosing gel packs, look for the largest size you can afford to ship. One large gel pack will provide better performance than several smaller ones. For example, if you place four ice cubes next to one big block of ice both at room temperature, the ice cubes will melt faster than the block of ice. The larger the mass, the longer it will take to thaw.
WITH AIR COMES HEAT
It is equally as important to fill your box as full as possible, allowing the energy from the gel pack to focus on keeping the enclosed products cold and not the surrounding air. If using an insulated box liner, press down on it to release air before sealing. For added protection, taping the outside of the box at every seam will also slow down the infiltration of air.
LINER STORAGE
Extend the life of your gel packs by storing insulated liners, in a cool place prior to use. Starting with cool air inside each bubble means the gel pack doesn't have to work overtime to cool down the air inside the liners.
SHIPPING WITH DRY ICE
To save on shipping cost, you may want to use dry ice for frozen items that will be in transit for more than 24 hours. A combination of dry ice and gel packs is the best insurance. Dry ice will keep the gel pack frozen the first day and after the dry ice evaporates, the frozen gel pack will keep the contents of the package cool for the second day. The amount of dry ice depends on the size of package, freight carrier requirements and transit times. If using dry ice, do not tape the outside seams of your boxes to allow the carbon dioxide gas to escape as it evaporates.
Using dry ice is not always recommended for foods that are not frozen, as it may give off an odor that could be absorbed by foods, such as chocolate. To keep dry ice from effecting the flavor of your product, carefully cover your product with shrink wrap and only use dry ice when necessary. To ensure product meets your quality standards, taste test it after it's been packaged with dry ice for 48 hours.
CONTROLLING CONDENSATION
The space between the inside of a corrugated box and the outside of an insulated liner may condensate in warmer weather. Occasionally this may be enough to dampen a corrugated box and cause it to become soft. To avoid this, place an absorbent pad in the bottom of the corrugated box under the insulated liner. Absorbent meat pads can be found online and are an inexpensive way to abate excess moisture.
Shipping in warm weather is definitely a challenge, but when successful, it can surprise and delight your customers and create new sales opportunities.
Crave more? If you like what you read here, look for the "Subscribe now" box on the right to enter your email address and start receiving weekly tips, like this, delivered straight to your email inbox. RCI's Tip of the Week blog is just one of the many resources we offer to help candy makers refine their craft and build upon their business and marketing practices.
Tags:
Chocolate
Packaging
Shipping
Summer
Permalink
| Comments (0)
|
|
|
Posted By RCI,
Tuesday, March 12, 2019
Updated: Monday, April 27, 2020
|
Are you using the right size gel pack?
What are you doing to prevent condensation from turning your shipping box into a soggy mess?
Shipping chocolate in the summer is tricky, but not impossible with the right supplies. Pulled from an article in RCI's Kettle Talk magazine, shipping experts from InsulTote by Innovative Energy, Inc. shared a list of must-have supplies and important considerations to ensure your precious cargo is properly packaged.
SUMMER SHIPPING TOOLBOX
When shipping temperature-sensitive products, like chocolate, frozen gel packs are a given. Maximize the life of your gel packs by equipping yourself with the following summer shipping tools.
- Insulated box liners
- Large frozen gel pack(s)
- Dry ice (for shipping frozen items)
- Shrink wrap
- Absorbent pads
- Packing tape
CHOOSING THE RIGHT GEL PACK
When choosing gel packs, look for the largest size you can afford to ship. One large gel pack will provide better performance than several smaller ones. For example, if you place four ice cubes next to one big block of ice both at room temperature, the ice cubes will melt faster than the block of ice. The larger the mass, the longer it will take to thaw.
WITH AIR COMES HEAT
It is equally as important to fill your box as full as possible, allowing the energy from the gel pack to focus on keeping the enclosed products cold and not the surrounding air. If using an insulated box liner, press down on it to release air before sealing. For added protection, taping the outside of the box at every seam will also slow down the infiltration of air.
LINER STORAGE
Extend the life of your gel packs by storing insulated liners, in a cool place prior to use. Starting with cool air inside each bubble means the gel pack doesn't have to work overtime to cool down the air inside the liners.
SHIPPING WITH DRY ICE
To save on shipping cost, you may want to use dry ice for frozen items that will be in transit for more than 24 hours. A combination of dry ice and gel packs is the best insurance. Dry ice will keep the gel pack frozen the first day and after the dry ice evaporates, the frozen gel pack will keep the contents of the package cool for the second day. The amount of dry ice depends on the size of package, freight carrier requirements and transit times. If using dry ice, do not tape the outside seams of your boxes to allow the carbon dioxide gas to escape as it evaporates.
Using dry ice is not always recommended for foods that are not frozen, as it may give off an odor that could be absorbed by foods, such as chocolate. To keep dry ice from effecting the flavor of your product, carefully cover your product with shrink wrap and only use dry ice when necessary. To ensure product meets your quality standards, taste test it after it's been packaged with dry ice for 48 hours.
CONTROLLING CONDENSATION
The space between the inside of a corrugated box and the outside of an insulated liner may condensate in warmer weather. Occasionally this may be enough to dampen a corrugated box and cause it to become soft. To avoid this, place an absorbent pad in the bottom of the corrugated box under the insulated liner. Absorbent meat pads can be found online and are an inexpensive way to abate excess moisture.
Shipping in warm weather is definitely a challenge, but when successful, it can surprise and delight your customers and create new sales opportunities.
Crave more? If you like what you read here, look for the "Subscribe now" box on the right to enter your email address and start receiving weekly tips, like this, delivered straight to your email inbox. Plus, review past blog posts for quick and actionable tips to apply to your business. RCI's Tip of the Week blog is just one of the many resources we offer to help candy makers refine their craft and build upon their business and marketing practices.
Tags:
Chocolate
Packaging
Shipping
Permalink
| Comments (0)
|
|
|
Posted By RCI,
Friday, January 6, 2017
Updated: Wednesday, April 29, 2020
|
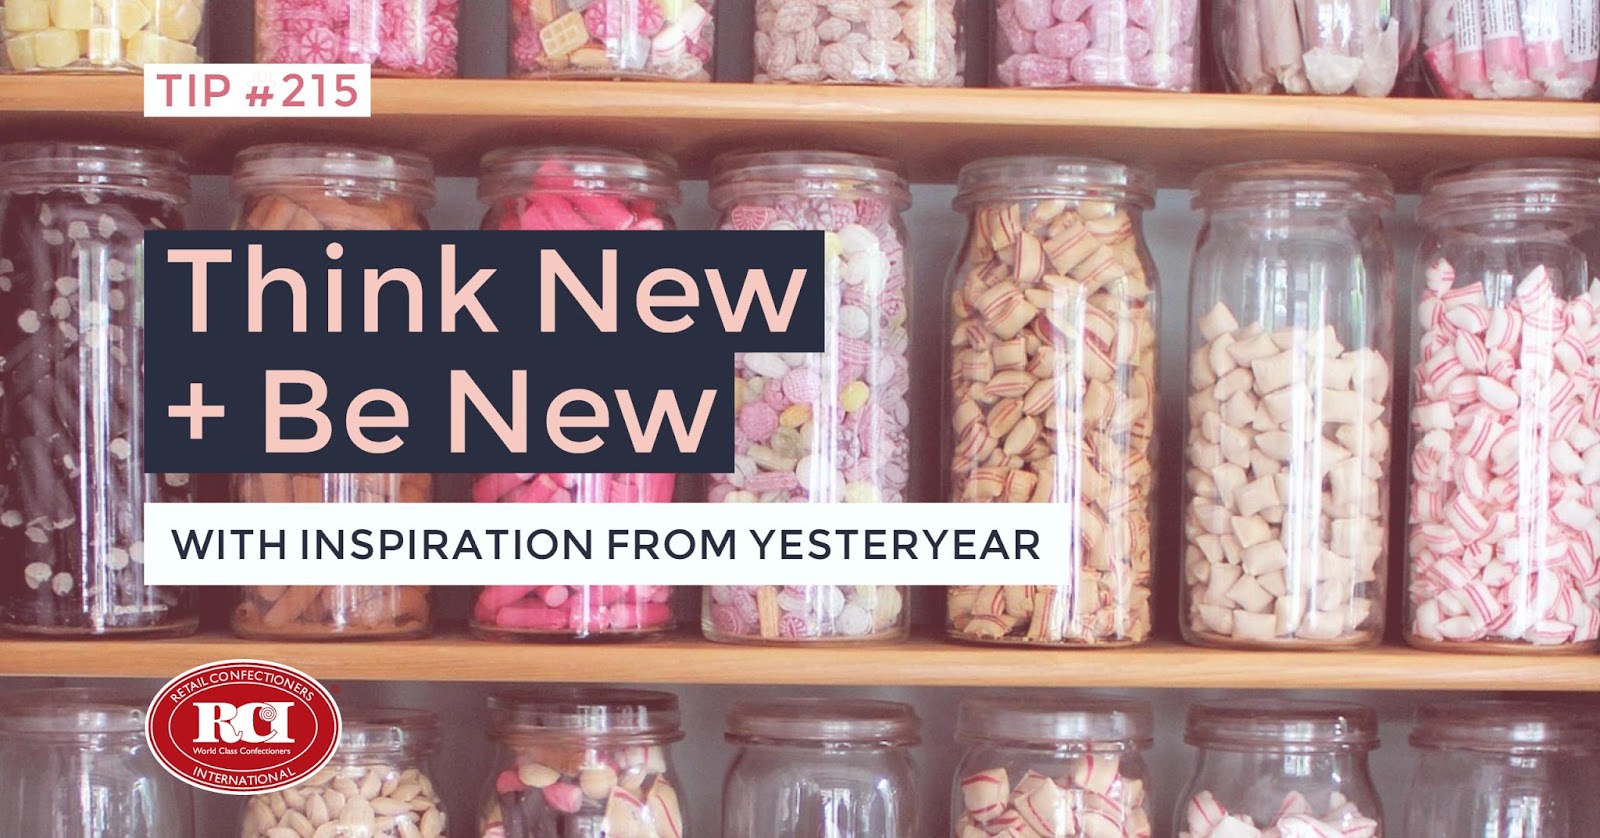
As we welcome the New Year at RCI, we welcome the opportunity to celebrate RCI’s 100th anniversary. During our year-long celebration of this association’s rich history, we aim to reflect on the past, while looking to the future of this sweet industry.
In thumbing through historical RCI documents, we discovered an article from one of RCI’s monthly newsletters that is surprisingly fitting for kicking off 2017!
In this excerpt from event speaker and vice president of ad agency Batten, Barton, Durstine and Osborn, Inc. (BBDO), Whit Hobbs reflects on the 1950s and helps his audience of candy makers look to the “sizzling sixties” to inspire fresh, new ideas.
Notice the date: it’s Thursday, June 11, 1959, which means that you are standing on the threshold of a new decade and a new world, the Sizzling Sixties. Behind you lie nearly all of the fabulous rapidly fading fifties.
The decade of the superhighway and the super market. The family room and the TV dinner. The Sputnik and the Beatnik. The greatest decade of CHANGE that there has ever been in the history of the world. Every day during this decade, this whirling-dervish world of ours has made another complete revolution around the sun. Day after day, revolution after revolution. Revolutions in the way people live. In the way they shop. In what they buy. And what they eat. And what they drink. And what they think.
Look around you. Notice how completely the world has changed. Markets have changed. Diets have changed. Habits have changed. And money is in new pockets.
Most of all people have changed. Notice that people are taller than they used to be. And healthier. And smarter. And savvier. And more sophisticated. With more varied appetites. And more cultivated tastes. People are growing up faster. And staying young longer. They’re becoming harder to satisfy. Harder to fool. Easier to bore. Hungrier for novelty and news. They’re constantly reaching for something better. Something fresh. Something new. And they’re constantly finding it.
My point is this: your customers have changed more than you and your products have changed. What an opportunity you have in the next few months and in the next few years to throw away the old rules and the old yardsticks…in favor of new appeals and new looks and new products and new ideas. WHAT AN OPPORTUNITY TO STOP PLAYING FOLLOW THE LEADER. To stop “doing it this way because this is the way we’ve always done it.” What an opportunity to reach for something better – something fresh and new – and find it.
You know what I’d do if I were you?
I’d make candy that you LOVE to make. And I’d sell it the same way. With pride. With conviction. With enthusiasm. And, most of all, with imagination. And with every piece of candy I sold, I would also sell the IDEA of eating candy. The REWARDS OF CANDY. The fun, the energy, the nutrition, the convenience.
If I were a candy manufacturer heading into the 1960s, I’d make my products timely and talked about and tantalizing. Candy is strictly for pleasure, and I’d have fun with my products and with my customers. I’d tie in with every fad and fancy I could find.
- Everybody is on a fortune cookie kick these days. I’d bring out Fortune Candies, with corny, crazy fortunes on them.
- I’d do what the cosmetic people are doing. They bring out shade promotions: Rue de la Pink and French Spice and Red Tape. I’d bring out taste promotions: exciting one-shots that are here today and eaten up tomorrow.
- I’d bring out special summer candy…to be chilled and served ice cold. Bought in the freezer department in a supermarket.
- Why isn’t candy on every restaurant menu as a dessert? Why isn’t it packed in TV dinners? Why isn’t there dry candy, like dry wine and dry beer?
- I’d find candy boxes that turn themselves into toys or lunch boxes or something. Inventive packaging has sold my wife one helluva lot of (ugh) cottage cheese. And she buys vitamins the same way: to end up with a handsome jar. She buys soap in plastic bags just to wind up with the bags. You’d like my wife.
- Give her Monday bars and Tuesday bars and Wednesday bars to put in lunch boxes and she’ll buy a whole mess of ‘em.
- Give her a box of candy for a long motor trip: each kid gets one of the small pieces every 50 miles, a larger piece for every 100 miles and a special red piece every time you cross a state line.
- Give her a big bag of un-birthday candy to serve tonight at an un-birthday party…just for the fun of it, because it isn’t someone’s birthday.
These are just some of the things I might possibly do, if I were you. Time to think big and be big. Time to think new and be new.
Tags:
Creativity
Ideas
Marketing
Merchandising
New Year's
Packaging
Permalink
| Comments (0)
|
|
|
Posted By RCI,
Tuesday, April 26, 2016
Updated: Wednesday, April 29, 2020
|
 |
Get answers to even the trickiest questions directly from
confectioneryprofessionals through RCI’sList Serve. |
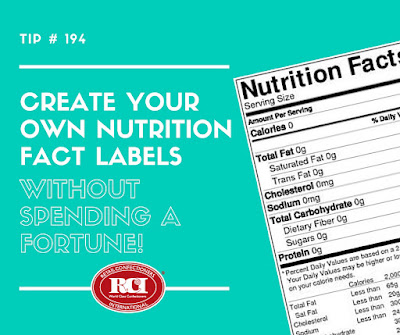
So, your business is required to provide nutrition fact labels for your products. Whether you’re looking for a solution or reconsidering your current solution, you can create your own FDA-approved nutrition fact labels without spending a fortune. Read the following recommendations from fellow candy makers through RCI’s forum, List Serve.
“My state health department offers a free service. I gave them my ingredients, package size and serving size and they built complete nutritional labels.” - W. Lewis, Chiammaya Custom Crafted Chocolates
“NutraCoster is a good program for creating nutritional and ingredient information panels. Another good one is Genesis R&D by ESHA Research. Both of these programs have generic ingredients to add, but you have the ability to use specific information on ingredients like chocolate.” – M. Koch, Morley Candy Makers/Sanders Candy “We use NutraCoster as well and like it okay, but I just learned about ReciPal, who will do individual recipes for $19. They also have monthly plans.” – B. Pelletier, Kakao Chocolate
Not sure if your business is required to provide nutritional information for your products? Click here to learn about the FDA’s requirements for nutrition labeling.
Tags:
FDA
Idea Sharing
List Serve
Member Recommendations
Nutrition Labels
Owning a Business
Packaging
Permalink
| Comments (0)
|
|
|
Posted By RCI,
Tuesday, August 5, 2014
Updated: Thursday, April 30, 2020
|
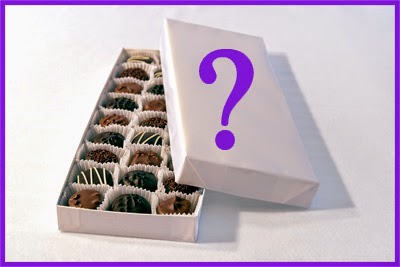
Many candy makers do not print a key or legend describing the specific pieces inside their boxes of chocolates because they want the flexibility to be able to change or update what goes inside the box as demand and supply for products change. However, that leaves your customers doing a guessing game of what they’re about to bite into. That’s why this week’s tip is to post a candy key (menu, legend, etc.) on your website.
Each of your chocolates likely has a specific marking or shape which allows you and your staff to know what’s inside. But how are your customers supposed to know? Of course, your loyal customers will know which their favorites are but new customers may need a little help. Take a moment to get quality photos of each of your chocolates and then create a quick key describing the centers of each piece.
Posting it on your website allows you to update the file as needed plus you will not have any printing costs. Additionally, if you reference it on packaging, inside packaging (i.e. small paper insert inside boxes of candy) or in the store, you’ll be driving traffic to your website. It’s a win-win situation for both you and your customers!
P.S. This week RCI is hosting our Creams, Fondants & Fudges course in Dayton, Ohio. Check out photos from the course throughout the week on the RCI Facebook page!
Tags:
Merchandising
Packaging
Permalink
| Comments (0)
|
|
|
Posted By RCI,
Tuesday, July 1, 2014
Updated: Thursday, April 30, 2020
|
Did you know we are in the middle of the 2014 World Cup? In celebration of the World Cup being hosted in Brazil this year, this week’s blog tip is to add some Brazilian flair to your products or store. While the World Cup is not quite as big in the U.S. as it is in other parts of the world, customers all over will appreciate the opportunity to join in the fun and festivities.
- Colored Ribbon – A cost effective way to add flair is through wrapping products with yellow and green colored ribbons.
- Sprinkles or Nonpareils – Many candy makers make chocolate covered Oreos® with embellishments or sprinkles. Use yellow and green sprinkles on your chocolate covered items and you have instant Brazilian-themed products.
- Flavors – Fruits such as passionfruit and guava are popular in Brazil and can be fun flavors to incorporate with your chocolates and candies, too!
The tips here are specific to celebrating Brazil but if you are a die-hard fan of a specific soccer team, just adapt these tips to fit the colors and flavors of your favorite team.
Tags:
Marketing
Merchandising
Packaging
Seasonal
Permalink
| Comments (0)
|
|
|
Posted By RCI,
Tuesday, May 13, 2014
Updated: Thursday, April 30, 2020
|
You’ve made a delicious product covered in chocolate and now it is time to package it. Have you considered how the temperature of the packaging room or area will affect your product?
This week’s tip is to control the temperature of your packaging room or area in order to protect the integrity of your products. Oftentimes the focus of room temperature is on the cooking or kitchen area but the temperature and relative humidity of the packaging area is important as well. For example, conditions with high humidity will lead to moisture condensation which will eventually result in sugar bloom on the product’s surface. Additionally, conditions that are too warm could melt your products.
Confectionery experts recommend that the packaging area be maintained at 65° to 70°F with a relative humidity of maximum 65 percent. To help with control, install a thermometer that measures both temperature and relative humidity and assign an employee to check the measurements on a regular schedule.
Temperature control is one of many factors and variables that should be considered as you prepare product for customer distribution. The decisions you make about these items can help to prolong the beauty and shelf life of your confections.
Tags:
Candy Making
GMP's
Packaging
Quality Control
Permalink
| Comments (0)
|
|