|
|
Posted By RCI,
Tuesday, March 12, 2019
Updated: Monday, April 27, 2020
|
Are you using the right size gel pack?
What are you doing to prevent condensation from turning your shipping box into a soggy mess?
Shipping chocolate in the summer is tricky, but not impossible with the right supplies. Pulled from an article in RCI's Kettle Talk magazine, shipping experts from InsulTote by Innovative Energy, Inc. shared a list of must-have supplies and important considerations to ensure your precious cargo is properly packaged.
SUMMER SHIPPING TOOLBOX
When shipping temperature-sensitive products, like chocolate, frozen gel packs are a given. Maximize the life of your gel packs by equipping yourself with the following summer shipping tools.
- Insulated box liners
- Large frozen gel pack(s)
- Dry ice (for shipping frozen items)
- Shrink wrap
- Absorbent pads
- Packing tape
CHOOSING THE RIGHT GEL PACK
When choosing gel packs, look for the largest size you can afford to ship. One large gel pack will provide better performance than several smaller ones. For example, if you place four ice cubes next to one big block of ice both at room temperature, the ice cubes will melt faster than the block of ice. The larger the mass, the longer it will take to thaw.
WITH AIR COMES HEAT
It is equally as important to fill your box as full as possible, allowing the energy from the gel pack to focus on keeping the enclosed products cold and not the surrounding air. If using an insulated box liner, press down on it to release air before sealing. For added protection, taping the outside of the box at every seam will also slow down the infiltration of air.
LINER STORAGE
Extend the life of your gel packs by storing insulated liners, in a cool place prior to use. Starting with cool air inside each bubble means the gel pack doesn't have to work overtime to cool down the air inside the liners.
SHIPPING WITH DRY ICE
To save on shipping cost, you may want to use dry ice for frozen items that will be in transit for more than 24 hours. A combination of dry ice and gel packs is the best insurance. Dry ice will keep the gel pack frozen the first day and after the dry ice evaporates, the frozen gel pack will keep the contents of the package cool for the second day. The amount of dry ice depends on the size of package, freight carrier requirements and transit times. If using dry ice, do not tape the outside seams of your boxes to allow the carbon dioxide gas to escape as it evaporates.
Using dry ice is not always recommended for foods that are not frozen, as it may give off an odor that could be absorbed by foods, such as chocolate. To keep dry ice from effecting the flavor of your product, carefully cover your product with shrink wrap and only use dry ice when necessary. To ensure product meets your quality standards, taste test it after it's been packaged with dry ice for 48 hours.
CONTROLLING CONDENSATION
The space between the inside of a corrugated box and the outside of an insulated liner may condensate in warmer weather. Occasionally this may be enough to dampen a corrugated box and cause it to become soft. To avoid this, place an absorbent pad in the bottom of the corrugated box under the insulated liner. Absorbent meat pads can be found online and are an inexpensive way to abate excess moisture.
Shipping in warm weather is definitely a challenge, but when successful, it can surprise and delight your customers and create new sales opportunities.
Crave more? If you like what you read here, look for the "Subscribe now" box on the right to enter your email address and start receiving weekly tips, like this, delivered straight to your email inbox. Plus, review past blog posts for quick and actionable tips to apply to your business. RCI's Tip of the Week blog is just one of the many resources we offer to help candy makers refine their craft and build upon their business and marketing practices.
Tags:
Chocolate
Packaging
Shipping
Permalink
| Comments (0)
|
|
|
Posted By RCI,
Tuesday, March 5, 2019
Updated: Monday, April 27, 2020
|
Many confectioners create showpieces or “attention grabbers” for their retail storefronts. RCI member, Wilbur’s of Maine Chocolate Confections started making a three-foot tall rabbit, affectionately known as “BFB” (Big Friendly Bunny), about 20 years ago to grab everyone’s attention, and along the way we have learned a few tricks to making this work seamlessly.
THE WARM UP
Start with a warm mould, 85-90 degrees Fahrenheit, to allow for easier mould release. If your production area is cooler, warm the mould with a hair dryer for a moment before filling. This tip also seems to reduce the amount of cocoa butter left behind on the mould and yield a better shine, since fat migration doesn’t occur where the mould meets the chocolate.
FILLING THE MOULD
A book-mould with an open bottom is a popular choice for creating large moulded chocolates. At Wilbur’s, they bolt two sides together and start filling the mould from the tempering kettle, a little at a time. Utilizing skewers and a shaker table will help ensure all crevices are filled and air bubbles are release. Many larger operations have mould spinners that can make this step easier, but spinners require a closed mould.
COOLING TIME
To create a hollow moulded piece, turn it over on parchment paper to set. The chocolate that is still liquid will move to the bottom and create a base. Time in the cool closet needs to be watched carefully with a piece as large and as time consuming as this one. Regularly rotate the mould to evenly cool the chocolate and then start to loosen the wing nuts on the bolts as it nears release. Great caution is vital during this step since cracking means starting over. Wilbur’s clocks in about an hour of time to complete each large mould, but agree the time is worth it.
FINISHING TOUCHES
After release, it’s time to trim and brush off the trimmings before transporting the moulded chocolate piece to the retail shop. To protect your large and delicate the large and delicate chocolates from getting banged up, Wilbur’s recommends placing the chocolate back in the mould, loosely bolted together.
Even though it takes about an hour for Wilbur’s to create their three-foot tall rabbit, they agree the time is worth it. “We have sold a few of the BFBs over the years, but he serves primarily as a decoration, a conversation starter and a selfie opportunity,” said Andy Wilbur, owner of Wilbur’s of Maine Chocolate Confections. “Using him as a promotion or a raffle is a great bonus. We have found that even customers reluctant to sign up for email lists are eager to share if they have a chance at winning a large specialty item such as the BFB.”
Making an oversized moulded chocolate can be intimidating, but with practice these tips will help you create showstopping chocolate centerpieces for your retail displays. Hoppy moulding!
Crave more? If you like what you read here, look for the "Subscribe now" box on the right to enter your email address and start receiving weekly tips, like this, delivered straight to your email inbox. RCI's Tip of the Week blog is just one of the many resources we offer to help candy makers refine their craft and build upon their business and marketing practices.
Tags:
Chocolate
Holidays
Marketing
Moulds
Permalink
| Comments (0)
|
|
|
Posted By RCI,
Tuesday, February 19, 2019
Updated: Monday, April 27, 2020
|
So, it’s February! And how are those New Year’s resolutions coming along?
Whether you made a resolution to improve your business this year or not, now is a great time to evaluate the goals you do have and measure your progress since setting those goals. Experts agree measuring your progress on an ongoing basis is a vital part of successfully attaining goals.
If you aspire to learn more about chocolate and expand your candy making skills, we’ve pulled sample questions from RCI’s Chocolate Boot Camp® “School of Knowledge” quiz, as a way to help you take a pulse of your chocolate knowledge.
1. Which of the following steps of cocoa bean processing must take place within the growing country?
A. Conching
B. Winnowing (shell removal)
C. Fermentation
D. All of the above
2. When tempering chocolate, what percentage of solid fat crystals is desired when process is complete?
A. 0.1 - 1.0%
B. 1.5 - 4.0%
C. 5.0 - 8.0%
3. Which of the following will contribute to bloomed bottoms?
A. Cold belt temperatures
B. Using chocolate in bottomer
C. High-viscosity chocolate
D. All of the above
4. When removing confections from freezer storage, typical temperature profile is:
A. 0°F - 30°F - 70°F
B. 0°F - 40°F - 70°F
C. 0°F - 50°F - 70°F
Now that you've completed the sample quiz, ask yourself, how confident do you feel in your answers? Would you qualify for master chocolatier status or could you use a refresher on the subject? See post #295 for the answers.
Warren Buffet once said, “The best investment you can make is an investment in yourself, the more you learn the more you’ll earn.” Whether you're a veteran chocolatier or a newcomer to the industry, if you aspire to learn more and expand your candy making skills, consider ways to invest in your education. Thankfully education is more accessible than ever before! Education is available in all different formats; print, webinars, podcasts, seminars and workshops, certifications and courses, even in-person meetings such as trade shows or local networking events. Experiment with different learning formats to find out what works best for you.
Want to learn more about RCI’s upcoming events and education? Click here to receive notifications about when registration opens for events and education courses, like RCI’s Chocolate Boot Camp and Annual Convention & Industry Expo.
Crave more? If you like what you read here, look for the "Subscribe now" box on the right to enter your email address and start receiving weekly tips, like this, delivered straight to your email inbox. RCI's Tip of the Week blog is just one of the many resources we offer to help candy makers refine their craft and build upon their business and marketing practices.
Tags:
Candy Making
Chocolate
Chocolate Boot Camp
Education
Enrobing
Shelf Life
Tempering
Permalink
| Comments (0)
|
|
|
Posted By RCI,
Tuesday, February 12, 2019
Updated: Monday, April 27, 2020
|
Checking your temper is an important step to ensure you aren’t surprised by unsightly bloom or dull or tacky chocolates.
Chocolates that have a dull appearance may be over tempered, while rapid bloom or a tacky, greasy surface are indicators that chocolate is under tempered. Quit guessing and rest assured your chocolate is always in good temper with these two methods for checking your temper.
The Blade Test: This method is quick, easy and budget friendly; however, the results could vary on the temperature of the room.
Simply dip a metal spatula or knife blade into the chocolate and leave a small film on the blade. At room temperature (65-68° F), well-tempered chocolate should be firm, not tacky, after just five minutes.
Tempermeter: Although more costly, this method will most accurately measure the degree of tempering, indicating the quality and quantity of stable crystals that have been formed.
Tempermeters produce a temperature-versus-time curve, resulting from uniform cooling of a chocolate sample over a specified period of time.
It may be easy to assume your chocolate is well tempered and ready to move into the assembly line, however, skipping this step could result in a costly mistake.
Choose a testing method that works best for you and put a plan in place to ensure your chocolate is being checked on a regular basis. Many of our candy maker members have a system in place to verify their chocolate’s temper every hour.
Next week: Check your chocolate knowledge and stay tuned for details on RCI’s 2019 Chocolate Boot Camp®!
Crave more? If you like what you read here, look for the "Subscribe now" box on the right to enter your email address and start receiving weekly tips, like this, delivered straight to your email inbox. Plus, review past blog posts for quick and actionable tips to apply to your business. RCI's Tip of the Week blog is just one of the many resources we offer to help candy makers refine their craft and build upon their business and marketing practices.
Tags:
Chocolate
Chocolate Boot Camp
Tempering
Permalink
| Comments (0)
|
|
|
Posted By RCI,
Tuesday, January 22, 2019
Updated: Monday, April 27, 2020
|
With a pinch of moisture and a dash of heat, you’ve got the recipe to ruin perfectly good chocolate. But we’re not looking to ruin chocolate here! It may not be easy, but as a chocolatier, you are expected to craft delicious chocolate with a glossy sheen and perfect snap every time, without fail. However, thanks to a myriad of factors that can negatively affect your chocolate at any given point, even the most skilled chocolatiers can have off days in the kitchen. To help, we’ve created this quick-reference guide to pinpoint common mishaps that can occur when working with chocolate so they can be easily corrected.
Chocolate is dry and powdery
When you rub chocolate and it feels dry and powdery, say “hello” to sugar bloom. Sugar bloom is caused by moisture. Dew forms on chocolate and gets absorbed by the sugar, leaving a dusty layer of crystals.
Causes:
- High humidity (50% humidity or less is best)
- Cooling temperature was too low (below 50° F)
- Chocolates with a moist center were stored in a high-temperature room.
Chocolate feels greasy
If your chocolate feels greasy, you've got fat bloom. Fat bloom is caused when cocoa butter separates and moves to the surface of chocolate.
Causes:
- Centers made with soft fats. Many nut centers can also cause fat bloom when in contact with incompatible fats.
- Proper storage temperature was not maintained.
Chocolate doesn't release properly from mould
Are your chocolate moulds putting up a good fight? Learn how to fight back with common causes for sticky moulds.
Causes:
- Mould was too cold or too warm, causing chocolate in contact with the mould to lose temper.
- Mould was not clean.
- Too much or too little seed when tempering.
- Sugar bloom (see above)
- Center was too cool. Center must be close to the temperature of the chocolate.
Cracks in finished product
Sure, that chocolate bunny with a crack down the middle can still taste good, but it doesn't exactly send the right message to customers. Learn what's causing the problem below, so you can avoid it in the future.
Causes:
- Cooling temperature was too low (below 50° F)
- Chocolate was in the cooler too long.
- Low viscosity of the chocolate
Other considerations
If you've covered all the bases above and are still unsure what's wreaking havoc in your candy kitchen, here's a few other common culprits you may have overlooked.
- Local climate conditions can greatly affect the environment of your candy kitchen and, in turn the results of your finished products. Take care to create an ideal environment for working with chocolate.
- Chocolate picks up and holds odor. Be careful when using products with a strong odor near chocolate, such as mint and even cleaning products.
- Be mindful of where air vents are blowing. Avoid air vents blowing directly on product.
- Keep moisture far from your chocolate making areas. A dishwasher giving off a bit of steam can have a negative effect on any product that is near it.
- Do not cook near chocolate. If you make caramel, for example, it should be made in a separate area.
Mistakes happen. Learn from your mistakes and the mistakes of others through education and talking with fellow candy makers. By understanding what could go wrong and how to avoid or correct mistakes, you can avoid a great deal of unnecessary costs and frustration.If you have questions that are not addressed in this post, RCI members can login to pose questions to fellow members on RCI’s online forum, List Serve.
RCI's Tip of the Week blog is just one of the many resources we offer to help candy makers refine their craft and build upon their business and marketing practices. Review past blog posts for quick and actionable tips to apply to your business. Look for the "Subscribe now" box on the right to enter your email address and start receiving weekly tips, like this, delivered straight to your email inbox.
Not a member? Click here to learn how RCI can help you build your sweet business.
Tags:
bloom
Chocolate
Cracks
List Serve
Moulds
Tempering
troubleshooting
Permalink
| Comments (0)
|
|
|
Posted By RCI,
Tuesday, November 27, 2018
Updated: Monday, April 27, 2020
|
If you temper chocolate in small-batch tempering machines, save yourself the headache this holiday season with this week’s quick and easy tip.
Are you using chocolate wafers as seed for your tempering unit? Before putting them in the feed of the tempering machine, quickly (don’t overheat!) use a heat gun on them to form one large clump or block of wafers. By doing this, you will help keep the wafers from sneaking through the blade and over-tempering your chocolate.
See? Quick and easy!
Want more game-changing tips like this?
Register now for RCI’s Truffles+More course February 20-22, 2019 in Elk Grove Village, Illinois (just outside Chicago). Visit retailconfectioners.org/events to stay up-to-date with all RCI’s educational offerings in the coming year.
RCI's Tip of the Week blog is just one of the many resources we offer to help candy makers refine their craft and build upon their business and marketing practices. Review past blog posts for quick and actionable tips to apply to your business. Look for the "Subscribe now" box on the right to enter your email address and start receiving weekly tips, like this, delivered straight to your email inbox.
Not a member? Click here to learn how RCI can help you build your sweet business.
Tags:
Chocolate
Chocolate Production
Education
Seeding
Tempering
Permalink
| Comments (0)
|
|
|
Posted By RCI,
Tuesday, September 25, 2018
Updated: Monday, April 27, 2020
|
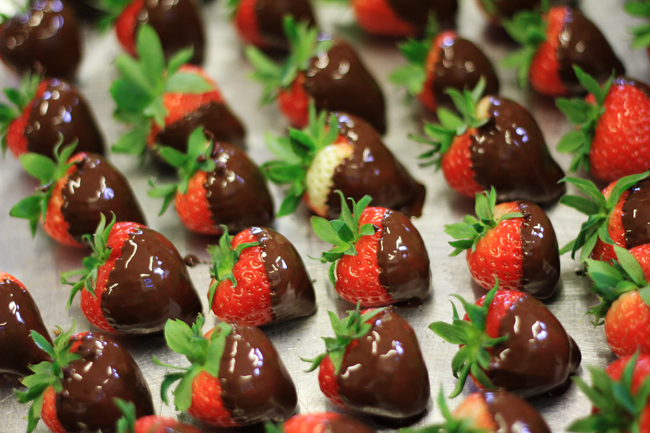
Since strawberries soak up water like a sponge, which can lead to moldy or mushy berries, it is important to be mindful of how you wash your strawberries before coating them in chocolate.
If you don’t plan on using your strawberries right away, experts agree it is best to store them in the refrigerator and wash them no more than a couple hours before using them. If you hull your strawberries before coating them, wait to do so until after they are washed. Cut strawberries will absorb even more water, making them more susceptible to mold, while also diluting their flavor. Below are two member-recommended methods for washing strawberries to make them last, we suggest experimenting to find which method works best for you.
Damp cloth method: Since strawberries are often prewashed, some experts suggest wiping strawberries with a damp cloth instead of submerging them in water to keep the moisture content low. Keep in mind as much as strawberries like to soak up water, they are equally adept at soaking up other things like pesticides. If you choose this method, consider sourcing strawberries from local farms that don’t use pesticides or are certified organic.
Vinegar solution method: If you prefer a more thorough cleaning, RCI member, Luisa Chocolatier, recommends washing strawberries in a solution of cold water and non-pasteurized apple cider vinegar (use approximately 3 tablespoons for every one gallon of water). After, first, wiping away any dirt with a clean towel and discarding unwanted mushy or moldy berries, gently submerge berries in the vinegar solution for five minutes. Next, place the strawberries in a colander to drain excess water before placing in a single layer on top of a dry towel to air dry. Once the strawberries are dry, they can be placed in their original containers, which have since been cleaned and dried as well, until they are ready to dip.
Since excess water will prevent chocolate from sticking to strawberries and also cause chocolate to have a dull appearance, both methods emphasize the importance of drying strawberries before dipping them into chocolate. Try one of these methods and let us know which works best for you!
RCI's Tip of the Week blog is just one of the many resources we offer to help candy makers refine their craft and build upon their business and marketing practices. Review past blog posts for quick and actionable tips to apply to your business. Look for the "Subscribe now" box on the right to enter your email address and start receiving weekly tips, like this, delivered straight to your email inbox.
Not a member? Click here to learn how RCI can help you build your sweet business.
Tags:
Candy Hacks
Chocolate
Chocolate Production
Shelf Life
Strawberries
Permalink
| Comments (0)
|
|
|
Posted By RCI,
Tuesday, September 4, 2018
Updated: Monday, April 27, 2020
|
We have a quick Good Manufacturing Practices tip for you this week. When you receive pallets of chocolate or the ten-pound bars of chocolate from your chocolate supplier, you need to break them into smaller pieces to melt down and create your confections. How do you go about doing that?
Many candy makers will break the chocolate into smaller pieces by smashing it with a hammer. However, if you are using a hammer with a wooden handle, you risk the wood chipping off in the process and small shreds of wood landing in your chocolate. Additionally, if you are using a hammer with a rubber handle, it likely has small crevices that can easily hold chocolate and create bacteria.
Lessen your risk with this week’s tip! Pitch the old hammer and replace it with a stainless steel or titanium crowbar to break your chocolate into pieces for melting. Of course, it is still a good idea to clean the crowbar on a regular basis. With no other elements such as wood and rubber on the bar, it is much easier to clean and sterilize so it is ready for safe use with food.
For $15 or less, you can create a more food safe candy kitchen. Now that’s cost effective! Do you have a quick and easy tip to improve food safety in your business? If so, please share in the comments below.
RCI's Tip of the Week blog is just one of the many resources we offer to help candy makers refine their craft and build upon their business and marketing practices. Review past blog posts for quick and actionable tips to apply to your business. Look for the "Subscribe now" box on the right to enter your email address and start receiving weekly tips, like this, delivered straight to your email inbox.
Not a member? Click here to learn how RCI can help you build your sweet business.
Tags:
Candy Hacks
Cheap Fix
Chocolate
GMP's
Tools
Permalink
| Comments (0)
|
|
|
Posted By RCI,
Tuesday, July 10, 2018
Updated: Monday, April 27, 2020
|
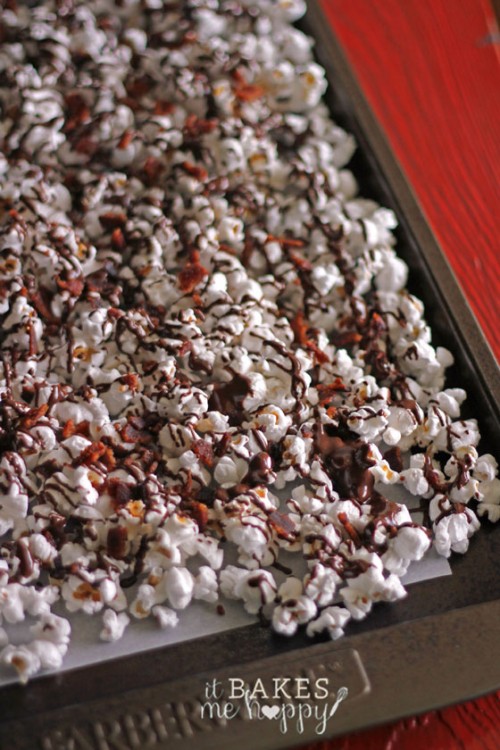
Now that fireworks from the 4th of July have fizzled, it’s time to look forward to the next major holiday! Many Americans have already started making arrangements for Labor Day on September 3, while our Canadian friends may be counting down until Civic Day on August 6, however, any bacon fan worth their salt is already salivating for International Bacon Day(otherwise known as “IBD” by bacon fanatics) on September 2.
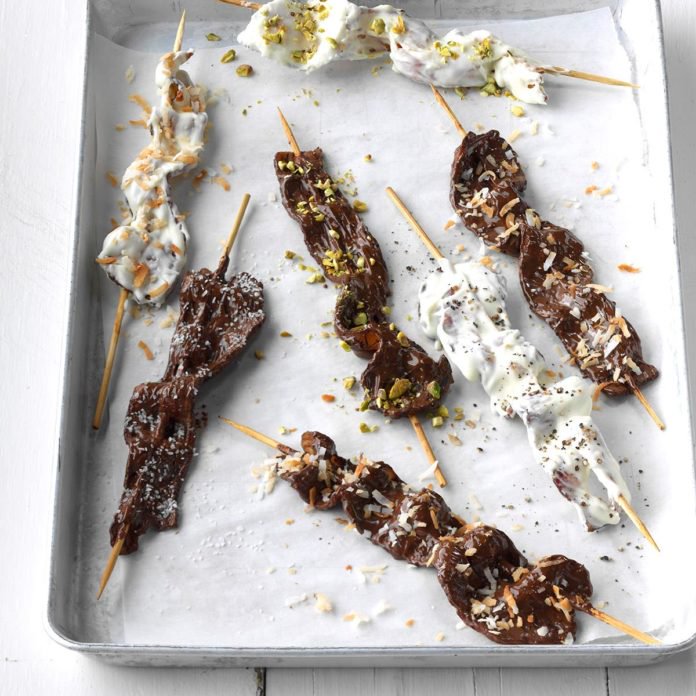
Even if you don’t regularly observe IBD, you can agree the salty flavor and crunchy texture of bacon, paired with sweet chocolate is a match made in hog heaven (okay, maybe just heaven). There’s a seemingly endless array of ways to pair bacon with chocolate. Whether you’re working with bits, chunks, strips or not-so-delicate bacon roses, this little piggy may bring with it different requirements from your local health department that you should be aware of before you grab that skillet.
Here’s some ideas, if you decide to go whole hog:
If you don’t want to take the risk of using real bacon in your recipes, consider using bacon flavoring or smoked bacon sea salt for a more subtle flavor. Make your bacon confections sizzle by sprinkling with Sizzling Bacon Candy. Check out this past post about how to preserve the pop when incorporate popping candy into a truffle center.
If you really want to make your local bacon fans squeal, ask your fans to share ideas for bacon-related confections they’d like to see at your shop or let them vote for their favorite once you’ve narrowed down some realistic options. Not only is this sure to create some excitement amongst your fans, it will help identify if you have enough of an audience to really bring home the bacon!
Tags:
Bacon
Candy Making
Chocolate
Creative Flavors
Marshmallow
Popcorn
Recipe
Social Media
Trends
Permalink
| Comments (0)
|
|
|
Posted By RCI,
Tuesday, May 22, 2018
Updated: Monday, April 27, 2020
|
Is shaking out excess chocolate from your moulds leaving your work place a mess? Sure, you have parchment paper to catch the chocolate as it falls, but it probably still lands in other undesired places. Dennis Witzel with Linnea's Candy Supplies says a small or medium plastic storage bin can take care of this problem for less than $10. Simply set the tub on your work table and set your mould upside down on edges of the tub, so gravity can drain the chocolate. Be sure the bin has a wide enough opening at the top allowing your mould to easily fit into it. When you are ready to shake the excess chocolate from your mould, place the mould into the tub so as you shake it, all of the chocolate that flies out will land in the tub—not on you, the floor or the table.
Tags:
Chocolate
Chocolate Production
Cleaning
Moulds
Permalink
| Comments (0)
|
|