|
|
Posted By RCI,
Tuesday, December 15, 2020
Updated: Thursday, January 21, 2021
|
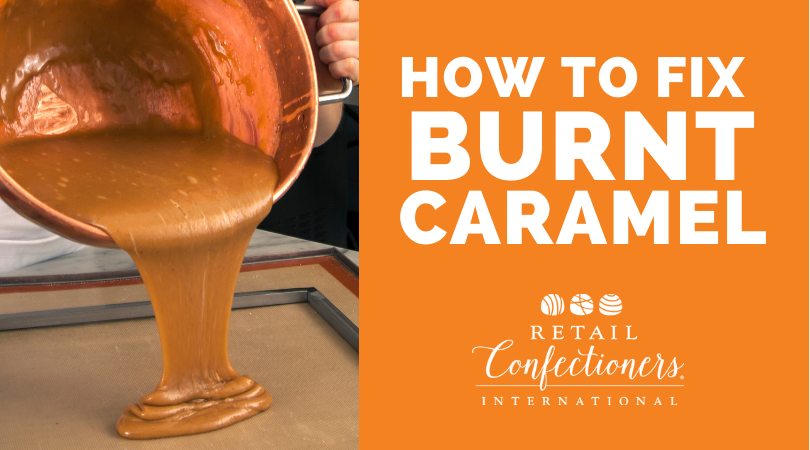
We’ve all heard the saying “don’t cry over spilled milk,” the same could be said for burnt caramel. Mistakes in the kitchen happen and sometimes there’s nothing you can do but put the mistake behind you and move on. Before pitching a botched batch of caramel, here are a couple quick fixes. One option would be to try masking the bitterness of burnt caramel by incorporating instant coffee into the mix. There is something comforting about this flavor combination, plus with an extra jolt of caffeine, the only tears shed over this concoction will be tears of joy. Try this recipe for cozy coffee caramels from TheSpruce.com. If you're feeling adventurous, embrace the burnt flavor and use it as an opportunity to get creative. According toFoodIngredientsFirst.com, “burnt caramel flavor pairs the sweet, milky notes of the caramel with the deep and slightly smoky characteristics of burning the caramel.” When life gives you burnt caramel, take the opportunity to transform it into something uniquely delicious. Share in the comments below if you have other solutions for fixing burnt caramel. Crave more? If you like what you read here, look for the "Subscribe now" box on the right to enter your email address and start receiving weekly tips, like this, delivered straight to your email inbox. RCI's Tip of the Week blog is just one of the many resources we offer to help candy makers refine their craft and build upon their business and marketing practices. Follow us on Facebook for even more sweet inspiration.
Tags:
Burnt Caramel
Caramel
troubleshooting
Permalink
| Comments (0)
|
|
|
Posted By RCI,
Tuesday, December 8, 2020
Updated: Thursday, January 21, 2021
|
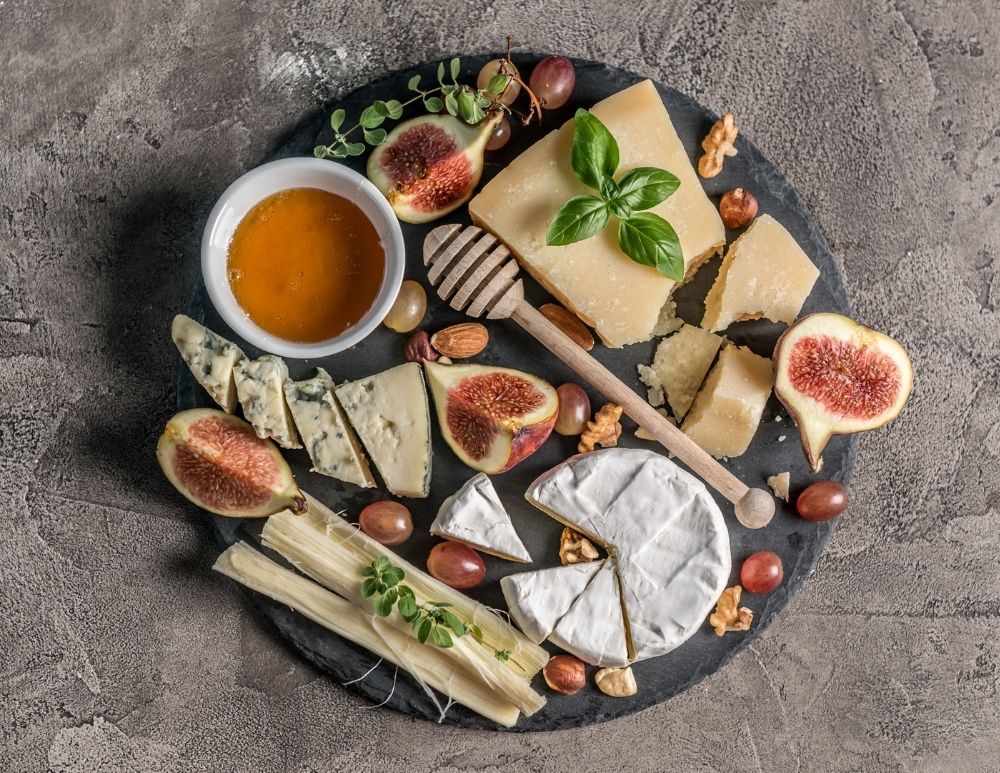
Options for good chocolate pairings are seemingly limitless, from the ever-popular wine and beer pairings to bourbon, cider, tequila and even cheese. If you are considering hosting an in-person or virtual chocolate tasting and pairing event or even just looking for fun ways to spice up your holiday offerings, RCI member Carmen Romeo of Fascia’s Chocolates shares guidelines for easy, worry-free pairings. Wine White and milk chocolate pairs best with sweet red or white varietals, while dark chocolate goes better with more complex red wines. Beer
Chocolate pairs well with many craft beers, however, when attempting to pair with India pale ale (IPA), chocolates with citrus flavors are best. Bourbon
It is recommended to match flavors when working with bourbon. Some of Fascia’s favorites include pairing a coffee bourbon with a mocha meltaway or a cinnamon bourbon with a cinnamon cream. Cheese
Cheese can be an unexpected, yet, surprisingly well-received addition to a wine and chocolate or beer and chocolate pairing. Try Carmen’s “no-fail” pairing by finding the best, sharpest Pecorino Romano cheese, pair it with a semi-sweet chocolate wafer or cup, topped with coarse-ground black pepper and a glass of Zinfandel wine—the spicier the better. Help shoppers get in the holiday spirit by hosting pairing events (in-person or virtual) or by simply recommending new, exciting ways to enjoy your chocolates. Cheers to a spirited holiday season! Crave more? If you like what you read here, look for the "Subscribe now" box on the right to enter your email address and start receiving weekly tips, like this, delivered straight to your email inbox. RCI's Tip of the Week blog is just one of the many resources we offer to help candy makers refine their craft and build upon their business and marketing practices. Follow us on Facebook for even more sweet inspiration.
Tags:
Beer
Bourbon
Cheese
Chocolate
Pairings
Tasting
Wine
Permalink
| Comments (0)
|
|
|
Posted By RCI,
Tuesday, December 1, 2020
Updated: Thursday, January 21, 2021
|
Known as a gift of courtship and love since the turn of the 20th century, this small, but mighty confection has become synonymous with the holidays. Regardless of one’s technique for making cordial cherries, a successful outcome requires a preserved cherry coated in warm fondant. After invertase is applied to the fondant coating, the cherry must be covered in chocolate immediately. Over time, the enzyme invertase causes the fondant to liquefy inside the solid chocolate shell. Keep reading as RCI member and board president, Barry Bomboy with Bomboy’s Home Made Candy shares two popular techniques for creating this seemingly mystical confection.  Photos of panned chocolate-covered cherries taken at Fascia's Chocolates Photos of panned chocolate-covered cherries taken at Fascia's Chocolates
during RCI's 2019 Annual Convention. Panning This method requires a panning machine. Start by putting fondant sugar in the bowl, begin the spinning process and add drained cherries. Combine 20 ounces of water, 30 milliliters of invertase and 20 milliliters of flavor in a spray bottle. Spray mixture onto the cherries as they spin. The sugar will adhere to the wet cherries, so continue to spin cherries until you achieve the desired coating thickness. Now cover the cherries in chocolate. Double bottoming or coating the cherries twice with chocolate will prevent leaks. Let cherries set for four to five days before selling. This will make a juicy, flavorful cordial cherry. Note: Refrigerate spray bottle with remaining invertase mixture when not using. Dipping Mix water and fondant sugar (16 ounces of water to eight pounds of fondant sugar). Heat four pounds of the mixture in a double boiler. Be careful not to heat over 140˚F/60˚C. When fluid, add one teaspoon of invertase and 1/2-3/4 teaspoon of flavoring. Dip cherries in fondant, they will set quickly. Finally, coat the cherries with chocolate. As with the previous method, allow cherries to set for four to five days. Looking to take your cordial cherries to the next level this holiday? Keep reading below for festive decoration ideas.
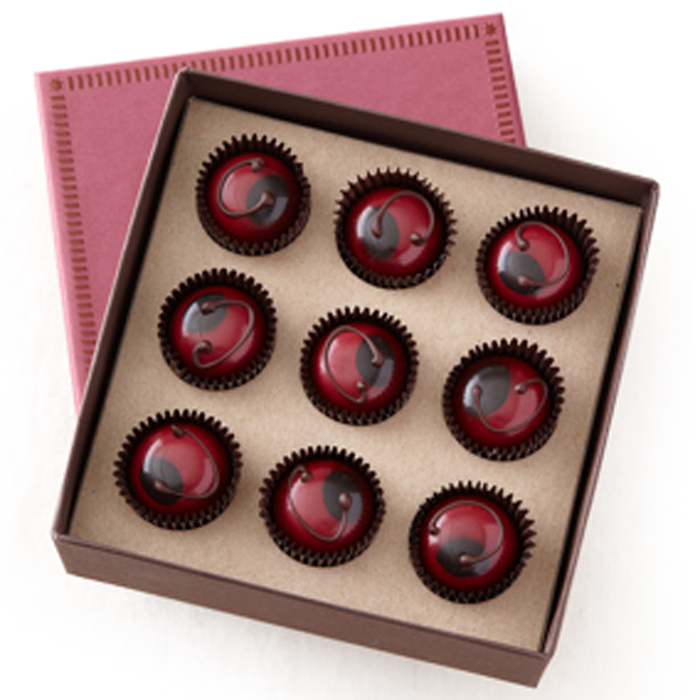
Add Color
We’re loving the sophisticated look of red and black colored cocoa butter used for John & Kira’s chocolate cherries.
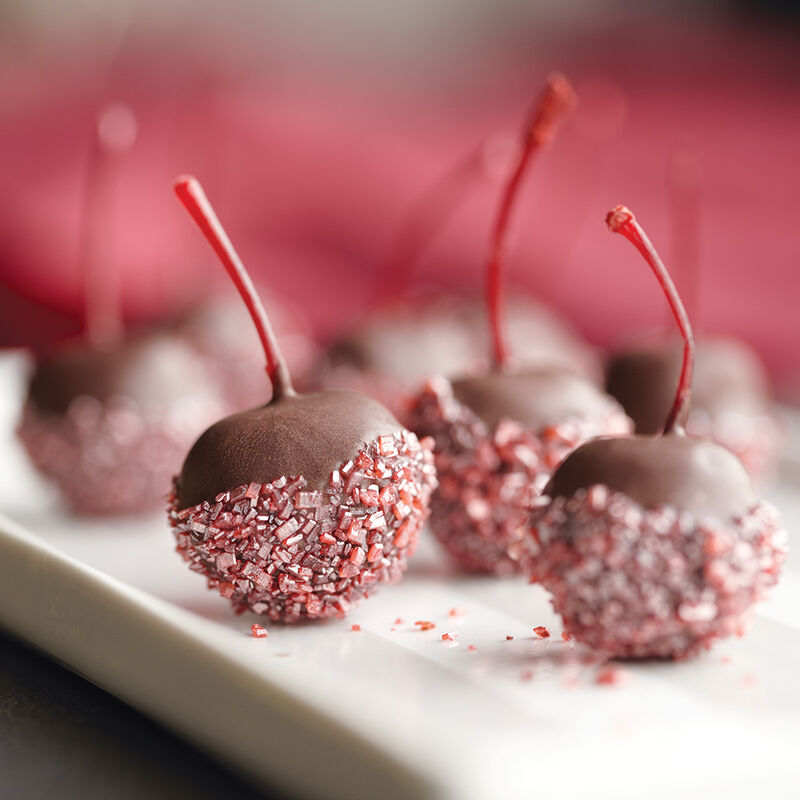
Add Sparkle
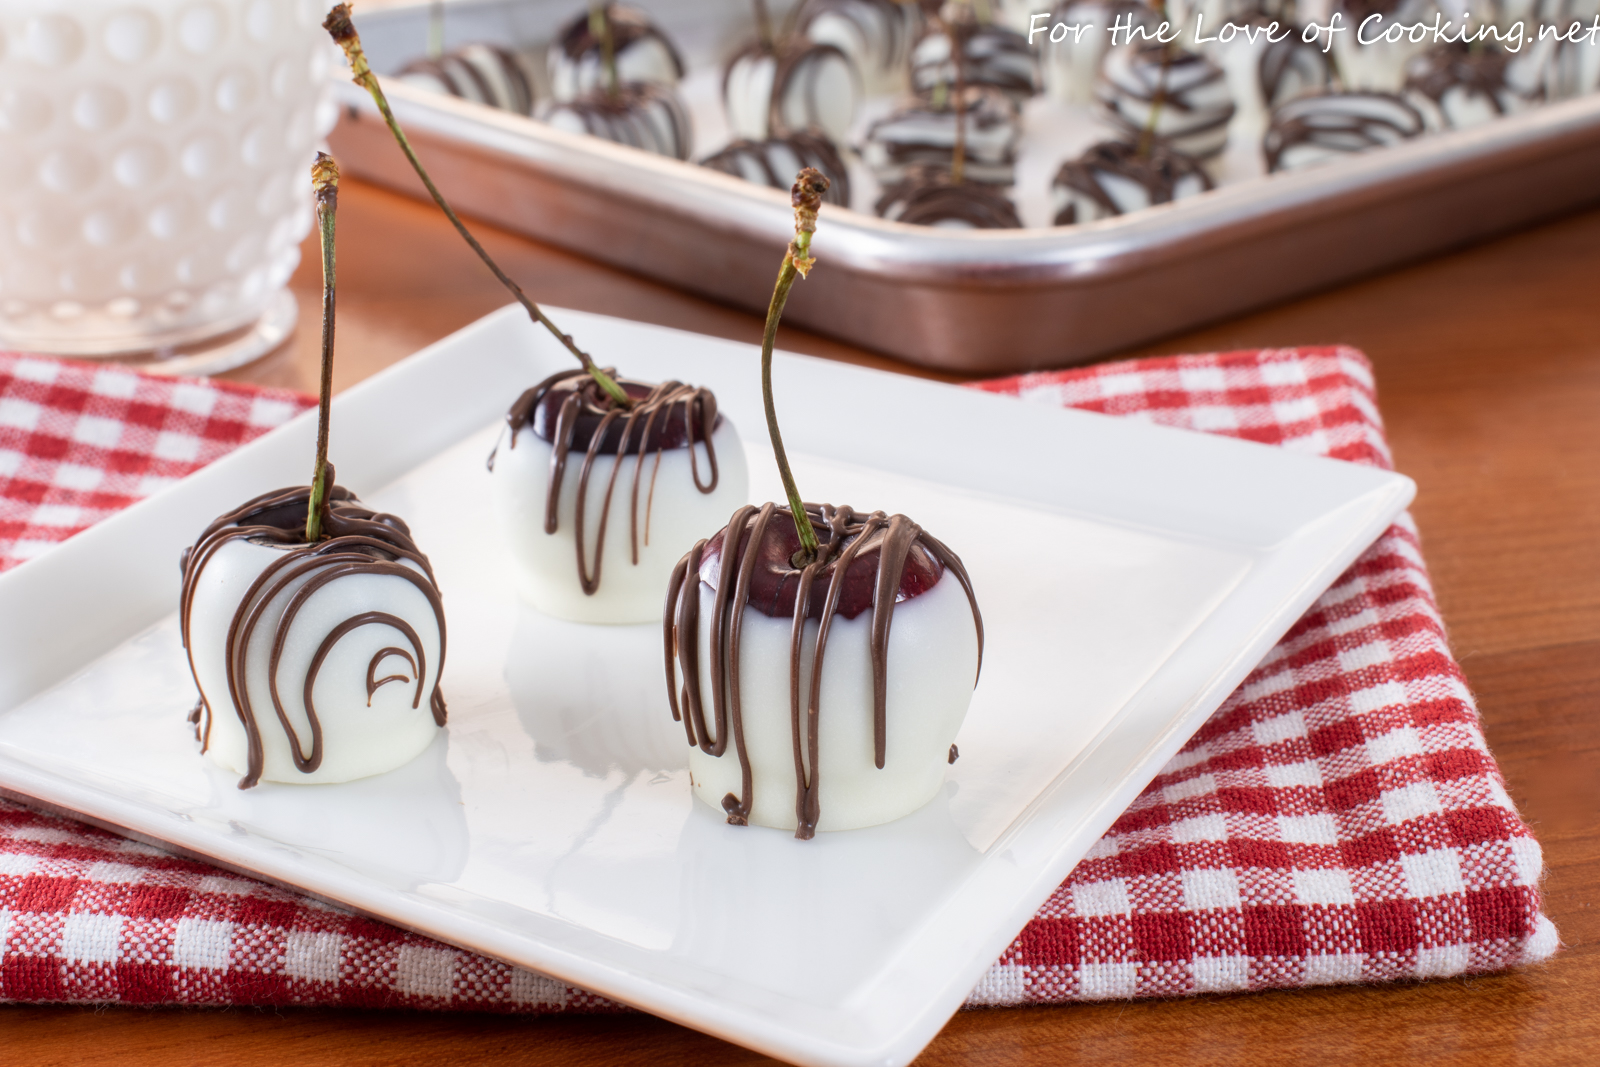
These long-stemmed cherries are dipped in colored sugar crystals for added sparkles, perfect for the holidays. Add White Chocolate
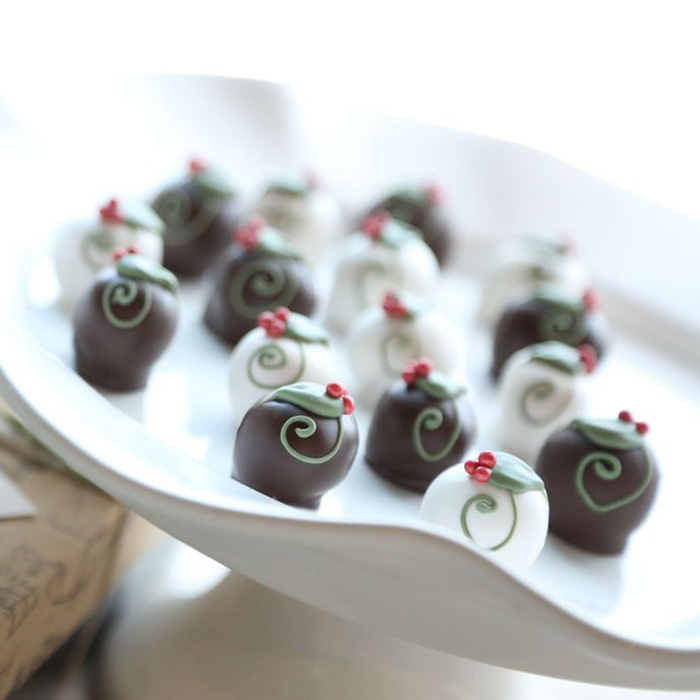
Consider dipping your cordial cherries in white chocolate for an unexpected look this holiday season. Photo credit: The Cordial Cherry Add Embellishment
This holly berry design sings holiday. Try the look for yourself with green-colored white chocolate leaves and red sugar pearls as the holly berries. Cordial cherries are a cherished holiday tradition for many families. We hope this member insight helps you create your best batches of cordial cherries this holiday season! Crave more? If you like what you read here, look for the "Subscribe now" box on the right to enter your email address and start receiving weekly tips, like this, delivered straight to your email inbox. RCI's Tip of the Week blog is just one of the many resources we offer to help candy makers refine their craft and build upon their business and marketing practices. Follow us on Facebook for even more sweet inspiration.
Tags:
Cherries
Chocolate
Chocolate-Covered Cherries
Christmas
Cordial Cherries
Holidays
Permalink
| Comments (0)
|
|
|
Posted By RCI,
Tuesday, November 24, 2020
Updated: Thursday, January 21, 2021
|
 You do it every day. When you see your co-workers on Monday morning, at dinner on Friday night, even when you're trying to convince your kids that green beans are good for them. You tell stories to make your case and to make connections. That's what we do as human beings. In fact, we're hardwired for it. If storytelling comes naturally to us, then it seems natural that we would use this skill in business—to attract customers, persuade partners and rally employees. Here are a few key points to keep in mind as you build your storytelling skills from Jill Pollack of StoryStudio Chicago, keynote speaker at RCI’s Annual Convention & Industry Expo in Chicago. To be persuasive and productive, the stories we tell at work need to be built with attention paid to: emotion, craft and action. Emotion No one needs to tell you that most of our decisions—whether in business or in life—are pushed along by our emotions. They also help us feel engaged in a story or a transaction. But how do you find and engage the right emotions? Entrepreneurs can learn from fiction writers who have long known that the success of a story rests in finding "the significant details,” as Eudora Welty once wrote. In good stories, it's the details that captivate us, that allow us to "see" the story, and that invite the reader to get involved in the conversation. If you write about your first bicycle as yellow with training wheels, that's not much to go on. But if you explain that your first bike was built by the boy down the street who added training wheels and streamers, and then jogged down the sidewalk with you, holding the banana seat with one hand while you learned how to pedal...now the reader has enough details to "see" the image. The reader is involved in your story, probably even starting to think about when they learned to ride a bike. In business, the same is true. Just as you focus on the details of your ingredients and processes, attending to the details in your marketing—even if you're just greeting someone who has walked into your store—can mean the difference between a customer who feels unwanted and one who feels like they are now a participant in the “conversation.” Even if you're not in full story mode, using clear details in your conversations will guarantee you a better relationship. Craft Even though we are all able to toss out a great story in the middle of a cocktail party, the stories you use at work should be crafted. Just like a house is built with bricks or wooden beams, stories are built on details and images and rhythm and voice, and so much more. Key among these craft elements is the idea of tension and conflict. While most of us don't like conflict in our lives, we must have it in our stories. Think about it this way: in a story, tension and conflict can be either a threat or an opportunity. In business we usually refer to this as creating a sense of urgency. "If you pay now you can save ten percent." That's the opportunity. The threat: "If you don't pay now, you'll be charged an additional ten percent." In stories, this concept works in a slightly different way. We create tension by sharing obstacles that may have been in our path. For instance, your signature chocolate relies on cocoa nibs from Ghana. But your sources have dried up and now you have to find the right quality beans somewhere else. And, you had to beat your competitors to them. We like our stories to have heroes. Overcoming obstacles, big or small, makes you a hero. Action Every story is persuasive in some way. Opinion pieces in the newspaper try to convince you to see the news the way the writer does. Novels and movies persuade us that this fictional world is real. Advertisers know they are not selling soap; they are selling us the idea that if we use this soap, we will be beautiful. To be persuasive, stories need to have a solid structure and a clear call to action. We must want our audience to do something. Imagine this: you spend 15 minutes explaining the process of developing a new, unique flavor profile and tell the story of how you stumbled on to it after you thought you were creating something else. Then you say, "let me know if I can help you find something,” and you walk back behind the counter. Even if the consumer found the story intriguing and would like to taste this new flavor, if you don't ask them to try a sample or buy some for dessert this evening. They will likely reply, “that's interesting,” and move on. Now, imagine this: you stand in front of a consumer with two trays and ask them to choose which one they think is the enhanced flavor. Right away you have gotten the consumer involved in this story. After pointing to the tray in your left hand, you say, “Right! Take a taste and let me tell you how we stumbled upon this extraordinary new flavor. We were in the back room on a cold and snowy Saturday morning…” Now you have made them a part of your story and because you asked a question, they are immediately involved in the conversation. When they serve the candy at their next dinner party, they will tell their guests your story, and then these new people will become a part of that story. And on and on and on. You can see how powerful this can be. What stories should you tell? There's a good chance you are not at a loss for personal stories, but in business we want to make sure the stories we craft will support a sales or relationship building goal. Here are just a few ideas for where to find good stories: 1.Why you got started in this business. 2.Why you stay in this business. 3. How you source your ingredients and materials. 4.What makes you different. 5.What suppliers you work with and why. The next time you start telling a story, stop for a moment and realize you are building a chain of connections that have the potential to reach far and wide. Crave more? If you like what you read here, look for the "Subscribe now" box on the right to enter your email address and start receiving weekly tips, like this, delivered straight to your email inbox. RCI's Tip of the Week blog is just one of the many resources we offer to help candy makers refine their craft and build upon their business and marketing practices. Follow us on Facebook for even more sweet inspiration.
Tags:
Content
Marketing
Social Media
Writing
Permalink
| Comments (0)
|
|
|
Posted By RCI,
Tuesday, November 17, 2020
Updated: Thursday, January 21, 2021
|
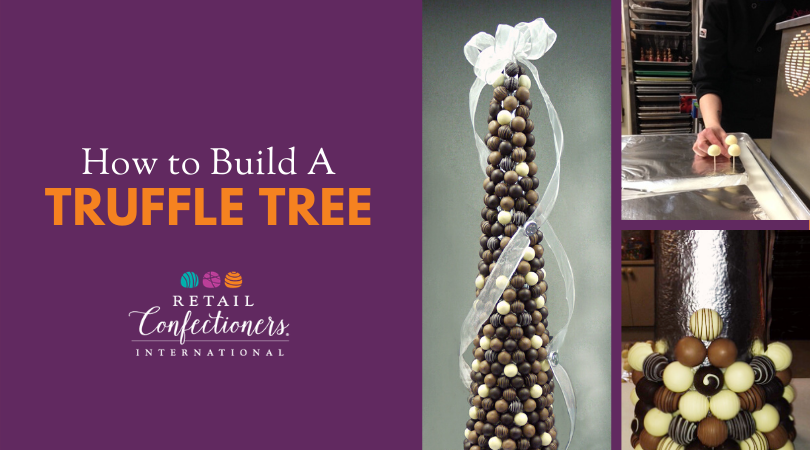
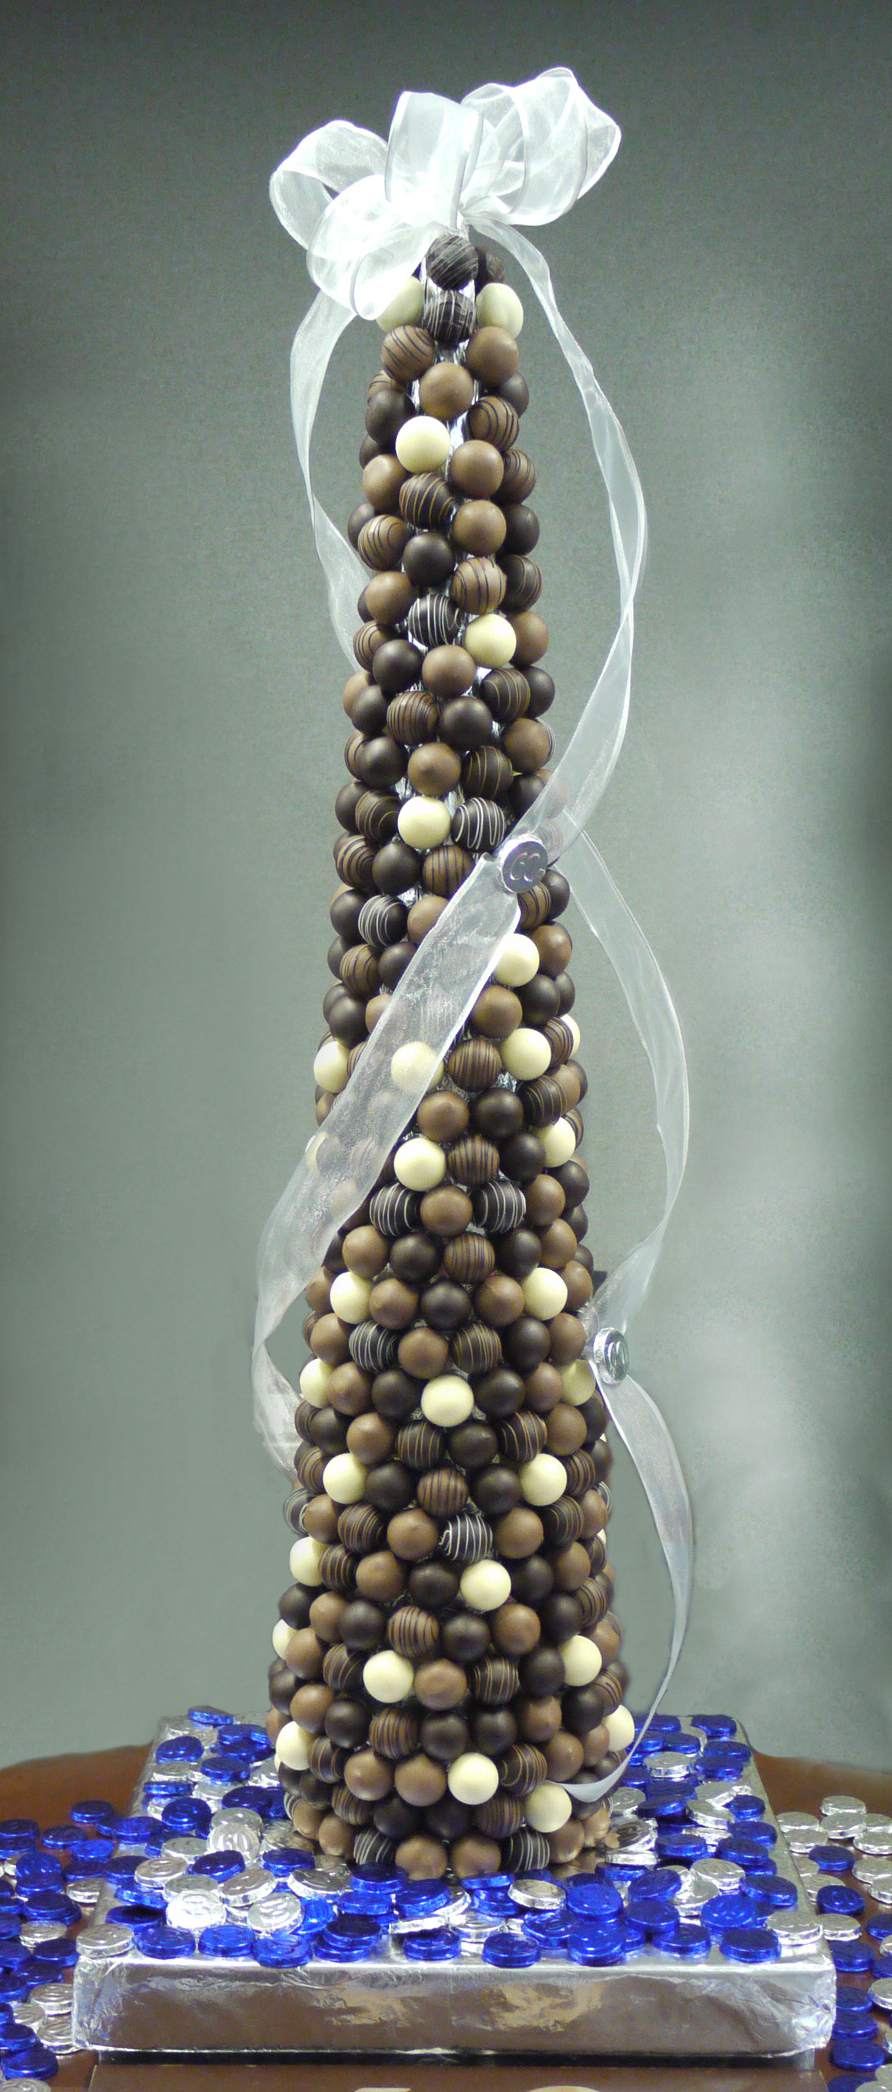
A truffle tree is an eye-catching way for your customers to serve truffles to a large group, in addition to an impressive merchandising display for your retail shop. It is a big-ticket item that can add nice revenue to your store’s sales. With a little advance planning, building the tree can be relatively easy to execute. Here you will find a list of materials needed and step-by-step instructions from RCI member, Annedore's Fine Chocolates, for creating this showpiece. For ease of construction, undipped ganache balls may be stored in the freezer. Simply follow the instructions below for thawing and dipping the ganache balls and you are ready to build a tree on demand. Materials Needed - Truffles (see recipes below)
- Silicone mats
- Plastic wrap
- Foam block
- Parchment paper or aluminum foil (optional)
- Round toothpicks
- Tempered chocolate
- Foam cone
- Wrapping paper or fabric (preferably coordinating with the color of your truffles)
- Flathead pins
- Scissors
- Ribbon or tree topper (optional)
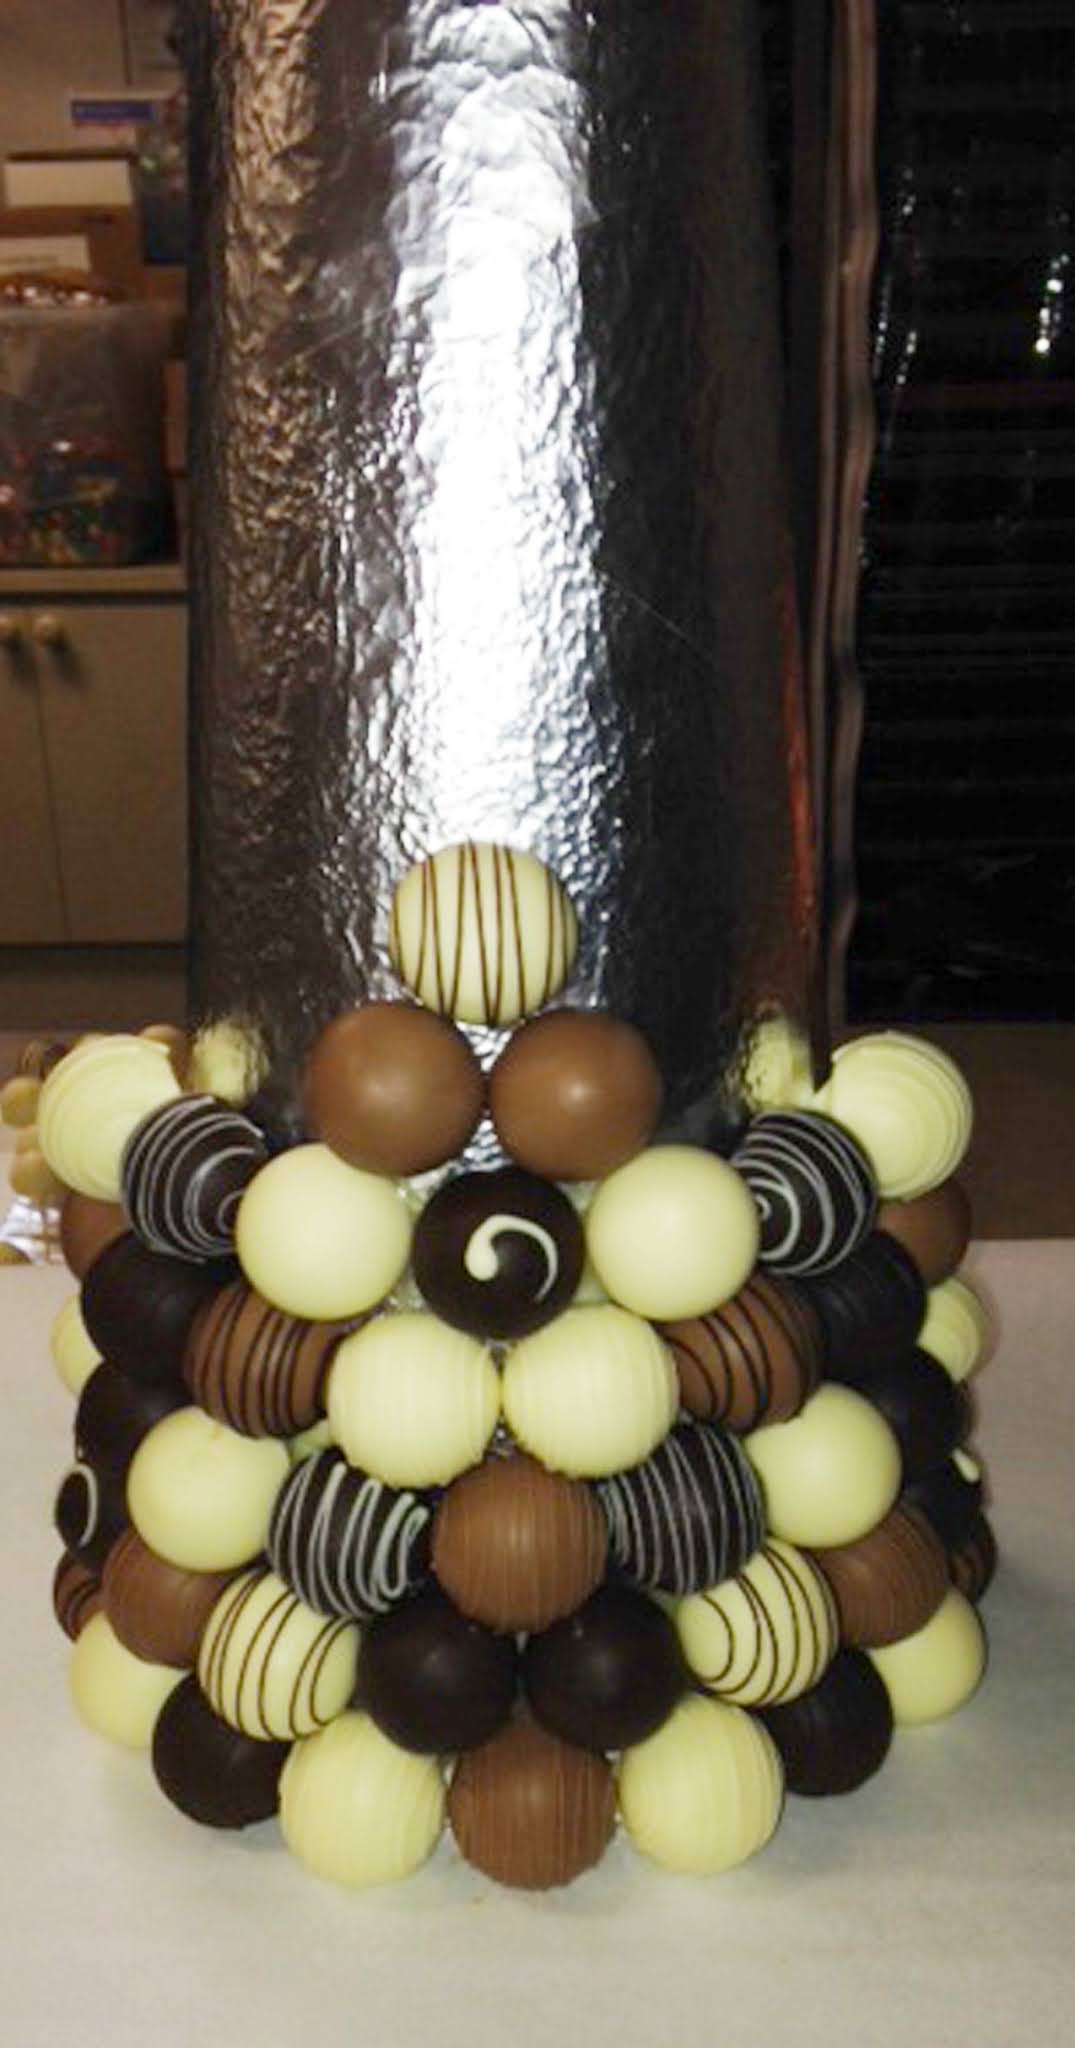
Step-By-Step Instructions Prepare truffle centers using your favorite ganache recipe. Pipe ganache onto silicone mats. Cover the mats with plastic wrap and refrigerate for 12 hours. Transfer mats to the freezer for 12 hours. Remove mats from the freezer and pop out ganache balls (Note: Ganache centers may be returned to the freezer for future use). Cover balls with plastic wrap and allow them to come to room temperature. Cover a foam block with parchment paper or aluminum foil, so it can be reused. Adhere a toothpick into each ganache ball by dipping one end of the toothpick into tempered chocolate and then inserting that end into the center of the flat side of the ganache ball. Allow toothpick to set up firmly in the ganache ball. Once the toothpick is firmly set in the ganache ball you are ready to dip each ganache ball in tempered chocolate. Dip each ball carefully and then insert tooth-picked end of the ball into the block of foam. This will allow for perfect-looking, uniform truffles to create your truffle tree. Allow chocolate to set up. Truffles may be decorated while standing in the block of foam. Before you begin to build your tree, first, wrap the foam cone completely with wrapping paper or fabric – secure with flathead pins, as needed. Beginning at the bottom of the cone, push the tooth-picked truffles into the cone working your way around the cone to create the first row. On the second row, stagger the truffles by placing them in the open spaces created by the first row. Carefully work your way up the cone row by row until the entire cone is covered in truffles. Toothpicks may need to be cut as you reach the top of the cone. Crown the top of your tree by inserting a tooth-picked truffle vertically on the top of the cone. Experiment with different tree toppers, such as a large bow or a chocolate initial or number (birthday idea). Use your imagination. Once complete, stop and admire your beautiful work…then, take a photo and post it on social media for a sneak peek of what you’ve been working on. Here’s wishing you a spectacular holiday season ahead! Crave more? If you like what you read here, look for the "Subscribe now" box on the right to enter your email address and start receiving weekly tips, like this, delivered straight to your email inbox. RCI's Tip of the Week blog is just one of the many resources we offer to help candy makers refine their craft and build upon their business and marketing practices. Follow us on Facebook for even more sweet inspiration.
Tags:
Displays
Holidays
Truffle Tree
Truffles
Permalink
| Comments (0)
|
|
|
Posted By RCI,
Tuesday, November 10, 2020
Updated: Thursday, January 21, 2021
|
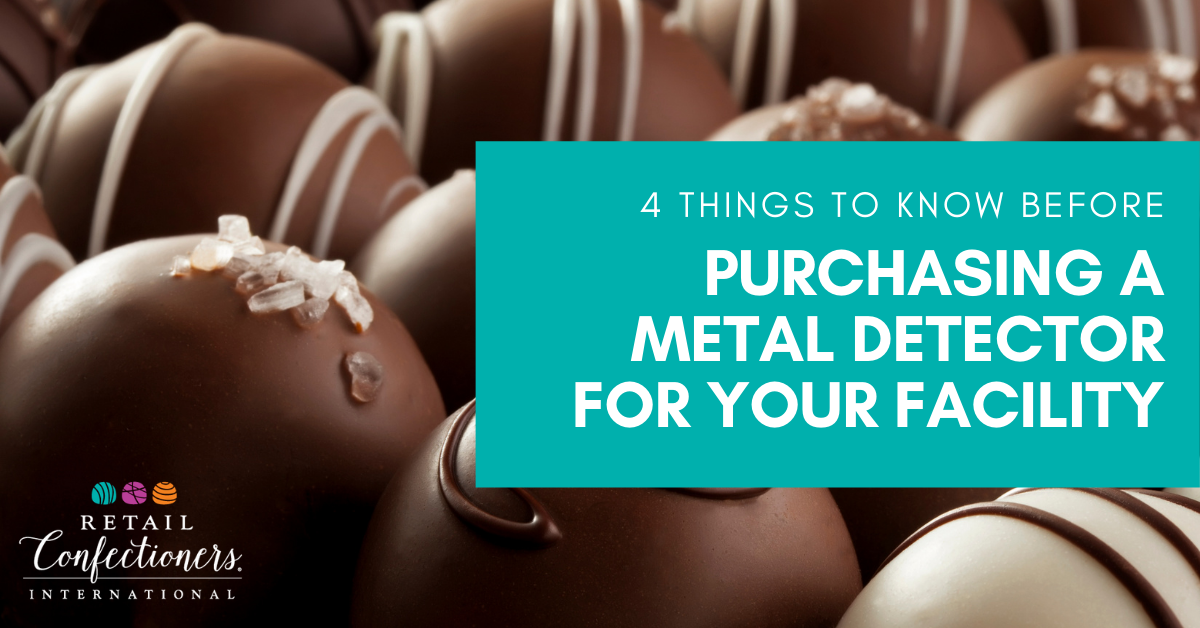
The call for safety is at an all-time high. Many things need to be taken into consideration when it comes to the safety of our products. One of the most dangerous, yet furthest in the back of people’s mind, is metal detection. We all work with surfaces of either stainless steel or copper. These surfaces have the ability to be chipped, scraped and gouged, producing minute particles of metal that can be dangerous to human consumption. In this excerpt from an article in RCI’s Kettle Talk magazine, Caleb Ramm with Candy House Gourmet identifies four considerations when adding a metal detector to your facility. Purchasing When purchasing a metal detector, make sure to buy from a company that supplies ample training and support to ensure you get the most out of your investment. For a metal detector to be truly effective, constant observation and calibration are key. Placement Another consideration when purchasing a metal detector for your facility, is to determine the best placement based on your needs. Companies that only enrobe candies or produce on a line may want to place a metal detector at the end of the line, so that the product will pass through before packaging. Others run their packaged products through the metal detector, which will detect metal that may be in or on the box itself. Placing the metal detector away from the enrober, in its own designated area may make it easier to access it at all times. Calibration When you set up a new product, you are given test cards that have ferrous, non-ferrous and stainless-steel samples to use to calibrate your machine. The smaller the particle you calibrate to, the smaller the particle the machine has the ability to detect. Elimination When a product is identified as contaminated, it is recommended to pull the entire batch and re-test it until all particle have been located and removed from the finished product. We all want the best for our customers, and look for any way to improve upon this. Safety in confectionery doesn’t just stop in production. Pass on the safety to your customers as well. Crave more? If you like what you read here, look for the "Subscribe now" box on the right to enter your email address and start receiving weekly tips, like this, delivered straight to your email inbox. RCI's Tip of the Week blog is just one of the many resources we offer to help candy makers refine their craft and build upon their business and marketing practices. Follow us on Facebook for even more sweet inspiration.
Tags:
Food Safety
Metal Detector
Owning a Business
Production
Permalink
| Comments (0)
|
|
|
Posted By RCI,
Tuesday, November 3, 2020
Updated: Thursday, January 21, 2021
|
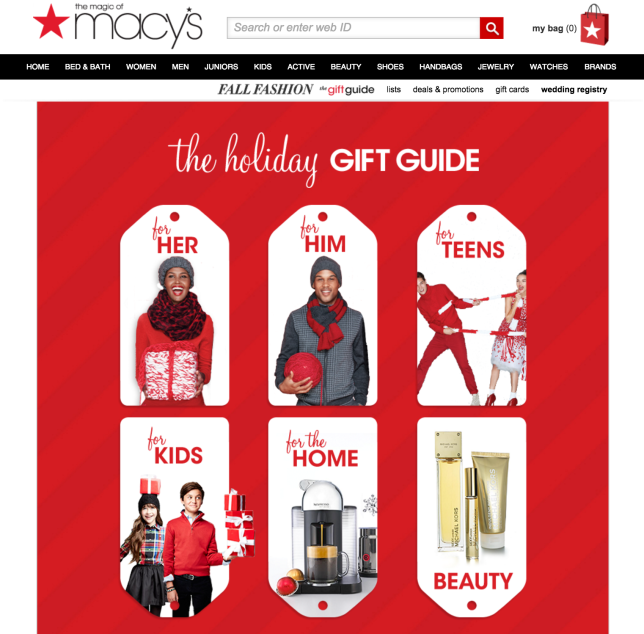
Holiday gift guides are a visual and trendy way to promote your popular holiday items both online and in your retail store. According to a recent survey by Dynata for Redpoint Global, “nearly two-thirds of the 1,000 adult shoppers surveyed (62%), planned to do all their holiday shopping online.” While Deloitte predicts “e-commerce holiday retail sales to grow between 25% to 35% from November through January.” Don’t wait to promote your holiday items either. Analysts believe holiday shopping will begin well before Black Friday. A study by Coresight Research revealed, “three in 10 consumers say they expect to start their holiday shopping earlier than usual this year." Make it easy for shoppers to find the perfect gift for everyone on their list with well-thought out gift guides. Photo credit: Macy's Pick a specific category. A visually appealing gift guide will not only help put your gift items in front of consumers, it will also help them check recipients off their shopping list with suggested gift ideas. Need ideas for your hard-to-buy-for dad? Check. What about stocking stuffers or the perfect gift for the person on your list who has everything? Check and check. When it comes to creating your gift guide, imagine who your customers will be buying for, targeting specific customer segments beyond “women,” “men” and “kids.” Consider categorizing lists by interests, like a sweet and nutty trail mix for outdoor enthusiasts or a chocolate and wine pairing for the wine aficionado. Another easy idea would be to categorize items by ingredient, flavor or texture. Compile your peanut butter meltaway, peanut brittle, chocolate-covered peanuts and peanut butter fudge onto a guide labeled “Gifts for Peanut Butter Lovers.” Or do you have a collection of mint-chocolate flavored products? What about a guide for those who are “All About the Crunch,” complete with caramel corn, toffee, brittle and chocolate-covered pretzels? 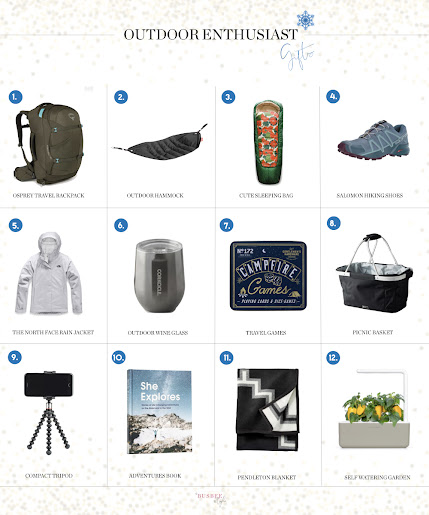 Find the perfect gift for the outdoor enthusiast, thanks to this gift guide by BusbeeStyle. We especially like the simple grid design. The numbers and labels make it easy for customers to identify and purchase products with links for each item included in the description. Find the perfect gift for the outdoor enthusiast, thanks to this gift guide by BusbeeStyle. We especially like the simple grid design. The numbers and labels make it easy for customers to identify and purchase products with links for each item included in the description. 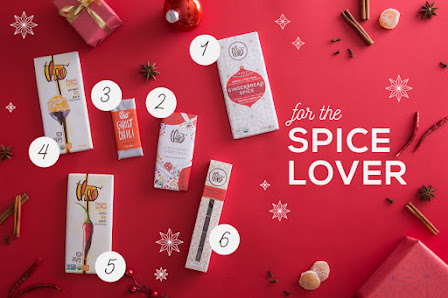
Theo Chocolate has curated a flavor-inspired collection of gift ideas that looks both beautiful and delicious. Categories include the perfect gift ideas for lovers all things spicy, minty, salty, fruity and then some. Click here to view the full guide.
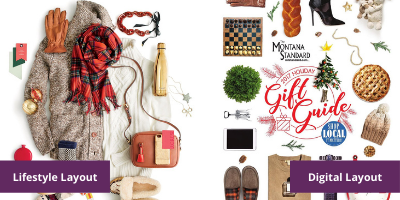
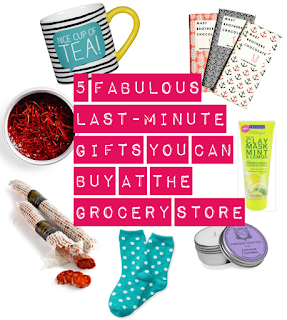 This gift guide from Always Order Dessert is for those well-meaning shoppers looking to snag a last-minute gift that doesn’t feel like an afterthought. This bright and bold header makes it super clear to the reader that the items on this gift guide are the perfect solution for the last-minute shopper. This gift guide from Always Order Dessert is for those well-meaning shoppers looking to snag a last-minute gift that doesn’t feel like an afterthought. This bright and bold header makes it super clear to the reader that the items on this gift guide are the perfect solution for the last-minute shopper.Consider categorizing some items by price, since most people have a budget in mind when shopping for gifts. “While many shoppers may gravitate toward lower-priced categories, don’t shy away from a luxury list for those looking to splurge,” suggests Cathie Ericson with Square. Despite trends indicating that many shoppers will be checking their list earlier than ever this year, Coresight Research shows 1 in 10 consumers expect to procrastinate. Since these are likely the shoppers who benefit from gift guides the most, compile a “last-minute gifts” guide of popular, ready-to-gift items that can be purchased in a pinch. Try to keep your gift guides concise, highlighting three to seven items. Too many items can get lost and turn shoppers away before they’re able to make a decision, let alone a purchase. If you have more items that you’d like to highlight, make several smaller gift guides instead of one big list. Get Visual Visuals are a must when it comes to a good gift guide. Period. If you don’t have a photo for every item on your gift guide, breakout your smart phone (or ask a friend or a member of your team who has a smart phone with a good camera to help) and start snapping. For best results, we recommend photographing your products against colors that contrast to make your product pop. Decide if you’d like to layout your products as part of a more “lifestyle” look or if you plan to remove the background of your product photos and lay them out using design software (keep reading for tips on how to do this—for free—with zero design experience). If you plan to remove the background, photograph product on a solid, white sheet of paper or cardstock for milk or dark chocolate. Try a darker, solid color for the background when photographing white chocolate. Sweet tip: Canva.com is a free graphic design platform that is easy to use even if you have zero design experience. With free and paid subscriptions, Canva’s a super-easy “background remover” tool removes the background of an image in one click. By removing the background, you can easily achieve a professional look by dragging and dropping your gift items and their descriptions within the guide layout. Click here to watch Canva’s two-minute tutorial. Partner with Local Businesses 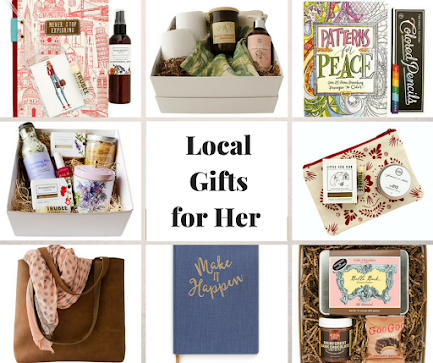 High Note Gifts of Nashville features some of their favorite local gifts in this easy-to-follow gift guide. High Note Gifts of Nashville features some of their favorite local gifts in this easy-to-follow gift guide.Invite some of your favorite local businesses to be featured in your gift guide. According to a study by Google, 66% of shoppers plan to shop more at local small businesses in 2020. Coffee shops, wineries and boutiques are examples of local businesses to partner with this holiday season. Offer to include one of their signature items on your guide and ask them to share your gift guide on their own social media pages. Tagging their business in your social media posts will offer your partners greater brand exposure and encourage them to return the favor. Seal the Deal Before tying your gift guide(s) with a bow, make sure it is clear how to purchase the items listed. This may include a web address and phone number or a direct link to your website or Facebook Shop. For shoppers seeking unique, local gifts to share this holiday season, a fun holiday gift guide is sure to pique their interest. We think you’ll be surprised at how easy it is to create a professional-looking guide highlighting your products. Cheers to a sweet holiday season ahead! Crave more? If you like what you read here, look for the "Subscribe now" box on the right to enter your email address and start receiving weekly tips, like this, delivered straight to your email inbox. RCI's Tip of the Week blog is just one of the many resources we offer to help candy makers refine their craft and build upon their business and marketing practices. Follow us on Facebook for even more sweet inspiration.
Tags:
E-Commerce
gifts
Graphic Design
Holidays
Marketing
online shopping
Permalink
| Comments (0)
|
|
|
Posted By RCI,
Tuesday, October 20, 2020
Updated: Thursday, January 21, 2021
|
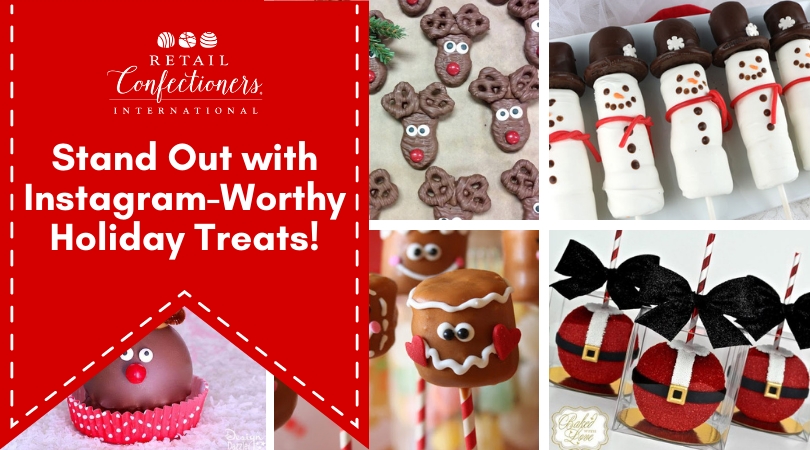
How Instagram-worthy are your holiday treats?
Sure, they taste delicious, but how would a potential new customer know if they’ve never tasted your confections? No surprise, social media, like Instagram and Facebook, can be an effective tool for reaching consumers, however if A.) you’re not sharing photos of your products on your social media sites daily or B.) they don’t stand out from other holiday gifts, you could be missing out on a massive opportunity to gain new customers this season.
A study by Forbes has shown that 78% of consumers’ purchases are impacted by companies’ social media posts. So, if you’re looking for a boost in sales, consider transforming these classic confectionery treats into holiday showstoppers to help your business standout this season.
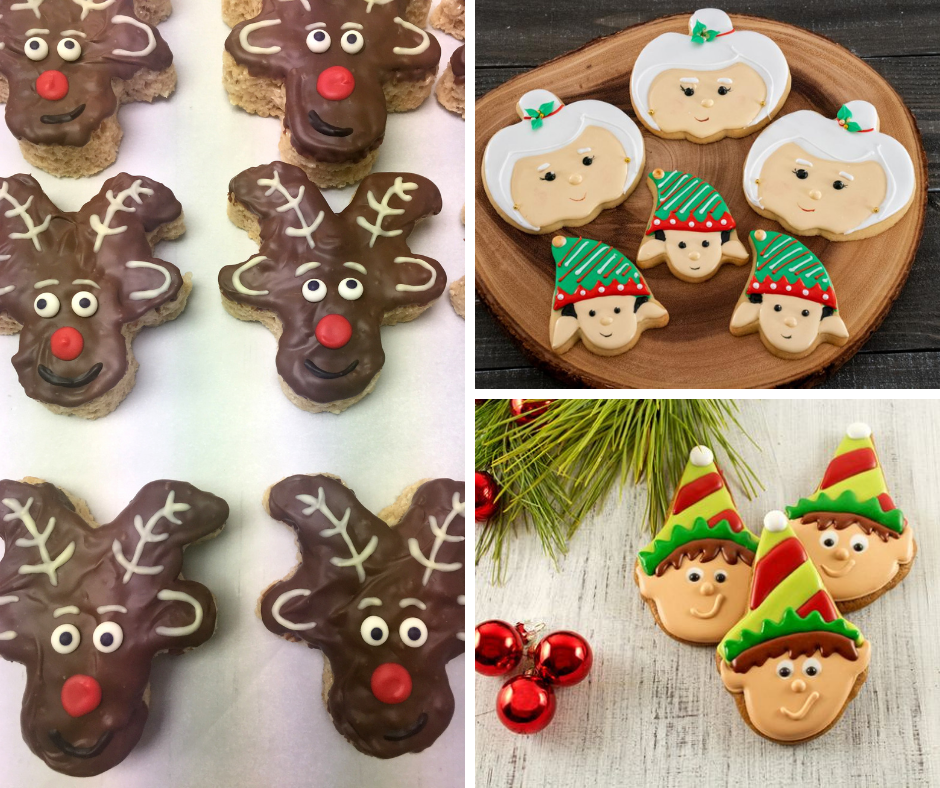
Rice Cereal Treats
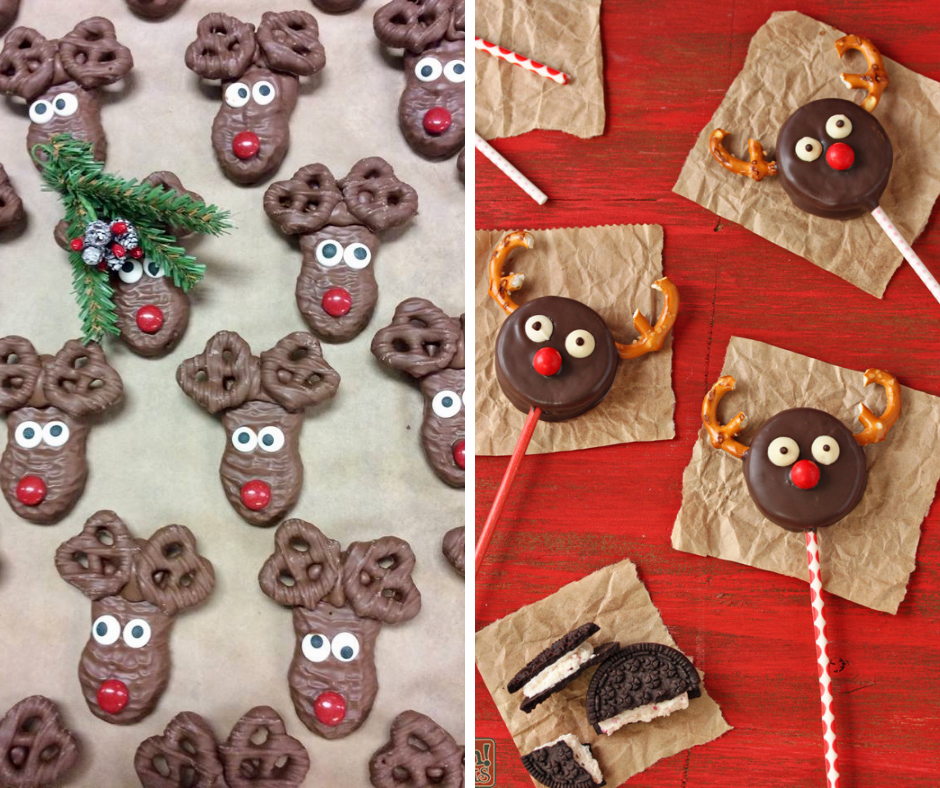
Cookie cutters aren't just for cookies. They also make a great tool for creating fun seasonal chocolate-covered rice cereal treats. Make the most out of your collection of cookie cutters, by repurposing common shapes to create new and unique designs. After realizing that their gingerbread man treats weren’t selling as well as other designs, Bomboy’s Home Made Candy gave the tired cookie cutter new life by turning it upside down and transforming it into Rudolph the Red-Nosed Reindeer. This little reindeer proved to be a hit!
Make fall and summer designs last into the holidays! If you have cookie cutters shaped like a ghost or even an ice cream cone, just flip them upside down to transform the shapes into cute elves. Did you know a pumpkin cookie cutter can be repurposed to make a jolly Mrs. Claus?
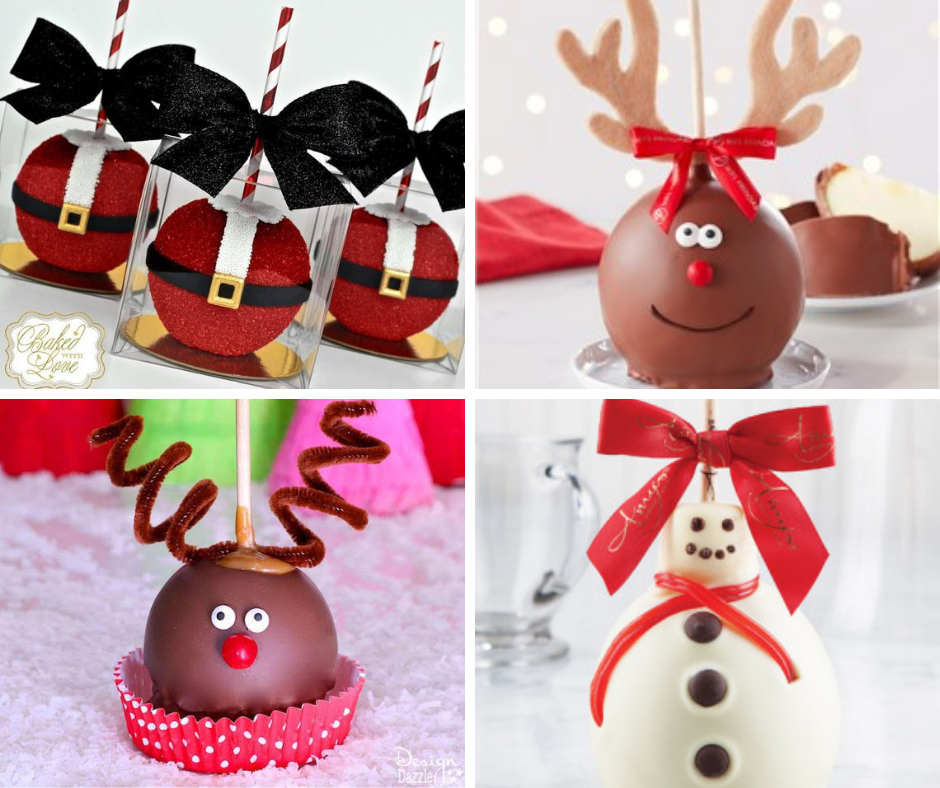
Caramel Apples
Traditionally a fall treat, a little creativity can help transform caramel apples into a festive holiday gift. For inspiration, mimic Santa’s jolly belly by adding his signature black belt and big gold buckle around a red caramel apple coated in red sprinkles or luster dust. Bring Frosty the Snowman to life by adding a jumbo marshmallow to the top of a caramel apple before dipping them both in white chocolate. A few chocolate chip “buttons" and a red licorice scarf will help tie it all together. Lastly, add candy eyes, a red nose and antlers, of course, to create everyone’s favorite reindeer out of a classic chocolate-covered caramel apple. There’s lots of ideas online for creating Rudolph’s antlers—from the easiest to the most realistic, you may want to try pipe cleaners, pretzel twists or sugar cookies for your antlers.
Need help perfecting your caramel apples? Check out these past blog posts for tips on making caramel stick to apples or learn why you should flip your caramel apples upside down.
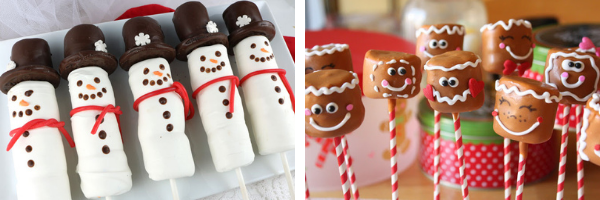
Marshmallows
Jumbo marshmallows make a quick and easy canvas for creating holiday magic. Put three jumbo marshmallows on a stick, coat them in white chocolate and decorate to make marshmallow snowmen pops that are too sweet to pass up. Click here to watch a tutorial by Two Sisters Crafting. All you need to make adorable gingerbread marshmallow pops are, your choice of caramel-coated marshmallows or marshmallows covered in peanut butter confectioner’s coating, some piped white chocolate and tiny sugar decorations.
Sandwich Cookies
If you don’t think of Rudolph the Red-Nosed Reindeer when looking at your favorite sandwich cookies, changing your perspective may increase your holiday sales. When RCI member Vande Walle’s Candies coated Nutter Butter sandwich cookies in chocolate and embellished them with a pair of candy eyes, pretzel twist antlers and a bright red nose, these cute reindeer treats reportedly “flew out the door,” they were so popular with their customers! For another spin on this idea, try substituting the Nutter Butter cookies with Oreo cookies on a stick.
More than ever, consumers are looking to social media for unique and memorable gift ideas this holiday season. Posting photos of your festive holiday treats on social media regularly will help your company capture the attention of consumers while they’re making their shopping list this season.
Crave more? If you like what you read here, look for the "Subscribe now" box on the right to enter your email address and start receiving weekly tips, like this, delivered straight to your email inbox. RCI's Tip of the Week blog is just one of the many resources we offer to help candy makers refine their craft and build upon their business and marketing practices.
Follow us on Facebook for even more sweet inspiration.
Tags:
Christmas
Holidays
Social Media
Permalink
| Comments (0)
|
|
|
Posted By RCI,
Tuesday, October 13, 2020
Updated: Thursday, January 21, 2021
|
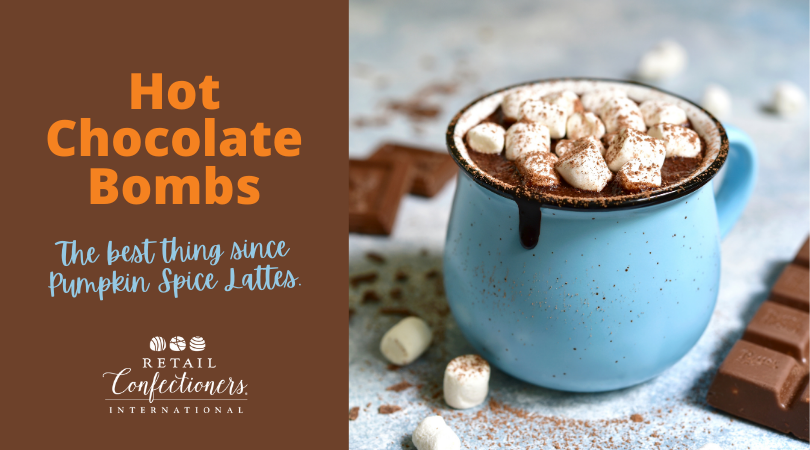
Although this is not a new concept, interest in "hot chocolate bombs" has skyrocketed since the beginning of October—in fact, it is now considered a breakout trend according to Google Trends. In case you’re wondering what this means, if Google Trends identifies a topic as “breakout” it means there has been a tremendous increase in searches using a specific topic or keyword.
Watch this viral social media video demonstrating a hot chocolate bomb from Wisconsin-based bakery, Sweets by Jen.
Elevate your hot chocolate experience with this season’s breakout trend, hot chocolate bombs. Essentially a chocolate sphere, when placed in a mug and drenched with warm milk, the hot chocolate bomb melts away to reveal hot cocoa mix and other sweet treats inside, like mini marshmallows.
Sweet Tip:
We believe the marshmallows are the key ingredient to create an almost magical effect. As the chocolate sphere melts and opens up, the marshmallows pop out and rise to the top of the hot chocolate.
How to Make Hot Chocolate Bombs
Take a sphere mould and make a hollow chocolate shell. Once the chocolate shell has set, it’s time to fill it. A popular option is to fill the shell mould with generous portions of hot cocoa mix and mini marshmallows. Other ideas may include crushed peppermints, chocolate chips, toffee bits, mint chocolate pieces or even holiday sprinkles. Seal the two pieces of the mould together and decorate with a drizzle of dark chocolate or white chocolate swirls, topped with more sprinkles, crushed peppermints or whatever your heart desires.
RCI member tip: Vande Walle’s Candies uses a golf ball mould and rolls the finished product in white chocolate.
Don’t Have A Sphere Chocolate Mould? Don't Sweat!
If you don’t have a sphere mould consider using a round truffle mould and filling it with hot chocolate mix and a mini marshmallow or two. Since they’re smaller than the typical hot chocolate bombs, package multiples together and instruct users to use two or three "truffles" to make one cup of hot chocolate. You may not get the same effect as the large spheres pop open, but you’ll have the benefit of being able to use your existing truffle packaging.
RCI member, Bruce’s Candy Kitchen put a witchy spin on this concept by dropping a mini marshmallow cluster into a mini muffin tin and topping it with Sixlets® candies and sprinkles to represent bubbling witch’s brew. After the mixture sets up, they insert the cluster into a plastic cauldron. These frighteningly cute cauldrons are sold as part of their Halloween Hot Chocolate Kits, complete with hot chocolate mix, extra sprinkles, candy corn and a chocolate-covered Oreo®.
RCI member, Nothing But Chocolate
fills a large hollow pumpkin mould with pumpkin spice hot chocolate mix for two or more servings. Consumers are directed to heat milk on the stovetop and drop the entire pumpkin into the simmering milk. For Christmas, Nothing But Chocolate
uses an ornament mould to replicate the concept.
How to Package Hot Chocolate Bombs
As with any confection, your packaging can really set the tone of the presentation. For shoppers who aren’t familiar with hot chocolate bombs (yet
), we recommend utilizing packaging that allows shoppers to see the product, as well as instructions on how to use it.
Cello Bag with Ribbon
A clear cello bag is a classic and simple packaging solution, tie it with a colorful ribbon and cute name tag with instructions to create a festive and eye-catching look.
Acetate Tube
This clear acetate tube creates a sleek and modern look that would fit nicely in a Christmas stocking. Packaged as a set of three, it allows you to upsell the product and offer a “variety pack” with three different flavors.
Acetate Cube
This chocolatier uses a clear acetate cube to package their hot chocolate bomb. A metallic gold sticker describes the product as “exploding with mini marshmallows and chocolate hearts.”
Colorful Foil
If you want to highlight a variety of flavors and fillings, consider wrapping your hot chocolate bombs in colorful foil. Not only does this make for a colorful and festive look, it is easy and encourages consumers to try different flavors.
Short on time or staff? Wholesale Hot Chocolate Bombs!
While we are loving this fun holiday trend, we understand that COVID-19 has presented many candy makers with restrictions that make it challenging to develop a trendy, new product for the busy holiday season.
If you love the idea of selling hot chocolate bombs, but you don’t love the idea of making them yourself, consider wholesaling “Hot Chocolate Balls” from RCI member ChocolatesU. More like a solid hot chocolate truffle, instead of a hollow chocolate shell, their Hot Chocolate Balls are made with "the best quality couverture chocolate, cocoa powder and honey," delivering a rich, more chocolatey cup of hot chocolate. Hot Chocolate Balls are available in six flavors, as well as several limited-edition flavors for the holiday season. Click here to learn more.
Cheers to hot chocolate season! We hope this has inspired you to create your own sweet version of hot chocolate bombs and meet the growing demand for this trendy product.
Crave more? If you like what you read here, look for the "Subscribe now" box on the right to enter your email address and start receiving weekly tips, like this, delivered straight to your email inbox. RCI's Tip of the Week blog is just one of the many resources we offer to help candy makers refine their craft and build upon their business and marketing practices.
Follow us on Facebook for even more sweet inspiration.
Tags:
Christmas
Halloween
Holidays
Hot Chocolate
Hot Cocoa
Marshmallows
Packaging
Trends
Wholesale
Permalink
| Comments (0)
|
|
|
Posted By RCI,
Tuesday, October 6, 2020
Updated: Thursday, January 21, 2021
|
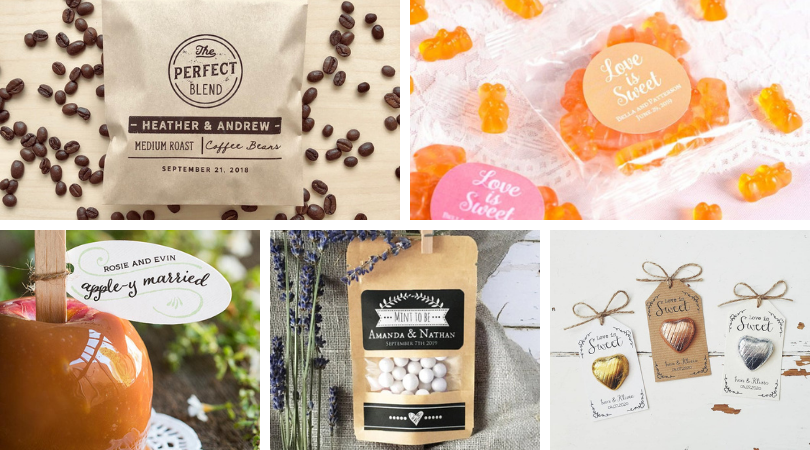
The wedding industry represents a sweet opportunity for confectioners. Offering ready-to-gift wedding favors will help eliminate one more item from the bride’s long list of to-do’s before she says “I do!” By focusing on personalization and packaging, your wedding favors are sure to stand out and WOW the wedding party and their guests.
Sources: The Perfect Blend Coffee Favors; The Paper Shoppe CA/Etsy; Champagne Gummy Bear Favors, Beau Coup; Caramel Apple Favors, Evermine; Mint To Be Favors, The Kraft Moon/Etsy; Sweet Chocolate Heart Favors, Little Indie Studio/Etsy
Personalized
Personalization can help achieve a greater impact without having to spend a fortune on materials. Print directly onto craft paper treats bags or purchase printable labels. Your local craft store will have a variety of paper punches in various shapes and sizes from a 2-inch circle punch to an ornate gift tag punch.
RCI member, Dietsch Brothers, uses a Cricut® cutting machine to create personalized tags to accompany their wedding favors.
Dietsch Brothers offers a simple order form for event tags. The order form includes options for tag shapes and six choices of messages. Clients can further customize their tags by adding their names and/or wedding date, in addition to
choosing between cream or white card stock, as well as the color of text to match their wedding colors.
If you’re not interested in purchasing equipment, Canva is a great alternative for creating professional-looking custom designs even if you have zero graphic design experience. This user-friendly platform offers thousands of custom templates and stock images, as well as easy-to-follow tutorials claiming to make you a “design pro in minutes.” Canva offers free and paid subscriptions.
Sources: Merci Beaucoup gift box, Mon Joli Paquet/Etsy; Hot Chocolate Tube, Custom Favours/Etsy, Mini Popcorn Boxes, Erickson Design/Etsy; Macaron Boxes, Cookiebox Store/Etsy; Chocolate-Covered Coffee Beans Favor, Evermine
Packaging
Even if you offer individually wrapped confections, a winning wedding favor is all about the presentation. The right packaging can help create a memorable way to commemorate the newlyweds and thank their guests for partaking in their nuptial ceremony. From sleek and modern to playful and crafty, there is packaging to fit every couple and every budget.
Sleek folded boxes in matte white or clear acetate tied with a satin bow, offer a luxurious touch. For a more creative and playful approach, hot chocolate mix can be packaged in food-safe tubes. Adding personal touches to ordinary packaging (like the mini popcorn boxes and coffee cups with customized sleeves pictured above) makes it feel elevated and fun.
Together with personalization, classic or creative packaging could help soon-to-be-wed couples fall in love with your wedding favors. Share your creative wedding favor ideas in the comments below.
Crave more? If you like what you read here, look for the "Subscribe now" box on the right to enter your email address and start receiving weekly tips, like this, delivered straight to your email inbox. RCI's Tip of the Week blog is just one of the many resources we offer to help candy makers refine their craft and build upon their business and marketing practices.
Follow us on Facebook.
Tags:
Creative
Custom
Graphic Design
Member Ideas
Packaging
Party Favors
Wedding
Wedding Favors
Permalink
| Comments (0)
|
|