|
|
Posted By RCI,
Tuesday, March 10, 2020
Updated: Monday, April 27, 2020
|
It doesn’t matter how great your confections look or taste if your business does not place an emphasis on food safety and quality control. This week’s blog post identifies four ways to ensure the safety and quality of your products with practices that you could start today.
Identify Risks
To best prevent potential hazards during the making of any food products, it is important to identify areas of potential risk. Create a Hazard Analysis of Critical Control Points (HACCP) plan to prevent biological, chemical and physical hazards during the production process that could cause a threat to food safety. RCI members, login to watch a video on how to properly identify potential risks and develop an effective HACCP plan in the past education presentation, A Practical Approach to HACCP Planning (click link to view).
Train Employees on Proper Hygiene
“Proper hand hygiene is the food [manufacturer’s] first line of defense against food contamination,” said Jim Grubb of GOJO Industries. “Bacteria, viruses, and parasites can be transmitted from person to person and from persons to food, so health and hygiene of the workforce is extremely important,” (Quality Assurance Magazine).
When identifying areas for potential risk effecting food safety, it is important to also look at current staff hygiene procedures. Since poor employee hygiene practices can lead to contamination, don’t assume staff members are washing their hands properly and at the appropriate times. Common problems with employee hygiene practices include poor hand washing practices, not washing at the right location in comparison to the production areas; manual sinks that are not kept clean; using cold water temperatures for hand washing and a poor overall food safety culture. Click here for tools and resources to train your staff on proper hand washing.
Use Both Wet and Dry-Cleaning Methods
Did you know limiting the use of water is one of the primary means of controlling pathogens in low moisture food establishments (foodprotection.org)? You are probably already using wet cleaning and sanitation methods which utilizes water and/or detergents to remove residue. When wet cleaning, it is extremely important that even the nooks and crannies of machinery is dry, because it is in these hard-to-reach places where bacteria can be difficult to remove and when water is present bacteria can grow.
The benefit to employing dry cleaning and sanitation methods, is that it allows you to remove food residue with little or no water application, significantly reducing the opportunity for bacterial growth. Dry cleaning can be as simple as surface cleaning with a vacuum or alcohol-based wipes. More detailed cleaning may be performed with a steam cleaner or dry ice cleaner.
When determining which method of cleaning is best, it is important to assess the risk level of the area in need of cleaning. Different areas of your facility may have a different level of risk, just as different ingredients would. It is important to understand what you are trying to remove when cleaning or sanitizing different work stations. According to Quality Assurance Magazine, it is essential to ensure all products used to clean and sanitize food-contact surfaces are approved by the Environment Protection Agency (EPA) in addition to being verified and validated.
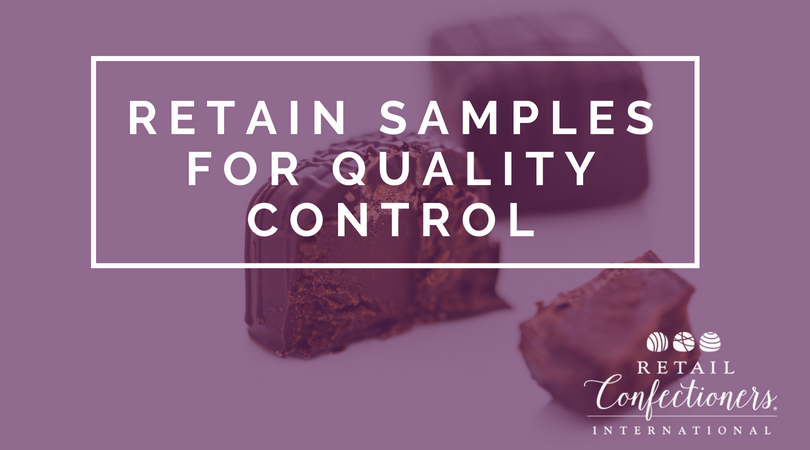
Collect Retention Samples
It is important to know and understand the shelf life of your products and collecting retention samples is the best way to test product limitations, so you can adjust recipe formulations if issues arise or advise customers on the best timeframe to enjoy your products.
When testing the shelf life of your product, variables, like packaging, must remain the same. For example, when testing your products, make sure they are stored in the same packaging they would be sold in. If they are shrink wrapped before selling (which is highly recommended), shrink wrap the product before storing them for testing. Anticipate how your customers would store your products, if not consumed right away. Would they store them in the refrigerator or in the pantry? Consider a reasonable length of time a consumer may store your products before consuming them. If you are unsure, ask a small group of loyal customers or friends and family.
Over time, enlist experienced tasters (this could be staff members or, again, frequent customers) to review your products for consistency and quality. If you run into issues with product quality, RCI members can login to pose questions to fellow members on RCI’s online forum, List Serve.
This week’s tips may require extra work, however, the benefits of taking a proactive approach to quality assurance often outweigh the risks of not practicing such precautions. Comment below on practices your company employs to help ensure your products are consistently safe for consumption.
Crave more? If you like what you read here, look for the "Subscribe now" box on the right to enter your email address and start receiving weekly tips, like this, delivered straight to your email inbox. RCI's Tip of the Week blog is just one of the many resources we offer to help candy makers refine their craft and build upon their business and marketing practices.
Tags:
Cleaning
Food Safety
HACCP
Hygiene
Quality Control
Retention Samples
Permalink
| Comments (0)
|
|
|
Posted By RCI,
Tuesday, August 21, 2018
Updated: Monday, April 27, 2020
|
When a delighted customer purchases a box of assorted chocolates from your shop, ideally, the box of chocolates would be consumed right away or at least within a week. In the event they are stored away in a cupboard for a special occasion or (dare, I say) forgotten, do you know what your products would look or taste like in two to three, or even four months? This week’s tip offers reasons for obtaining retention samples and advice on how to do so.
It is important to know and understand the shelf life of your products and collecting retention samples is the best way to test product limitations, so you can adjust recipe formulations if issues arise or advise customers on the best timeframe to enjoy your products.
When testing the shelf life of your product, variables, like packaging, must remain the same. For example, when testing your products, make sure they are stored in the same packaging they would be sold in. If they are shrink wrapped before selling (which is highly recommended), shrink wrap the product before storing them for testing. Anticipate how your customers would store your products, if not consumed right away. Would they store them in the refrigerator or in the pantry? Consider a reasonable length of time a consumer may store your products before consuming them. If you are unsure, ask a small group of loyal customers or friends and family.
Over time, enlist experienced tasters (this could be staff members or, again, frequent customers) to review your products for consistency and quality. If you run into issues with product quality, RCI members can login to pose questions to fellow members on RCI’s online forum, List Serve.
Regularly retaining samples of each batch could prove useful if you ever experience a product recall or customer complaints. At a past Chocolate Boot Camp course, RCI member, Candy House Gourmet, shared that they regularly take three samples of every product, label them each with a lot code and freeze the samples in a Ziploc freezer bag for four months. If a customer calls and complains, they can reference the quality of the product when it left their facility.
This week’s tip may require some extra steps and additional storage, however, the benefits of taking a proactive approach to quality assurance often outweigh the risks of not practicing such precautions. Comment below if you take retention samples of your products and what you’ve gained from this practice.
RCI's Tip of the Week blog is just one of the many resources we offer to help candy makers refine their craft and build upon their business and marketing practices. Review past blog posts for quick and actionable tips to apply to your business. Look for the "Subscribe now"box on the right to enter your email address and start receiving weekly tips, like this, delivered straight to your email inbox.
Not a member? Click here to learn how RCI can help you build your sweet business.
Tags:
GMP's
List Serve
Product Development
Quality Control
Shelf Life
Permalink
| Comments (0)
|
|
|
Posted By RCI,
Tuesday, January 16, 2018
Updated: Monday, April 27, 2020
|
Are you tempted to eat your chocolates as you walk by the packaging line? We have two great reasons to embrace the role of a frequent taste tester of your products without the guilt: quality and consistency. As the owner or manager of a candy store, you want to have complete confidence the products you are selling are not only delicious, but the same level of quality and flavor each time.
When a customer purchases a box of toffee, they expect to purchase the exact same product every time. Therefore, it’s extremely important to regularly taste your candies to ensure they meet your standards for quality and flavor.
Routine Taste Testing
If you have a quality control manager, consider adding a consistent taste testing program to their routine. The frequency for taste testing may vary depending on how often you produce a particular product, but at least weekly would be the minimum recommendation.
You’ve taken the time to achieve a great flavor, so take the time to ensure it’s consistently the same great flavor your customers expect.
RCI's Tip of the Week blog is just one of the many resources we offer to help candy makers refine their craft and build upon their business and marketing practices. Review past blog posts for quick and actionable tips to apply to your business. Look for the "Subscribe now" box on the right to enter your email address and start receiving weekly tips, like this, delivered straight to your email inbox.
Not a member? Click here to learn how RCI can help you build your sweet business.
Tags:
Chocolate Production
Owning a Business
Quality Control
Taste Testing
Permalink
| Comments (0)
|
|
|
Posted By RCI,
Tuesday, May 23, 2017
Updated: Wednesday, April 29, 2020
|
Checking your temper is an important step to ensure you aren’t surprised by unsightly bloom or dull or tacky chocolates.
Chocolates that have a dull appearance may be over tempered, while rapid bloom or a tacky, greasy surface are indicators that chocolate is under tempered. Quit guessing and rest assured your chocolate is always in good temper with these two methods for checking your temper.
- The Blade Test: This method is quick, easy and budget friendly, however the results could vary on the temperature of the room.
Simply dip a metal spatula or knife blade into the chocolate and leave a small film on the blade. At room temperature (65-68° F), well-tempered chocolate should be firm, not tacky, after just five minutes.
- Tempermeter: Although more costly, this method will most accurately measure the degree of tempering, indicating the quality and quantity of stable crystals that have been formed.
Tempermeters produce a temperature versus time curve, resulting from uniform cooling of a chocolate sample over a specified period of time.
It may be easy to assume your chocolate is well tempered and ready to move into the assembly line, however, skipping this step could result in a costly mistake.
Choose a testing method that works best for you and put a plan in place to ensure your chocolate is being checked on a regular basis. Many of our candy maker members have a system in place to verify their chocolate’s temper every hour.
Connect with fellow confectioners and industry suppliers at RCI's Annual Convention & Industry Expo next month! Register online now and join us in Chicagoland June 12-16, 2017!
Tags:
bloom
Chocolate
Chocolate Production
dull finish
Quality Control
temper
troubleshooting
Permalink
| Comments (0)
|
|
|
Posted By RCI,
Tuesday, February 14, 2017
Updated: Wednesday, April 29, 2020
|
Known for its characteristically smooth and chewy texture, caramel is one of the most popular and beloved candies. However, even caramel’s biggest fans are not willing to risk dental work for sticky caramel. If creating an unhappy customer isn’t enough, caramel that is too sticky can also lead to difficulties during the manufacturing process, thus creating a very sticky situation.
Below we’ve identified the top seven common causes for sticky caramels and possible solutions, presented at RCI's Caramels, Toffees & Brittles course.
- Not enough fat – Increase the percentage of fat and/or the amount of milk being used in the recipe. A minimum of 8% fat is recommended when making caramels.
- Excessive inversion – Inversion occurs when sucrose (a disaccharide) is broken down into glucose and fructose. This can be caused by extended cooking times (especially under acidic conditions) and the use of the enzyme invertase. Increasing reducing sugars will add to the flavor and color of caramel – but too much can cause excessive stickiness.
Check the pH of premix, water and other ingredients, including scrap, to identify excessive inversion as the problem. Caramel premix should have a neutral pH (6.8-7.0).
Two possible solutions for adjusting pH levels:
a) Add low-pH flavors at the end of cook sequence or use buffered flavors.
b) Increase premix pH with the addition of basic salts, such as sodium bicarbonate, sodium citrate (both considered natural and should be approximately 0.1% of batch)
- Not enough milk – A minimum of 3.7% milk protein solids or higher is recommended
- Low cooking temperature – Increasing the final cooking temperature slightly will produce caramel with a harder texture. Even one or two degrees can make a significant difference. Additionally, do not allow the moisture from the cooking process to drain back into the kettle.
- Too much corn syrup – Too much corn syrup can create a tender caramel, but also lead to stickiness and lack of body. Adjust the ratio of sugar to corn syrup (reduce the corn syrup or dextrose equivalent of corn syrup)
- Too much humidity – An overly humid environment can make caramel sticky and create a less than desirable layer of scum on its surface. Too avoid exposure to excessive humidity, pack and store cooked caramel away from steam kettles and in an area with a relative humidity of 40-50%.
- Lack of emulsifiers – The addition of mono and diglycerides (generally 1-1.25%) will produce caramel that is less sticky.
Great caramel doesn’t happen by accident. With all the factors that play into the science of making caramel, even one or two degrees, for example, can mean the difference between coveted caramels and a sticky mess.
Make your customers stick, but not your caramels! Registration for RCI’s Caramels, Toffees & Brittles course opens tomorrow, February 15. This three-day intensive course is designed to help candy makers (RCI members and non-members) understand the science behind recipe formulations and learn troubleshooting techniques for caramels, toffees and brittles. Participants will gain hands-on experience in the kitchen making variations of these coveted confections for several different applications.
Visit retailconfectioners.org/caramels for more information and to register for the course, starting February 15. Note: This course is limited to the first 24 registrants and is expected to sell out quickly.
Tags:
Candy Making
Caramel
Caramels
Education
Problem Candy
Quality Control
Sticky Caramel
troubleshooting
Permalink
| Comments (0)
|
|
|
Posted By RCI,
Tuesday, December 6, 2016
Updated: Wednesday, April 29, 2020
|
Customer service specialists for L.L. Bean, Inc., an outdoor retailer widely recognized for their exceptional customer service, led an educational session on the subject of customer service during RCI’s Fall Regional Conference in Portland, Maine in 2015. Liza Gerry and Valerie Marshall, who each have nearly thirty years of experience leading customer service initiatives at L.L. Bean, shared five tips to make customer satisfaction a cultural attribute of your business.
BONUS: We’ve added specific ways you, as a retail confectioner, can apply each tip to your sweet business.
Top Five Customer Service Tips
- Empower employees to do the right thing – Develop a service culture where your employees feel they are brand ambassadors, who have as much confidence in your brand as your most loyal customers.
How do I apply this to my business? To create your own brand personality, think about what cultural attributes are most important to you and your business. Offer 3-5 characteristics for your staff to focus on and share examples of how these attributes can help them address customer service in a way that best reflects your brand.
Print reminder cards, like the one below, and post them in visible areas such as the break room, in the restroom and near the cash register. Provide extra copies for staff to place in their private workspaces.

- Invest in training and communications – Never assume your team shares the same viewpoints on customer service as you do. Each member of your team brings their own unique personality and experience, which are like puzzle pieces that make up your company culture.
How do I apply this to my business? Clear expectations for customer service should be a key element of your employee training, just as important as dress codes and safety policies.
Additionally, ongoing communication is vital to remind staff of the company’s customer service policy. Share tips on how to achieve customer satisfaction through regular team huddles, a private Facebook group for staff or by printing newsletter-style handouts.
- Let customers define “good service” – According to L.L. Bean’s President and CEO, Chris McCormick, “you can’t tell customers, ‘you will be satisfied’ – they need to arrive at that conclusion on their own through the service experience itself.”
How do I apply this to my business? Provide opportunities for customers to share their feedback on your service through a social media site or an email survey. Even if the feedback is negative, it gives you the opportunity to make improvements and lets your customers know you value them.
- Offer a consistent, high-quality experience before, during and after their purchase across all channels to show you’re engaged with them throughout their journey.
How do I apply this to my business? To ensure you are consistently offering the best customer experience, play the role of a consumer regularly, both in-store and online. This will help you identify areas where improvements are needed.
- Guarantee 100% customer satisfaction – Satisfied customers make repeat customers.
L.L. Bean’s 100% Satisfaction Guarantee is the pinnacle of their customer service efforts and appears on their website, in their catalogs, in their stores and on every single receipt. While this guarantee serves their customers very well, according to Liza it serves L.L. Bean very well by making their customers the best “vocal champions” of their customer service. Clearly, making this worth standing behind.
How do I apply this to my business? What guarantee could you offer that would ensure your customers are 100% satisfied with your product or service. Consider offering a freshness guarantee. Clearly define what it means to be “fresh” and include a made-by date on each package. This gives customers the confidence that they are getting fresh products with every purchase and it gives you the opportunity to talk about it a lot.
Tags:
Customer Service
Education
Employee Management
Owning a Business
Quality Control
Permalink
| Comments (0)
|
|
|
Posted By RCI,
Tuesday, October 25, 2016
Updated: Wednesday, April 29, 2020
|
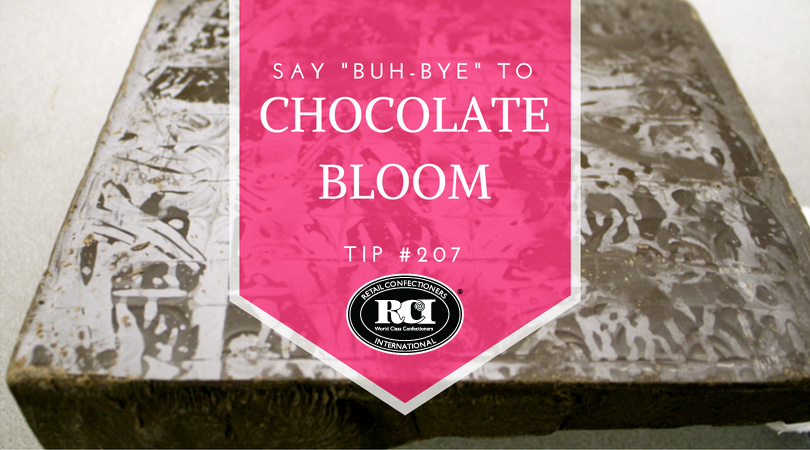
Simply put, chocolate is awesome. Consistently voted as most everyone’s favorite indulgence, it rarely fails to delight our customers. However, chocolate doesn’t always cooperate in the production of confections. Joe Sofia with Cargill Cocoa & Chocolate identifies one of the most common problems encountered with chocolate: bloom!
It can appear as spots, streaks, or a homogenous film, and can range from a dull white to a severe white discoloration, it’s bloom! The most common source is fat bloom, which is literally cocoa butter fat that has migrated to the chocolate's surface and recrystallized. While fat bloom has a negative effect on appearance, the product remains perfectly safe to eat. Pure chocolate that contains fat bloom can be remelted and retempered to reach the desired appearance. Unfortunately, finished confections that have fat bloom are more difficult to repair, since they contain fillings or inclusions and cannot be remelted.
EXCESSIVE HEAT
Fat bloom can develop for a few different reasons. Excess heat (from sunshine or warm temperatures) can cause perfectly good chocolate to bloom. The heat melts some or all of the cocoa butter, and when it recrystallizes it lacks the proper stable cocoa butter crystal nuclei and cooling for proper recrystallization. The best way to avoid fat bloom is to keep your chocolates away from heat!
POOR TEMPER
Another source of fat bloom is poorly tempered chocolate. The use of a tempermeter, or other means of optimizing your tempering step, will maximize bloom resistance in your chocolates. Both under-tempered and over-tempered chocolates will bloom faster than well-tempered ones.
INCOMPATIBLE FATS
A third source of fat bloom is the mixing of incompatible fats. If you use compound coatings, which are usually palm kernel oil based, these should not be mixed with cocoa butter based chocolate. The incompatibility of these fats can lead to inefficient crystallization and eventual fat bloom.
SUGAR BLOOM
Sugar bloom is a different type of bloom, resulting from exposure to moisture. It is formed by the dissolution and subsequent crystallization of sugar on the chocolate’s surface. It generally appears as droplets of sugar crystals on the surface of the product. If sugar bloom is moderate to severe, most likely the product will contain coarse sugar crystals and should be discarded. Sugar bloom can be avoided by keeping your refrigerated or frozen chocolates packaged and sealed until they equilibrate to ambient temperature.
Tags:
bloom
Chocolate
Chocolate Boot Camp
Chocolate Production
Education
Problem Candy
Quality Control
Permalink
| Comments (0)
|
|
|
Posted By RCI,
Tuesday, March 29, 2016
Updated: Wednesday, April 29, 2020
|
Suffer from sweaty sea salt caramels? Take tips from fellow candy makers and RCI members on how to avoid this common problem, as discussed through RCI’s member forum, List Serve.
“We are looking for a high-quality sea salt for our caramels. We experience problems when storing salted caramels in our cool room (50 degrees – 50% humidity). The sea salt seems to sweat or become clear on the caramel when stored.” - M. Mootz, Michael Mootz Candies, Inc.
“We do not store our sea salt caramels at a reduced temperature due to similar issues, we store [sea salt caramels] at factory room temperature.” – T. Hicklin, Candy House Gourmet
“Some salts are harder than others. Pink Himalayan sea salt is harder and more dense. It is less likely to absorb moisture.” – R. Hofberger, (retired)
“I would recommend dehumidifying to at least 40%. If that can’t be done, shrink wrap the boxes/cases. Completely enclose the product and then store. It works very well.” – Marty Lyp, Peterbrooke Chocolatier
Stay connected with RCI through Facebook for more tips and inspiration dedicated to the retail candy maker. Not a member?
Tags:
Candy Making
Caramel
Caramels
List Serve
Owning a Business
Problem Candy
Productivity
Quality Control
Permalink
| Comments (0)
|
|
|
Posted By RCI,
Tuesday, February 16, 2016
Updated: Wednesday, April 29, 2020
|
In an effort to protect the public and ensure safe food is provided by food manufacturers, the United States Food and Drug Administration (FDA) requires registration of all food manufacturing facilities. These regulations are part of the Food Safety Modernization Act enacted in 2011. We’ve provided answers below to some common FAQs regarding registering with the FDA.
Why is food facility registration a requirement?
Food facility registration will help the FDA determine the location and source of a potential outbreak of food-borne illness and quickly notify facilities that may be affected.
Who has to register?
The registration requirements apply to food facilities that manufacture, process, pack or hold food for human and animal consumption in the United States. Therefore, if you are a facility making chocolates and candies, then you should be registered with the FDA.
Do I register one time?
Food facilities are required to submit an initial registration to the FDA only once. After that, you must renew registration with the FDA every other year during the period beginning on October 1 and ending on December 31 of each even-numbered year. This means every food facility should be renewing their registration this year as 2016 is an even-numbered year.
Do I have to resubmit all information to renew?
FDA will provide an abbreviated biennial registration renewal process for a registrant of a facility that has not had any changes to its registration information.
Does it cost to register? There is no fee for registration or updates to a registration.
How do I register? Register online at FDA.gov by entering a search query for “Registration of Food Facilities,” or request the paper materials by calling 800-216-7331 or 301-575-0156.
How is registration confirmed? After you register your facility, the FDA will confirm the registration and assign a registration number. The information provided here is directly from the FDA website, FDA.gov. For direct links to materials from the FDA, including industry guidance for food facility registration, visit the GMPs page on the RCI website when signed in as a member (found under the Member Resources tab).
Tags:
FDA
Owning a Business
Quality Control
Permalink
| Comments (0)
|
|
|
Posted By RCI,
Tuesday, December 16, 2014
Updated: Wednesday, April 29, 2020
|
This week’s quick tip? Check your temper!
While we don’t want you to have a temper tantrum during the peak of the holiday season, we’re actually referring to checking the temper of your chocolate. As production aims to keep up with the demands of the holidays, it may be easy for production staff to get sidetracked and assume your chocolate is well-tempered and ready to move into the assembly line. However, not keeping a close eye on your chocolate’s temper is a costly mistake.
Many of our candy making members have a system in place to verify their chocolate’s temper every hour. While verification processes may vary, just be sure that you have a process in place, even if it is a simple pen and paper system.
How often do you check your temper? Leave us a comment below!
Tags:
Candy Making
Chocolate
GMP's
Quality Control
Permalink
| Comments (0)
|
|