|
|
Posted By RCI,
Tuesday, January 9, 2018
Updated: Monday, April 27, 2020
|
Nut butter adds a healthy halo and rich toasted notes to chocolates and confections and with the prevalence of peanut allergies, many food manufacturers are exploring options beyond the mainstream.
In this excerpt taken from an article published in RCI’s Kettle Talk magazine, discover three popular nut butters to enhance your product line and how to adapt any recipe to highlight these nutrient-dense tree nuts ( RCI members: login to read full article).
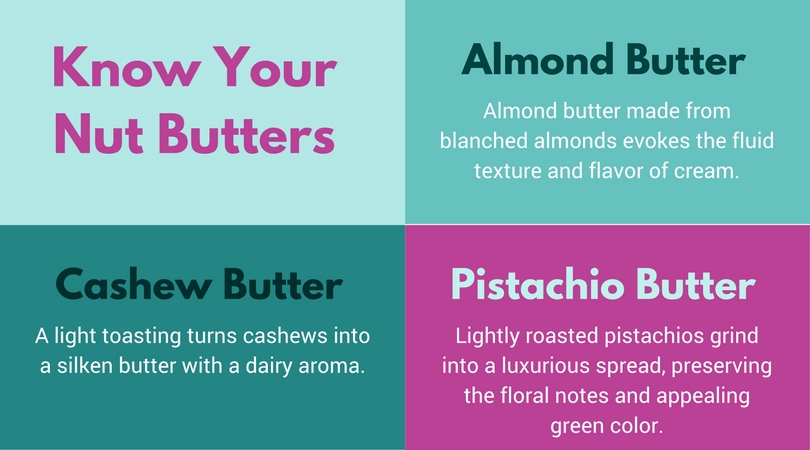
There are many ways to use nut butters in modern and traditional confectionery. Use them in any recipe where a pronounced nut taste is desired, such as truffles, fudges or as a substitute for peanut butter. When combined with dairy butter, their nutty flavor is enhanced. And for vegetarian and vegan recipes, nut butters are an ideal way to mirror some of the richness of dairy butter while providing the healthfulness of a whole food.
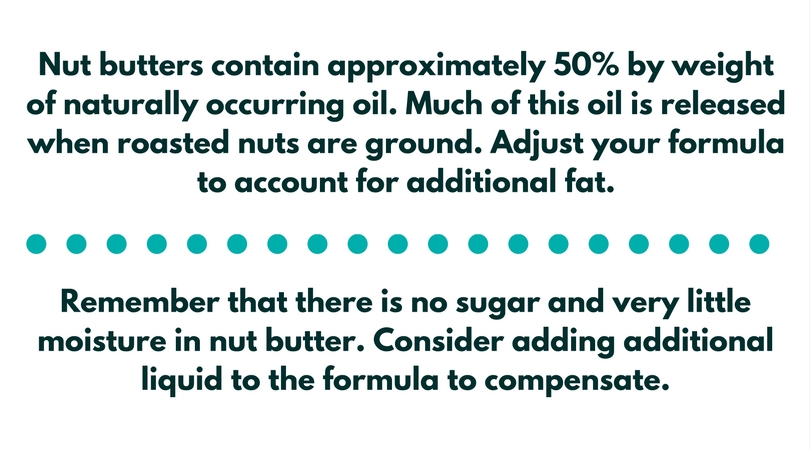
When adapting a formula to incorporate nut butter, here are a couple points to keep in mind:
Other considerations
The standard of identity for peanut butter permits the addition of stabilizers as well as salt and sugar. Stabilizers help control the flow of any liquid fat in the peanut butter. Most natural nut butters contain neither stabilizers nor sweeteners. Because oil migration can be a concern when using nut butter confectioners may want to pay special attention to chocolate confections that are not eaten within a few weeks of production.
3 Methods to Avoid Oil Migration When Using Nut Butter:
- "When working with nut butters in a chocolate piece, select a well-refined chocolate to stem oil flow migration," recommends Julie Mates, Specialties R&D Manager, Barry Callebaut U.S.A. The finer particles in the chocolate will slow oil migration, she explains.
- A thicker coating on enrobed chocolate also acts as an oil barrier.
- When making a chocolate center with nut butter consider adding finely ground nuts, nut flour or flaked feuillantine wafers to the mixture. Not only do these ingredients contribute flavor and texture, they also help mitigate the oil migration effect.
Try something unexpected by incorporating these trendy tree nuts into your favorite confections.
Sources:
Tags:
Allergens
Candy Making
Nut Butter
Oil Migration
Permalink
| Comments (0)
|
|
|
Posted By RCI,
Tuesday, November 28, 2017
Updated: Monday, April 27, 2020
|
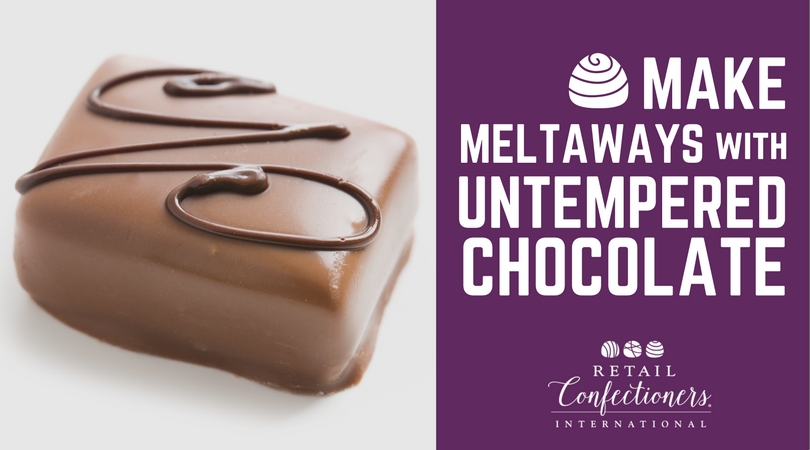
The most common way to make a meltaway is to combine tempered chocolate with melted coconut oil until it is smooth. Because coconut oil is a lauric fat, it must be added at a lower temperature so not to throw the chocolate out of temper. If the chocolate becomes untempered (or was never tempered to start with) the nice, smooth texture of the meltaway will eventually be replaced with an unpleasant mouthfeel due to the formation of fat globules.
Mixing Things Up
Consider this alternative method to making stable, smooth-textured meltaways with untempered chocolate. Instead of adding fat to tempered chocolate, combine untempered chocolate and coconut oil in a mixer. Mix at a slow speed until the temperature is below 78º F and has visibly thickened. Referred to as the “mixer method” in curriculum shared at RCI’s Chocolate Boot Camp®, it achieves the same desired stability and texture the meltaway is revered for, without the hassle of keeping temper.
Newcomers and veterans alike are invited to learn techniques of chocolate making, like this, during RCI’s Chocolate Boot Camp February 19-22, 2018 in Waterbury, CT at Fascia’s Chocolates. This popular hands-on course covers topics such as:
- Tempering
- Moulding
- Enrobing
- Chocolate Artistry
- and more!
SPACE IS VERY LIMITED! This course is expected to sell out! For complete information and to register online, visit retailconfectioners.org/bootcamp.
Tags:
Candy Hacks
Candy Making
Chocolate
Chocolate Boot Camp
Coconut Oil
Meltaways
temper
Permalink
| Comments (0)
|
|
|
Posted By RCI,
Tuesday, November 14, 2017
Updated: Monday, April 27, 2020
|
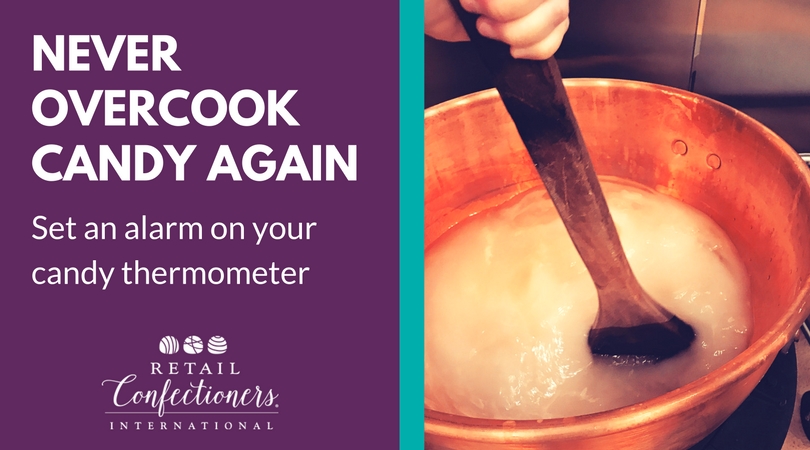
This week’s tip helps you manage your time and maintain the quality of your candies, which is especially important with the busy holiday season ahead.
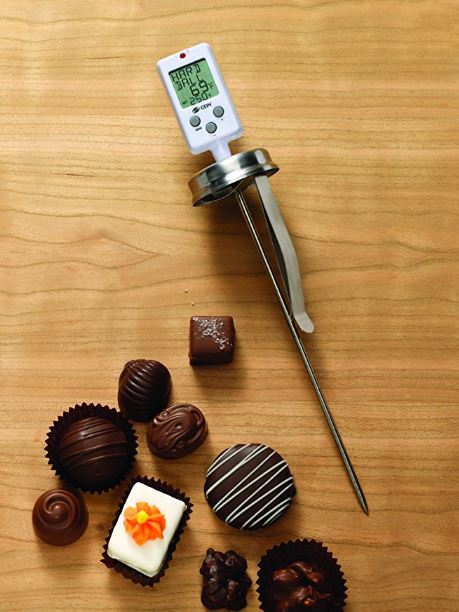
Set your candy thermometer with an alarm for one or two degrees lower than your cooking time to ensure you don't overcook.
When you start a batch of caramel and walk away to work on packaging, you’ll be alerted to the candy cooking process with enough time to remove it or begin the next step before it gets even one degree too high.
Programmable candy thermometers like the one pictured on the left are available on Amazon starting at $21.99.
Looking for other supplies? From thermometers to taffy. Chocolate to caramels. Moulds to mixers and peanuts to packaging solutions, RCI's Buyer's Guide is your all-in-one resource for products and services needed to run your business. Remember, RCI members can login to access RCI Buyer’s Guide on the member side of the website or call the RCI office to be connected to a supplier.
Tags:
Buyer's Guide
Candy Hacks
Candy Making
Caramel
overcooked
Thermometer
Permalink
| Comments (0)
|
|
|
Posted By RCI,
Tuesday, October 3, 2017
Updated: Wednesday, April 29, 2020
|
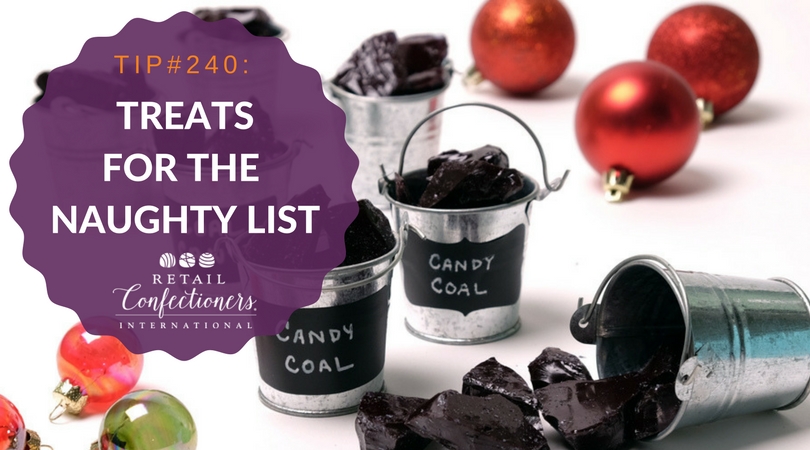
Create some laughter in your stores that is sure to generate impulse purchases this holiday season, with this recipe for cinnamon-flavored Candy Coal from RCI member, LorAnn Oils.
INGREDIENTS
2 cups granulated sugar
2/3 cup light corn syrup
3/4 cup water
1/2 teaspoon LorAnn Cinnamon Oil or 1 teaspoon (1-dram bottle) for a hotter cinnamon flavor
1/4 teaspoon LorAnn black powder food coloring or 1-1/2 teaspoons black gel food color*
Use of a candy thermometer is recommended
DIRECTIONS
- Have all ingredients and tools assembled and within easy reach of the stove. Line a 9" x 6" loaf pan or 8" x 8" baking pan with aluminum foil allowing foil to overhang sides. Spray with non-stick cooking spray, such as PAM.
- In a 2-quart saucepan, mix together sugar, corn syrup, water and black powder food color (*if using gel color, add at step 4). Stir over medium heat until sugar dissolves. Insert candy thermometer if using, making certain it does not touch the bottom of the pan.
- Bring mixture to a boil, without stirring. Early in the cooking process, you can "wash down" any sugar crystals that form on the sides of the pan with a wet pastry brush.
- *If using gel coloring, add when syrup reaches 260º F. Do not stir. Boiling action will incorporate color into syrup.
- Continue to cook and remove from heat precisely at 300º F (temperature will continue rising), or until drops of syrup form hard, brittle threads in cold water. After boiling action has ceased, add flavor and stir. USE CAUTION WHEN ADDING FLAVORING TO AVOID RISING STEAM.
- Pour syrup into prepared pan. Do not refrigerate. Cool completely. Once candy is cooled, lift from pan and remove foil.
- Break candy into small chunks to simulate coal pieces (see tip). For best results, store candy at room temperature in an airtight container.
For an eye-catching merchandising display, consider placing a clear candy bag of coal candies into cute Mini Glavanized Metal Pails from Oriental Trading Company. Add a chalkboard sticker like the photo above or a cute kraft paper label tied with ribbon or scraps of fabric for a rustic-chic look.
Stay connected with RCI through Facebook for more tips and inspiration dedicated to the retail candy maker. Not a member? Click here to learn how RCI can help you build your sweet business.
Tags:
Candy Making
Holidays
Recipe
Seasonal
Permalink
| Comments (0)
|
|
|
Posted By RCI,
Tuesday, May 2, 2017
Updated: Wednesday, April 29, 2020
|
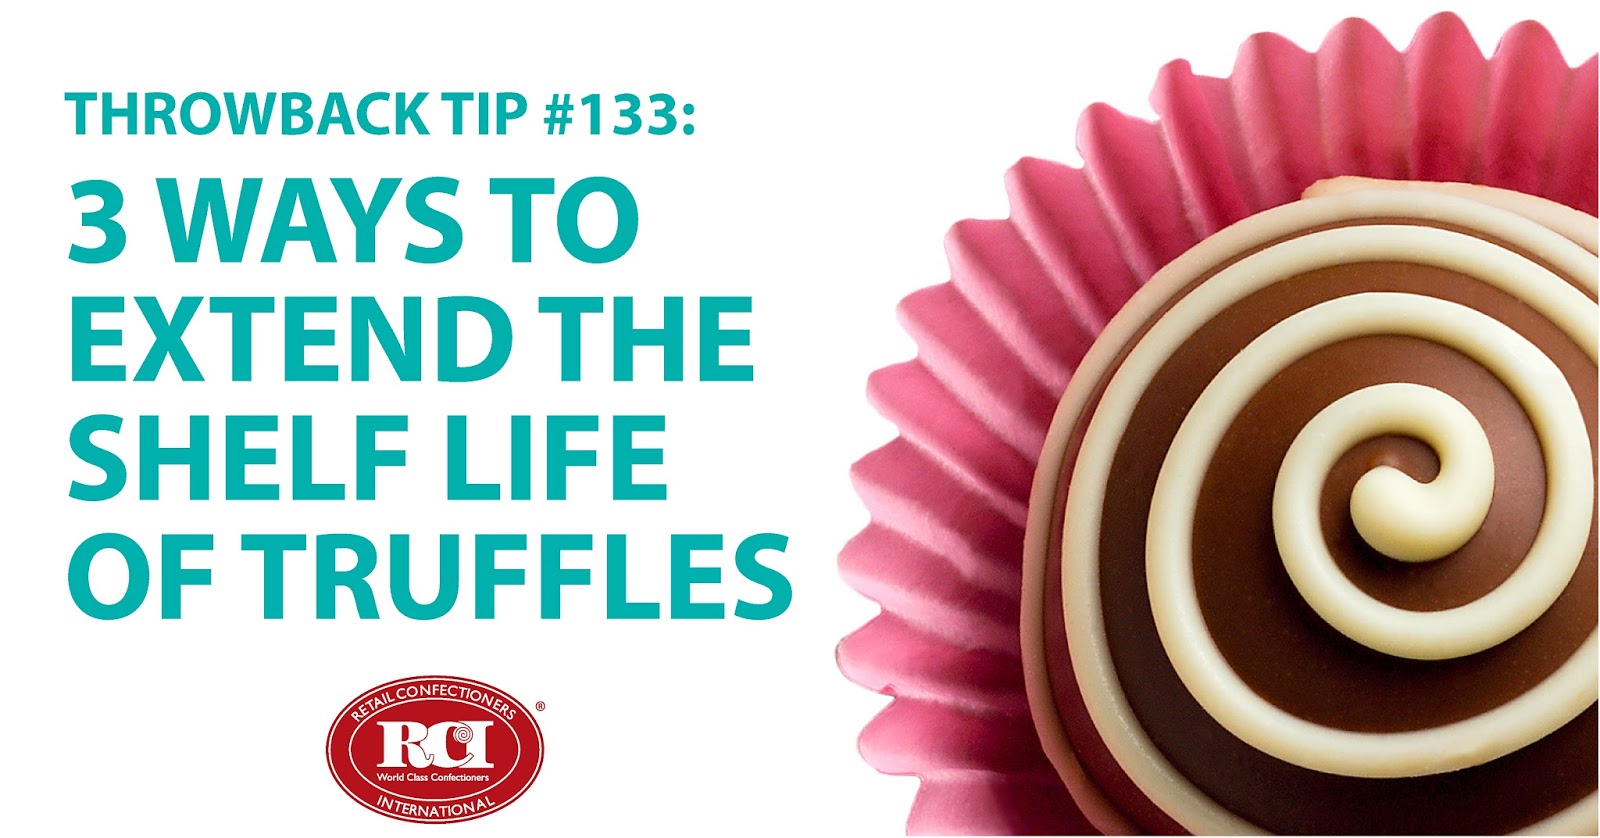
Today is National Truffle Day! Often considered the highest expression of a quality confection and often commands the highest price when purchasing, there’s no question why these little morsels are good cause for celebration.
A decadent truffle made with high-quality ingredients is a welcome surprise to chocolate lovers around the world, however, the surprise appearance of mold could ruin your sweet reputation. Keep reading for three ways to extend the shelf life of your truffles.
Reduce Water Activity
The high moisture of cream is often the cause of microbial growth in truffles. While cream arrives pasteurized, it is usually scalded to 190°F to ensure there’s no yeast and mold.
Reducing water activity will reduce the microbial growth and can be accomplished by:
- Replacing a portion of the cream with corn syrup
- Adding invertase (an enzyme derived from yeast)
- Increasing fat percentage
- Increasing chocolate solids
Use of Preservatives (including natural preservative options)
Preservatives can also control microbial growth. Potassium sorbate is one of the most effective options, however it is not usually considered natural. Natural preservatives might include cultured dextrose. Other preservatives can include reducing the pH of the ganache or the addition of alcohol. Legal and flavor considerations, however, must be addressed before using these methods.
Reduce Storage Temperature
A rule of thumb is that reducing the temperature by 18°F (10°C) will double the shelf life. Freezing truffles can substantially increase their shelf life, however, this must be done properly. Click here to view previous blog post on freezing truffles.
A truffle’s short shelf-life is a major challenge for many confectioners. With these tips from RCI’s Chocolate Boot Camp you can effectively extend the shelf-life of your truffles and avoid any unwanted surprises.
Get solutions to your problem candies from fellow confectioners and industry suppliers at RCI's Annual Convention & Industry Expo next month! Register online now and join us in Chicagoland June 12-16, 2017!
Tags:
Candy Holidays
Candy Making
Chocolate
Chocolate Boot Camp
Chocolate Production
Problem Candy
Truffles
Permalink
| Comments (0)
|
|
|
Posted By RCI,
Tuesday, April 18, 2017
Updated: Wednesday, April 29, 2020
|
During an RCI candy making course in 1971, the instructor discovered two students, although using identical formulas for rolled creams, were achieving vastly different results due to a variation in their cooking time. Keep reading to ensure your cooking time isn’t compromising the quality of your creams and other products.
Cooking Time for Rolled Creams, By Fred Janssen, SuCrest Corp.
While teaching at the RCI Short Course on Retail Candy Making, it was interesting to learn the following from two of the students who were trying to make the same type of candy. In this case, rolled creams. After questioning the students, an interesting fact was revealed. In one case, the cooking time of the batch was 8 minutes and in the other, 45 minutes. Both were using the identical formulas as suggested by many in the trade and it was quite evident that the student who took the longer cooking time was not getting good results. There was a great deal of variation in the type of product that he was trying to make.
Rolled creams are dependent upon the crystalline structure or the sugar remaining in the cream and with the longer cooking time, excessive inversion took place which reduced the percentage or amount of sugar remaining in the cream, thereby causing a great deal of difficulty for the candy maker.
A good rule to follow in any cooking operation is that all batches should be cooked to its final temperature within 20 minutes. If this is not possible on the equipment, the size of the batch should be reduced so that this cooking time can be accomplished. If larger batches are necessary, consideration should be given to making changes by obtaining better cooking equipment.
It's important to be mindful of cooking times, and not just ingredient formulations, when adjusting batch sizes. The 20-minute rule can help candy makers keep their cooking times in check and prevent excessive inversion.
Tags:
Candy Making
Creams
From the Archives
troubleshooting
Permalink
| Comments (0)
|
|
|
Posted By RCI,
Tuesday, February 14, 2017
Updated: Wednesday, April 29, 2020
|
Known for its characteristically smooth and chewy texture, caramel is one of the most popular and beloved candies. However, even caramel’s biggest fans are not willing to risk dental work for sticky caramel. If creating an unhappy customer isn’t enough, caramel that is too sticky can also lead to difficulties during the manufacturing process, thus creating a very sticky situation.
Below we’ve identified the top seven common causes for sticky caramels and possible solutions, presented at RCI's Caramels, Toffees & Brittles course.
- Not enough fat – Increase the percentage of fat and/or the amount of milk being used in the recipe. A minimum of 8% fat is recommended when making caramels.
- Excessive inversion – Inversion occurs when sucrose (a disaccharide) is broken down into glucose and fructose. This can be caused by extended cooking times (especially under acidic conditions) and the use of the enzyme invertase. Increasing reducing sugars will add to the flavor and color of caramel – but too much can cause excessive stickiness.
Check the pH of premix, water and other ingredients, including scrap, to identify excessive inversion as the problem. Caramel premix should have a neutral pH (6.8-7.0).
Two possible solutions for adjusting pH levels:
a) Add low-pH flavors at the end of cook sequence or use buffered flavors.
b) Increase premix pH with the addition of basic salts, such as sodium bicarbonate, sodium citrate (both considered natural and should be approximately 0.1% of batch)
- Not enough milk – A minimum of 3.7% milk protein solids or higher is recommended
- Low cooking temperature – Increasing the final cooking temperature slightly will produce caramel with a harder texture. Even one or two degrees can make a significant difference. Additionally, do not allow the moisture from the cooking process to drain back into the kettle.
- Too much corn syrup – Too much corn syrup can create a tender caramel, but also lead to stickiness and lack of body. Adjust the ratio of sugar to corn syrup (reduce the corn syrup or dextrose equivalent of corn syrup)
- Too much humidity – An overly humid environment can make caramel sticky and create a less than desirable layer of scum on its surface. Too avoid exposure to excessive humidity, pack and store cooked caramel away from steam kettles and in an area with a relative humidity of 40-50%.
- Lack of emulsifiers – The addition of mono and diglycerides (generally 1-1.25%) will produce caramel that is less sticky.
Great caramel doesn’t happen by accident. With all the factors that play into the science of making caramel, even one or two degrees, for example, can mean the difference between coveted caramels and a sticky mess.
Make your customers stick, but not your caramels! Registration for RCI’s Caramels, Toffees & Brittles course opens tomorrow, February 15. This three-day intensive course is designed to help candy makers (RCI members and non-members) understand the science behind recipe formulations and learn troubleshooting techniques for caramels, toffees and brittles. Participants will gain hands-on experience in the kitchen making variations of these coveted confections for several different applications.
Visit retailconfectioners.org/caramels for more information and to register for the course, starting February 15. Note: This course is limited to the first 24 registrants and is expected to sell out quickly.
Tags:
Candy Making
Caramel
Caramels
Education
Problem Candy
Quality Control
Sticky Caramel
troubleshooting
Permalink
| Comments (0)
|
|
|
Posted By RCI,
Tuesday, January 17, 2017
Updated: Wednesday, April 29, 2020
|
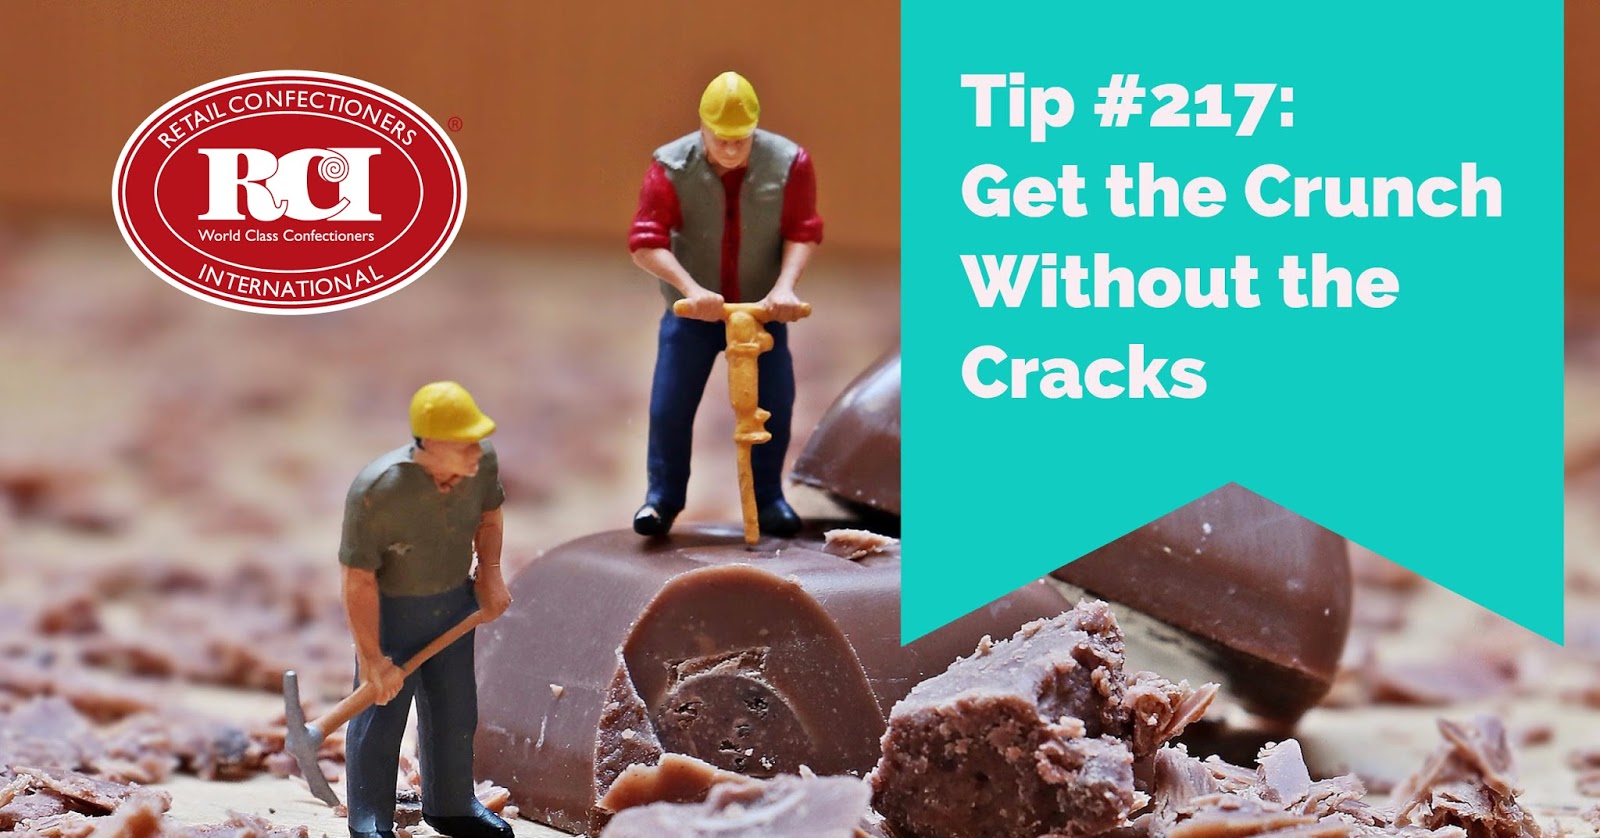
Randy Hofberger of R&D Candy Consultants, LLC, is an active member of RCI and the lead instructor for RCI’s Chocolate Boot Camp®. This week’s post is an excerpt from his article “Crunch Without the Cracks,” which offers eight tips to reduce cracking in chocolate-covered pretzels, cookies and crackers.
Texture is so very important in our foods and is a large part of the eating experience. Many of our most popular confections have a crunchy texture and using baked goods such as cookies, crackers and pretzels is one way to provide this. When coated with chocolate, however, there is a chance the finished product will crack, making it less appealing to consumers.
What cause these fissures to develop? While it may seem that there are little micro earthquakes occurring on your pretzels or gremlins attacking the chocolate-covered cookies, one of the main culprits can be moisture entering these dry baked goods and causing them to expand. To prevent moisture from coming in contact with the finished product, one of the most obvious solutions is to use packaging with a good moisture barrier. While this will solve many of the cracking problems, there are other factors that can cause cracking. Also, this will not help any of your products that are open to the atmosphere in your display cabinets.
Other suggestions to reduce cracking in chocolate covered pretzels, cookies and crackers include the following:
- Have a uniform coating. Unequal coverage will cause different contraction rates and, thus, cracking.
- Thicker coating is a stronger coating and a better moisture barrier. Coverage should be complete without pin holes, air bubbles or thin spots.
- Using a chocolate formulated to be softer will be less prone to cracking.
- Enrobed baked goods will generally have less of a heat load and will require a gentler (less) cooling. Good cooling tunnel conditions will have little or no air movement at the tunnel entrance and a temperature of approximately 65ºF. Air velocity may be gradually increased to about 700 CFM until the chocolate is set – at which time velocity may be increased to 1200 CFM. Coldest tunnel temperatures exceed the low 50sºF. Total tunnel time should be a minimum of eight minutes, but 12 minutes is better.
If your operation requires you to maintain consistent tunnel settings because of various product mixes, increasing the tunnel belt speed will give less total cooling and more line production.
- Enrober/tunnel/feeding area relative humidity should not exceed 55%.
- Pieces to be enrobed should be room temperature or warmer (up to 78ºF).
- Pretzel and cookie packages can be opened the evening prior to enrobing. This will help them equilibrate to the atmospheric conditions.
- Rough-surfaced centers reduce cracking and the loss of the chocolate shell, e.g., salted pretzels are better than unsalted pretzels.
Tags:
Candy Hacks
Candy Making
Chocolate
Chocolate Boot Camp
Chocolate Production
crack
Problem Candy
Permalink
| Comments (0)
|
|
|
Posted By RCI,
Tuesday, December 27, 2016
Updated: Wednesday, April 29, 2020
|
We've curated the most-read tips from 2016, to pinpoint topics that are most important to candy makers.
From troubleshooting tips to sky-high merchandising inspiration, plus a customer service must-read, the following posts deliver quick and easily executed tips to simply the lives of confectioners, like you!
Suffer from sweaty sea salt caramels? Take tips from fellow candy makers and RCI members on how to avoid this common problem.
Get step-by-step instructions for creating this eye-catching truffle tree.
RCI MEMBER BONUS: Click here to login to RCI’s member site and snag three variations of ganache recipes on page 9 of RCI’s Kettle Talk magazine.
Nobody likes hard, dried-out marshmallows! Keep your ‘mallows soft and pillowy all year long with this popular tip of the week.
An oldie, but a goodie, this throwback from 2012 covers four customer service basics that are too important not to review with your team on a regular basis.
Bloom is easily identified as one of the most common problems facing candy makers. No surprise, this post tops the list with common causes of chocolate bloom, as well as simple solutions.
Tags:
bloom
Candy Hacks
Candy Making
Caramel
Chocolate
Chocolate Production
Customer Service
Employee Management
Idea Sharing
Marshmallow
Merchandising
Problem Candy
Recipe
temper
Truffles
Tutorial
Permalink
| Comments (0)
|
|
|
Posted By RCI,
Tuesday, December 13, 2016
Updated: Wednesday, April 29, 2020
|
The mention of freezing chocolate products not too long ago was looked upon by candy makers as taboo. The two main concerns were “the product will bloom” or “the taste will be lost.”
Today, with new freezing systems and a better understanding of how to freeze products, it has become commonplace in the industry. Some of the largest manufacturers freeze products to keep up with seasonal demands.
In this excerpt from RCI’s 2010 spring regional conference, RCI member Mike Koch, of Morely Candy Makers/ Sanders Candy, offers 4 simple steps for successfully freezing and thawing chocolate, plus maximum storage times for both filled pieces and solid chocolates.
Freezing:
1. Prepare the product
· Shrink wrap or wrap as tight as possible, making the package air tight.
· Double shrink wrapping stock boxes is the best method if you use that type of packaging.
· If you don’t have a shrink wrapper, a double layer of plastic wrap will work.
2. Maintain a stable freezing and thawing process.
· Most household or small commercial freezers can consistently maintain temperatures with short thaw cycles, if any.
· Opening and closing freezers increases humidity in the units, thus the need for defrosting.
· Larger operations should utilize freezers that have defrosting cycles.
· Proper freezer drainage and regular maintenance is key to ensuring stability.
· Evaluate defrosting time regularly. If this process takes too long, product packaging could get wet. If it is too short, the cost of freezing will increase due to the use of power.
Thawing:
This may be the most important part of freezing.
1. Remove product from the freezer
· When removed from the freezer, product should be stored at 60 degrees Farenheit, with limited humidity.
2. Create air movement around the thawing package
· Smaller operations can remove a stock box from the freezer and place it on a counter with a small fan blowing on the package.
· Larger operations can put a pallet on a rack with a fan blowing on one end.
· Do not open the package or remove the wrap until the product temperature rises up to the room temperature.
· When opened at room temperature, the product will look and taste the same as it did before freezing.
For best results, thaw and sell frozen products within the recommended times below.
· Filled pieces and truffles should be 3-4 months.
· Solid chocolate pieces should be 6-8 months
Freezing is not for everyone, but for the companies that do freeze and do it right, it is a major part of their planning and operations. You cannot cut corners or hurry this process. It is a way for smaller confectioners to purchase products and reach the minimum manufacturer requirement. It will increase your shelf life a few months and will not harm the products.
Tags:
bloom
Candy Making
Chocolate
Chocolate Production
Freeze
Holidays
Shelf Life
Storing
Thaw
Permalink
| Comments (0)
|
|