|
|
Posted By RCI,
Tuesday, December 25, 2018
Updated: Monday, April 27, 2020
|
As we prepare to bid farewell to 2018, we’ve pulled the top five most-read tips from the year.
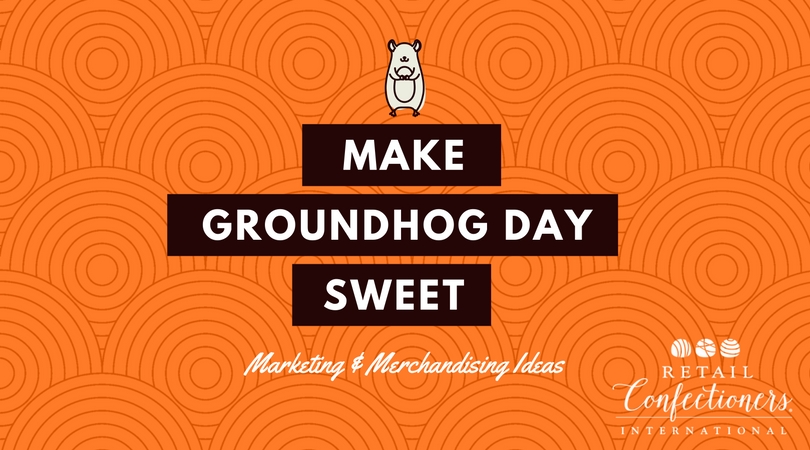
Nestled snuggly between New Year’s Day and Valentine’s Day is Groundhog Day on February 2. Although it may be a mystery to many of us as to why we give these furry little critters any merit when it comes to predicting the weather, there’s no question many consumers will be excited to participate in this American holiday. Start planning now to take advantage of all the groundhog hype at the beginning of February!
With the arrival of spring we can soon look forward to outdoor festivals, farmers markets, picnics and parties. Don’t let warm weather keep your business from shining at outdoor events by featuring more sturdy treats that aren’t as likely to melt in consumers' hands.
3.) Throwback Tip #12: Celebrate American Chocolate Week
American Chocolate Week is one of our favorite weeks of the year! Here’s a few of our favorite ways to make the most of five whole days of chocolatey celebration.
We can all agree teachers deserve a holiday! Remind your customers to celebrate World Teacher Day’s on October 5 by thanking the educators in their life with sweet treats that are sure to earn your candy shop an A+.
Why limit Christmas cheer to only once a year? A summertime spin on Christmas could be a great opportunity for your business to heat things up this summer! Pick up tips here to tie in to your summer promotion planning.
We look forward to bringing you more great tips to help you build your business in 2019! Wishing you a safe and happy New Year!
Tags:
Holidays
Ideas
Marketing
Top Tips of the Week
Permalink
| Comments (0)
|
|
|
Posted By RCI,
Tuesday, August 22, 2017
Updated: Wednesday, April 29, 2020
|
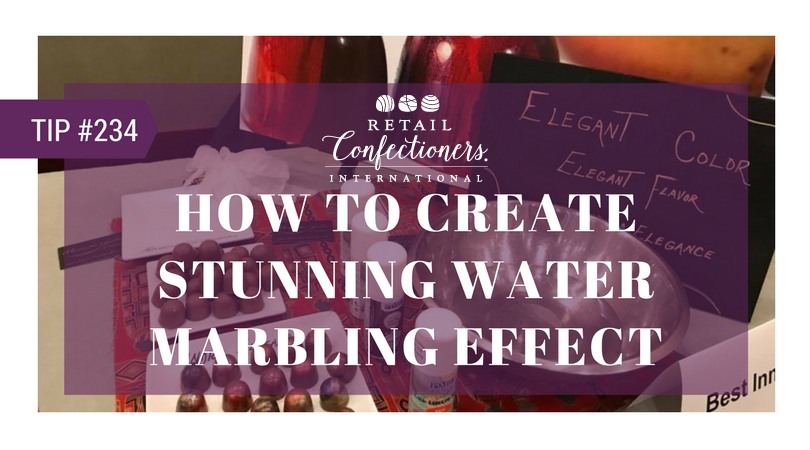
For members looking to gain creative ideas at RCI’s 2017 Annual Convention & Industry Expo, Candy Clinic did not disappoint. Since the thirties, this member-exclusive event has allowed RCI members from across the United States, Canada and abroad to share their best ideas and gain inspiration from fellow candy makers. Keep reading for an idea that won the award for best innovation at the latest Candy Clinic.
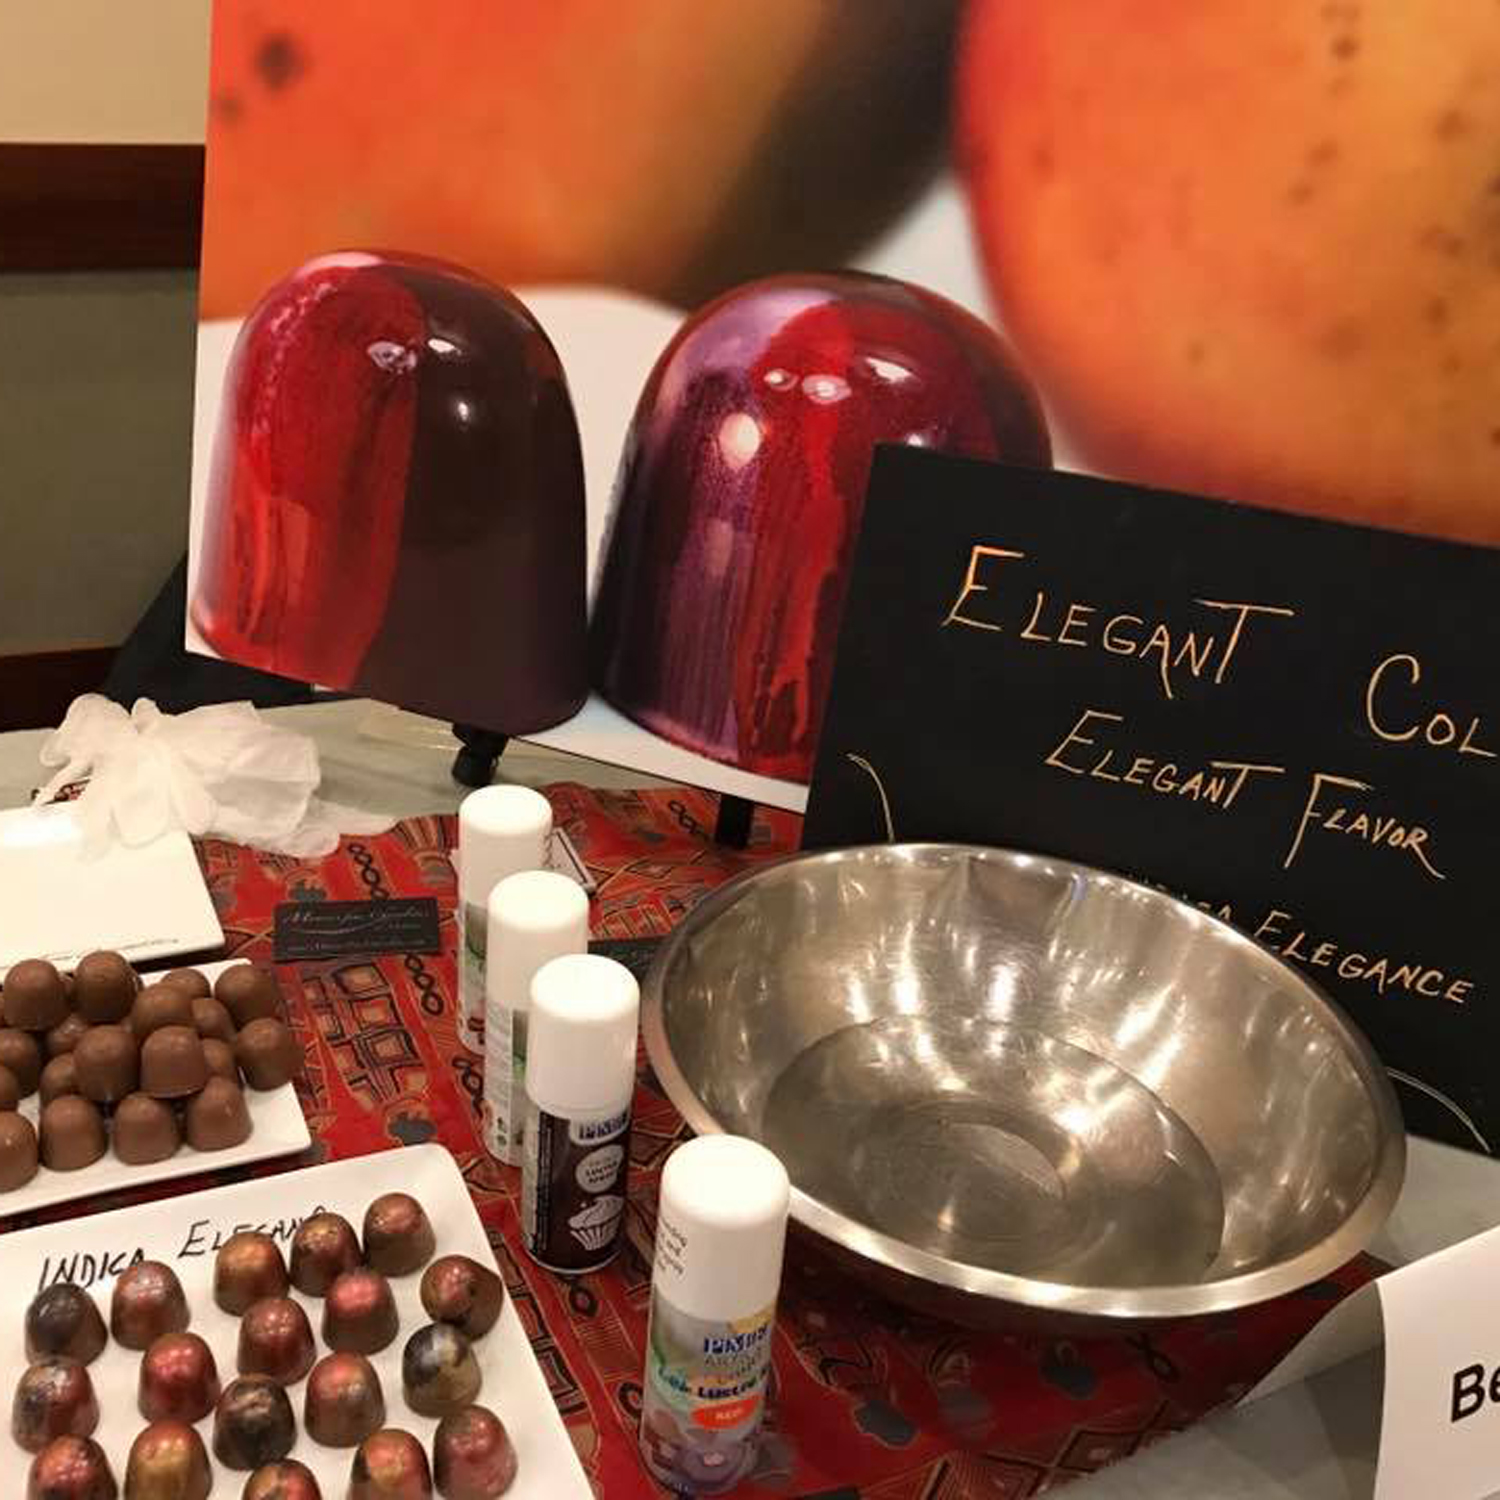
Inspired by an associate’s manicured finger nails, RCI member Cher Diamond of Maurie’s Fine Chocolates of Madison, shared a creative technique for applying cocoa butter to moulded chocolates. Water marbling is a technique used to create a unique nail polish design by adding droplets of nail polish to water before applying it to the nail. A similar effect can be achieved with cocoa butter and water.
Start by filling a bowl with room temperature water. If you read tutorials online for water marbling, they recommend using filtered or bottled water. Get cocoa butter spray, shake it up and spray it into the water. Because the oils in cocoa butter resist the water, the cocoa butter will float on top of the water, allowing you to create a unique design with a variety of different colored cocoa butters. Drag a toothpick or other similar object through the cocoa butter, cleaning it after each use.
Once the desired marbleized effect is achieved, take a finished moulded piece or just the shell and run it through the cocoa butter. Let each moulded piece dry for three hours or overnight. You may finish the piece by applying a glaze spray, but according to Cher, the cocoa butter will not rub off or detemper the chocolate.
If you’re looking to create stunning chocolate pieces, give this simple and fun water marbling technique a try and let us know how it turns out by leaving a comment below.
Tags:
Annual Convention
Candy Clinic
Colors
Creativity
Idea Sharing
Ideas
Innovation
Permalink
| Comments (0)
|
|
|
Posted By RCI,
Tuesday, June 27, 2017
Updated: Wednesday, April 29, 2020
|
If you attended RCI’s Annual Convention & Industry Expo June12-16 in Chicagoland, there’s a good chance you took away a lot of great ideas and inspiration. After returning to your business, you might be feeling overwhelmed and unsure of what to do with the new knowledge you’ve acquired. Consider using a mind map to organize your thoughts and apply them to your business.
What is a mind map? It’s a diagram used to visually outline information. Typically it begins with a word, image or phrase in the center and then other ideas and images branch out from the center across the page. One of the key benefits of a mind map is that an idea doesn’t have to be full or complete or even in sentence form in order to be displayed. The idea is that the process of a mind map resembles how your brain actually works!
Tips for an effective mind map:
- Start with a large piece of paper (Give your brain room to think!)
- Use images, not just words
- Vary the size, color and alignment of your images and text
- Keep topics and labels short (Think big picture.)
Mind maps are useful tools for individual creativity and also can help to get creative ideas flowing among a team of people. In your next team brainstorming session, consider using a whiteboard or oversized Post-it to map out ideas as they’re given and see where mind mapping can take you! If you prefer tech tools to paper versions, check out MindMeld or Mindmeister.
Tags:
Creativity
Ideas
Owning a Business
Permalink
| Comments (0)
|
|
|
Posted By RCI,
Wednesday, March 15, 2017
Updated: Wednesday, April 29, 2020
|
In celebration of RCI’s 100th anniversary, we have pulled favorite articles from the “archives.” In this excerpt from an issue of Kettle Gossip published in 1972, Dave Faurer of Wilbur Chocolate Co., shared Easter merchandising tips for candy makers. Although it's fun to reflect on how things (especially prices) have changed since 1972, many of Faurer's tips can be applied by today's retail confectioner. However, we've included some suggestions for updates to his merchandising ideas below.
Easter Merchandising
For most confectioners, Easter ranks second only to Christmas as a candy merchandising occasion. In some areas the Easter volume exceeds Christmas. As an occasion for the retail manufacturing confectioner to show his real skill in the art of candy making, Easter leads the list by far.
Timing – Easter falls on Sunday, April 2 this year (in 1972). Many merchants start showing some of their Easter items right after Washington’s birthday. Items like small chocolate-covered Easter eggs and 10, 15 and 25 cents eggs can be displayed or sold even earlier. This will include jelly eggs, marshmallow eggs, butter cream mix, etc.
About four weeks before Easter, your full line of Easter items should be on display. These would include your more expensive gift items, large eggs, gift baskets, etc.
Displays – The very nature of the items in your Easter line makes them easy to display. In themselves, they are so colorful that very little in the way of display material need be added. Basic colors for your display should be in the pastel shades. Usual color combinations are orchid and yellow, green (light) and yellow or pink and green.
It is extremely important that all signs are selected very carefully. To make sure that your signs stand out from the merchandise, you should choose the strongest colors in your display for the sign background. Good eye catchers are a super-large chocolate egg or a chocolate bunny or even an extra large size plush bunny.
Here are a few ideas which may help to create better and more effective Easter displays:
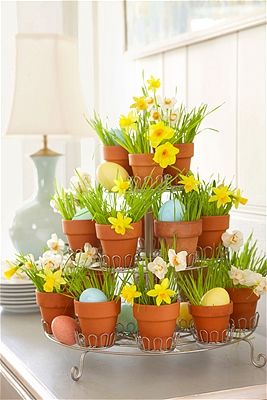
1972: A border of artificial daffodils and tulips can be very effectively arranged around the front of your windows
Now: For a more current take on this idea, use a cupcake stand,terra cotta pots and fresh daffodils to create a visually interesting Easter display.Photo from living.msn.com
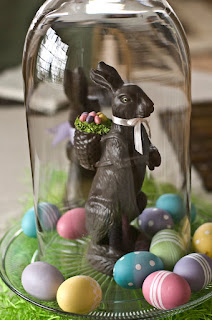
1972: A good way to show your moulded eggs and rabbits is to use a large round glass, covered with either amber or green cellophane grass. Use a separate piece of glass for each group. Place the largest item in the center and surround with the smaller sizes.
 |
Now:Consider purchasing real or artificial wheatgrass, which can be used to nestleproductsand décor for fresh and colorful merchandising throughout spring and summer.Photo frombestorganicwheatgrass.com
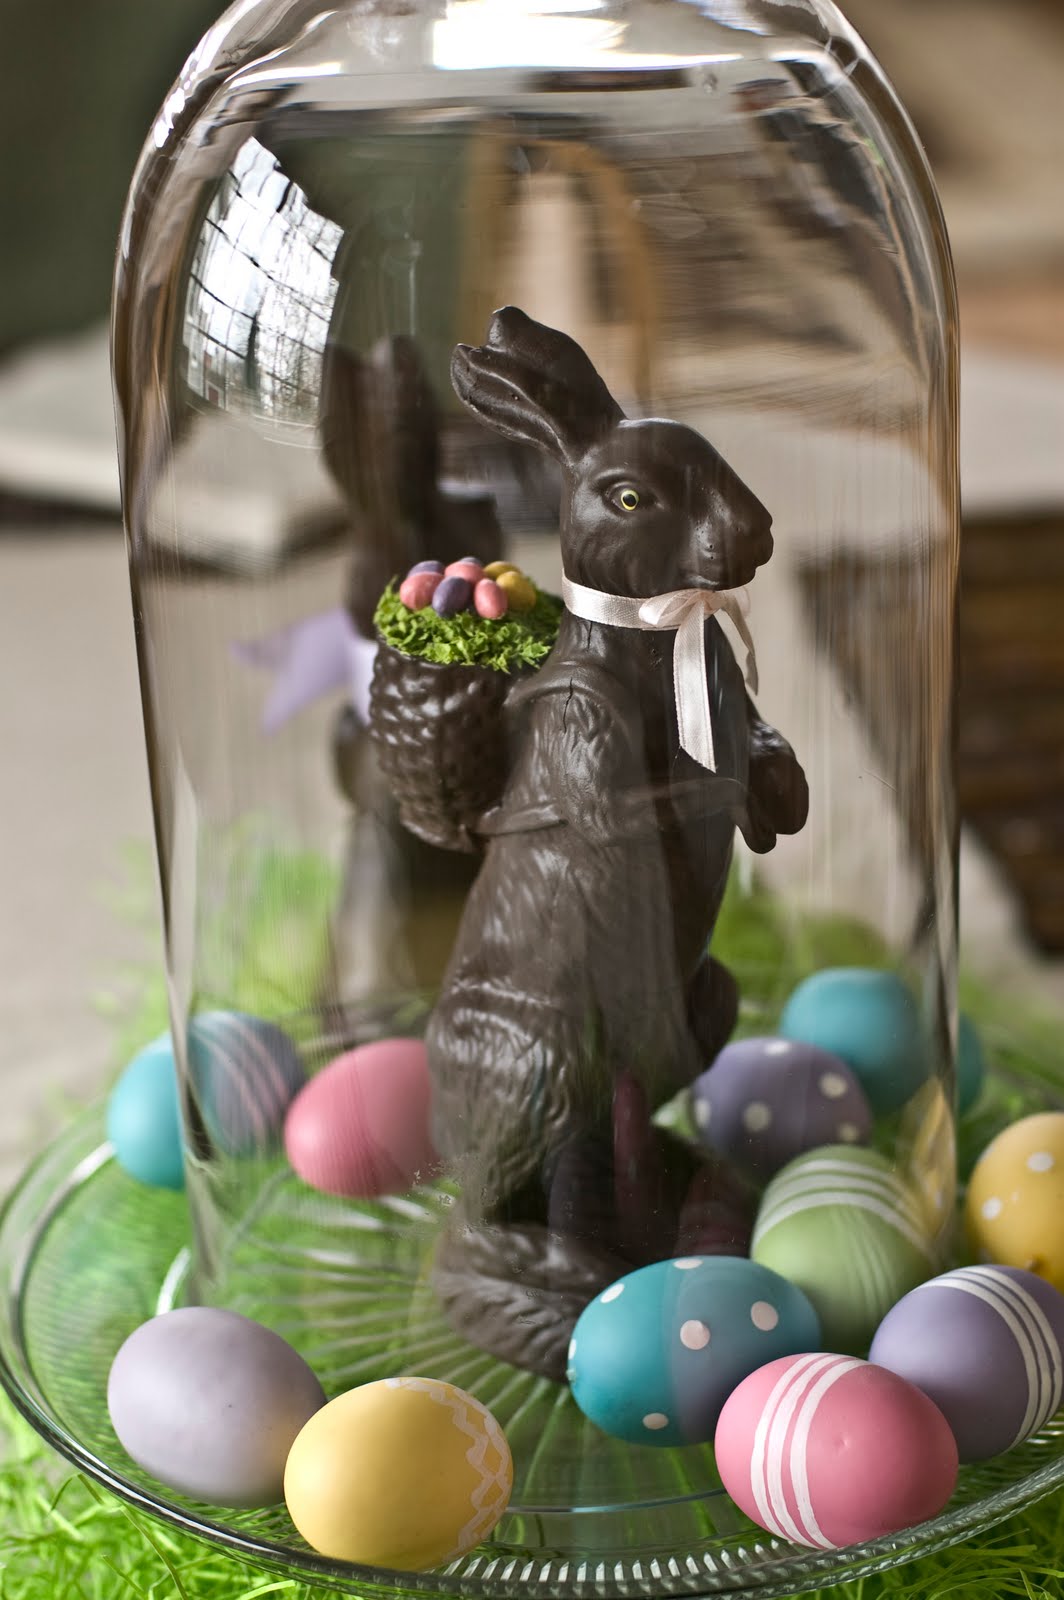
1972:When displaying your eggs, cut one very carefully, cello wrap so customer can see what the egg is like inside. This is especially true of the fruit and nut centers.
|
 |
Now:What’s on the inside counts, right? Instead of wrapping a cut-chocolate in cello wrap, consider displaying cut pieces on a glass dish or cake stand, topped with a glass dome. Glass domes of all shapes and sizes are super trendy right now and are relatively inexpensive at your local craft and hobby shop. And don’t think you have to splurge on a big, pricey dome. Even small and dainty domes can create an elegant display. Photo courtesy ofkimborup.blogspot.com/au
In conclusion, Easter is one of the most fascinating (and exasperating) periods of the candy year. By careful thought in selecting items and merchandising them properly, you can capture the Easter market in your town.
|
Tags:
Easter
From the Archives
Ideas
Merchandising
Permalink
| Comments (0)
|
|
|
Posted By RCI,
Tuesday, February 28, 2017
Updated: Wednesday, April 29, 2020
|
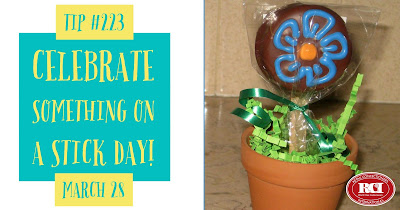
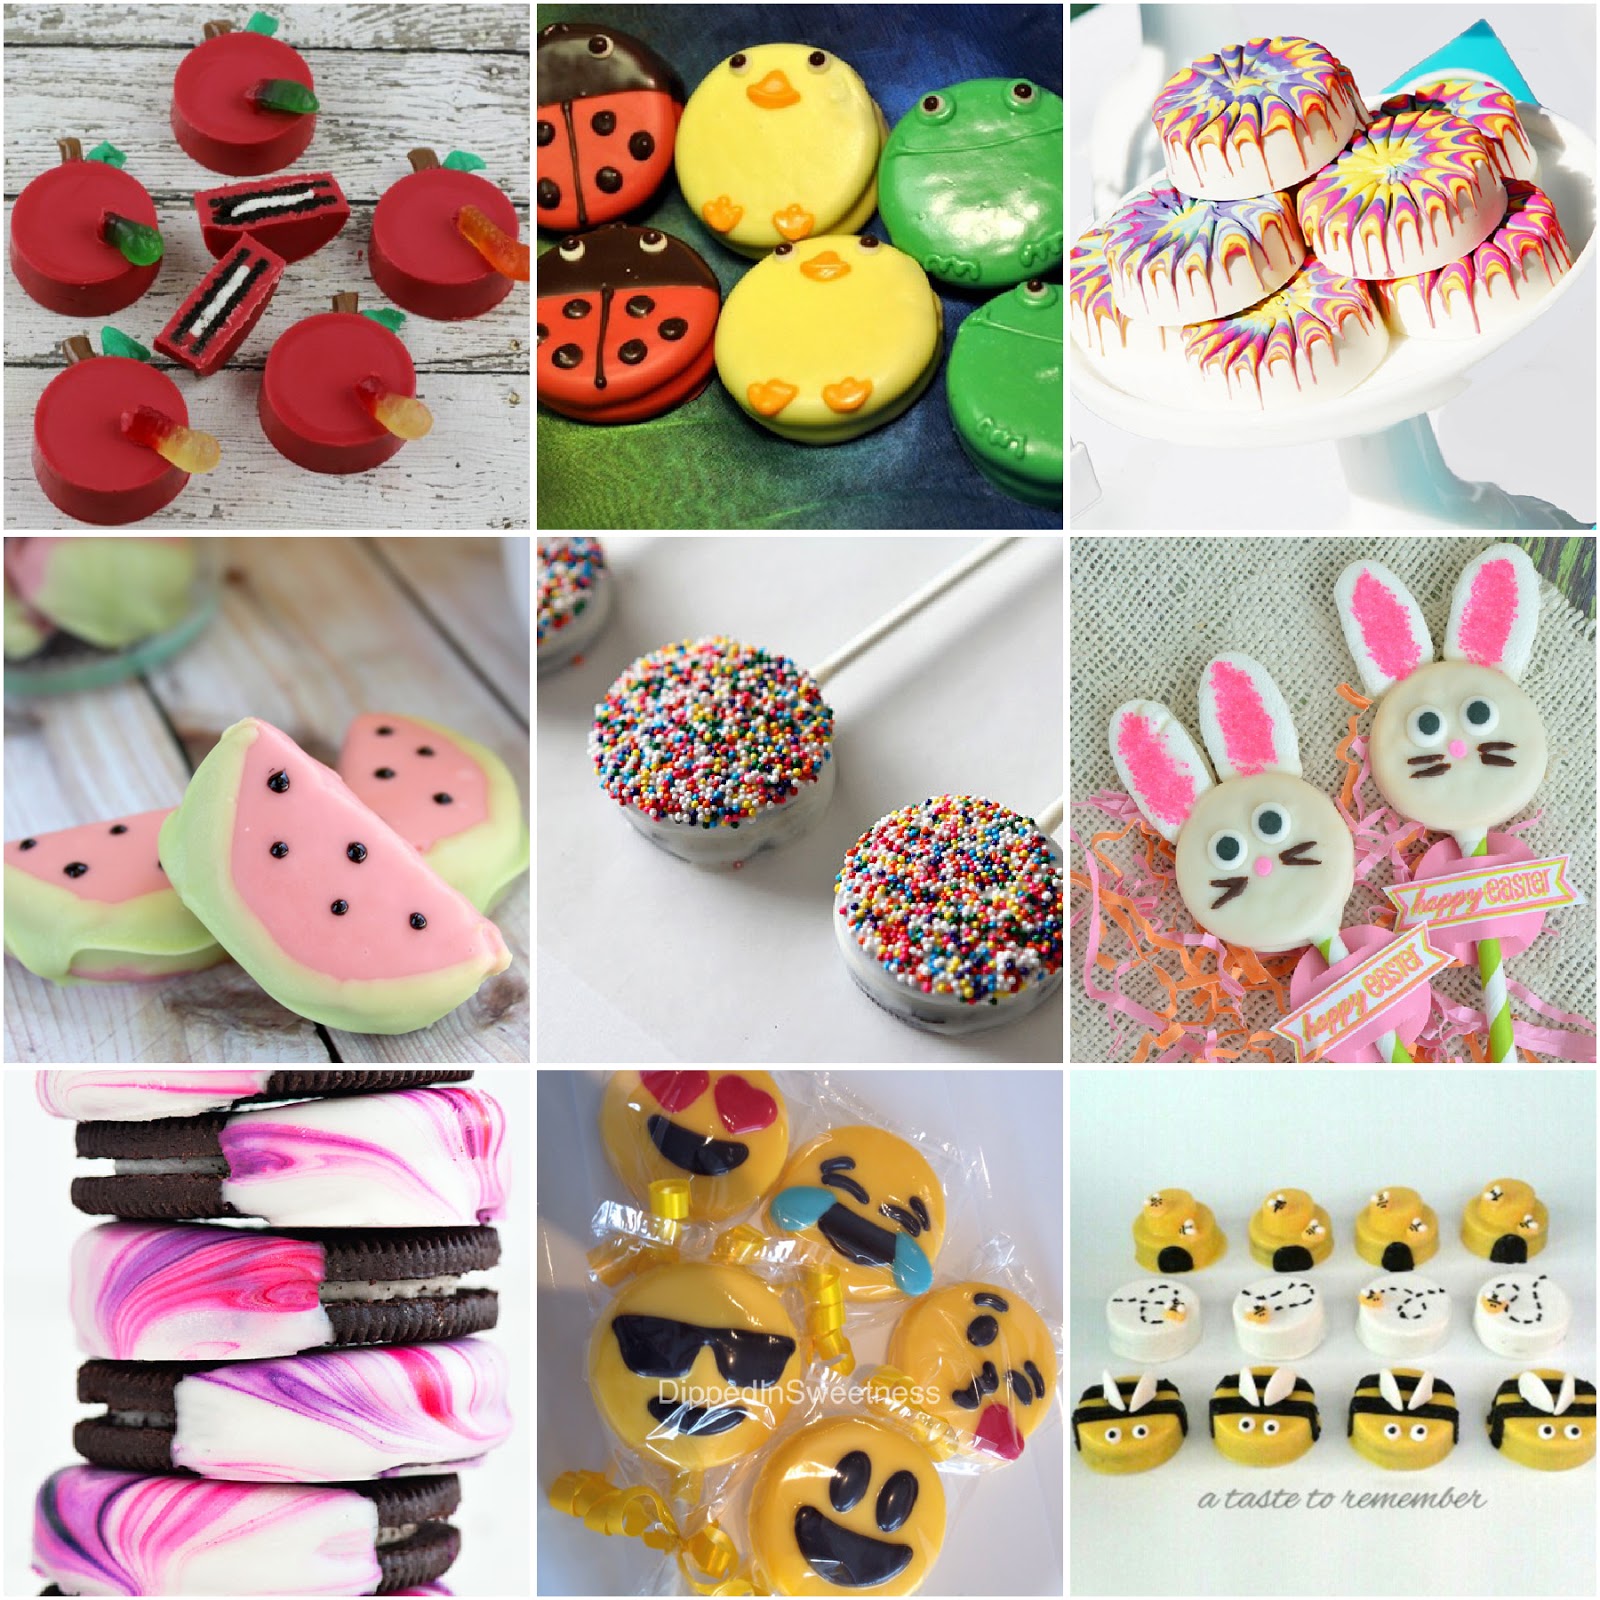
Did you know March 28 is National Something on a Stick Day? Yes, it may be another quirky food holiday but there’s no denying it is a fun excuse to invite your customers and social media followers to visit your store…as if we need another reason to eat more chocolate!
Opportunities to join in on this celebration are endless! You could go the more daring route that involves bacon or anything deep fried or try something fail-proof that you know everyone will love…chocolate-covered sandwich cookies!
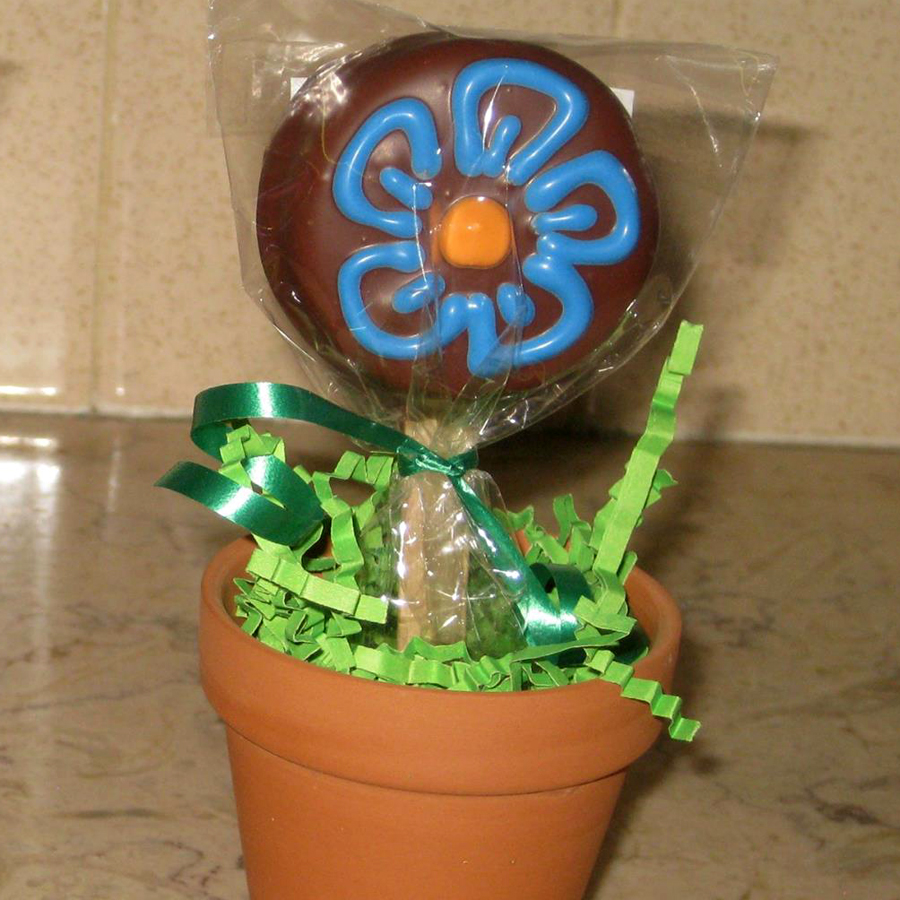
If you have ever tried to insert lollipop sticks into any number of sandwich cookies, you probably felt about as efficient as a tortoise. Thanks to a quick and easy tip shared by RCI member, Kimberly Mitchell with Olympian Candies, you can pump out as many chocolate-covered sandwich cookies on a stick as your heart’s content and still have time to decorate them for National Something on a Stick Day! Inserting wooden popsicle sticks into double-stuffed sandwich cookies will make this process much easier and efficient than using lollipop or sucker sticks. With a little embellishment, wrapped in a clear candy bag and tied with a pretty little ribbon, Olympian Candies can’t keep their chocolate-covered-sandwich-cookies-on-a-stick on the shelf!
 |
Olympian Candies uses flower pots, foam and shredded paper
to display their cute,spring-themed sweets-on-sticks! |
Here’s some other decorating ideas for your chocolate-covered sandwich cookies.
Stay connected with RCI through Facebook for more tips and inspiration dedicated to the retail candy maker. Not a member? Click here to learn how RCI can help you build your sweet business.
Tags:
Candy Holidays
Idea Sharing
Ideas
Merchandising
Oreos
Something on a Stick Day
Spring
Summer
Teacher
Permalink
| Comments (0)
|
|
|
Posted By RCI,
Tuesday, February 21, 2017
Updated: Wednesday, April 29, 2020
|
Spring is the perfect time to freshen up your merchandising displays. Save money by finding new uses for old items to create eye-popping displays with “wow factor!” Old ladders, tables, or wooden crates can make for unexpected and memorable ways to display your confections.
Before you spend any money, take a look at items currently used in your store, tucked away in storage or even at your home that could be repurposed or upcycled with a fresh coat of paint. Next, visit a local flea market and use your imagination to search for anything that could be a vesicle to display your products.
Take tips from RCI’s 2016 Merchandising Essentials course when seeking display pieces that help satisfy one or more of the following five design principles:
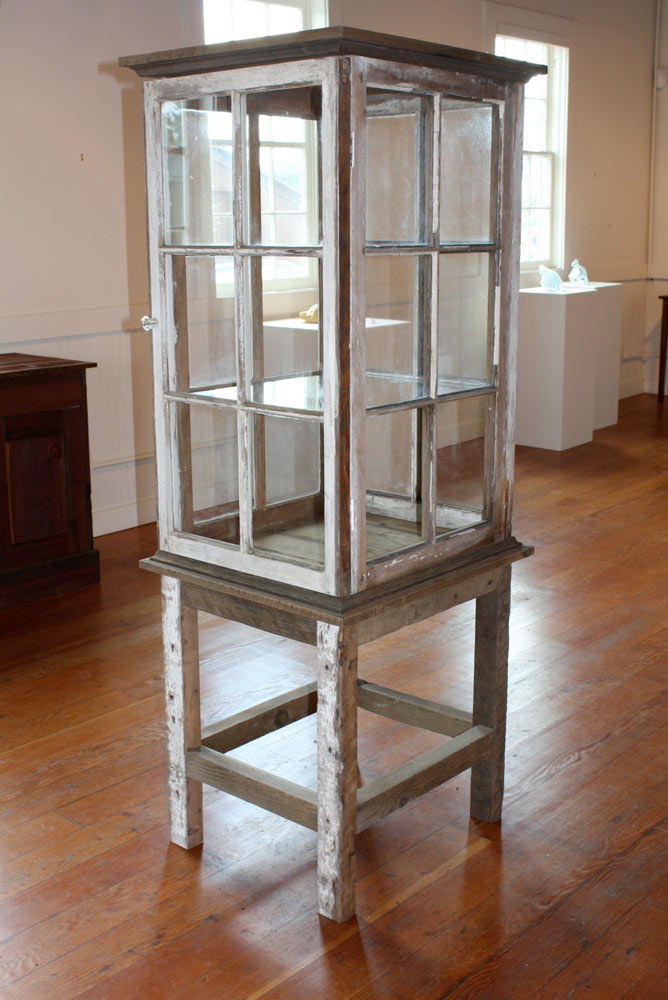
- Focal Point - Every display or category/department should have a focal point or a center of activity, interest or attention.

Old windows can be reimagined to create a stunning focal point as a glass-enclosed display case. Photo property ofre-store.org |
- Balance (symmetrical or asymmetrical) – Symmetrical balance is created by repeating the reverse of a design (or a mirror image) on the opposite side of the vertical axis. Symmetrical balance is considered formal, sophisticated and easy to visually digest. Asymmetrical balance is more informal, yet dynamic, achieving balance through contrast, using different elements that have equal weight.
 |
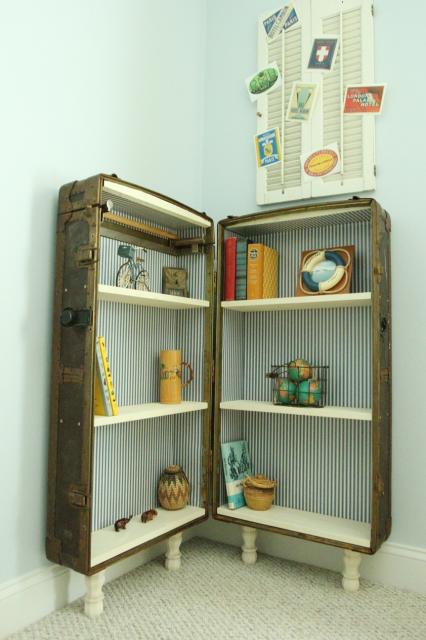
An open trunk or small suitcase can be repurposed into shelving to create the perfect opportunity for a symmetrical display. Check outremodelaholic.comfor tutorial on how to create a bookshelf (pictured above) out of an antique trunk.
|
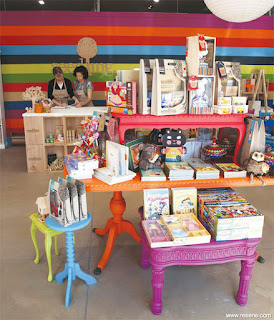 |
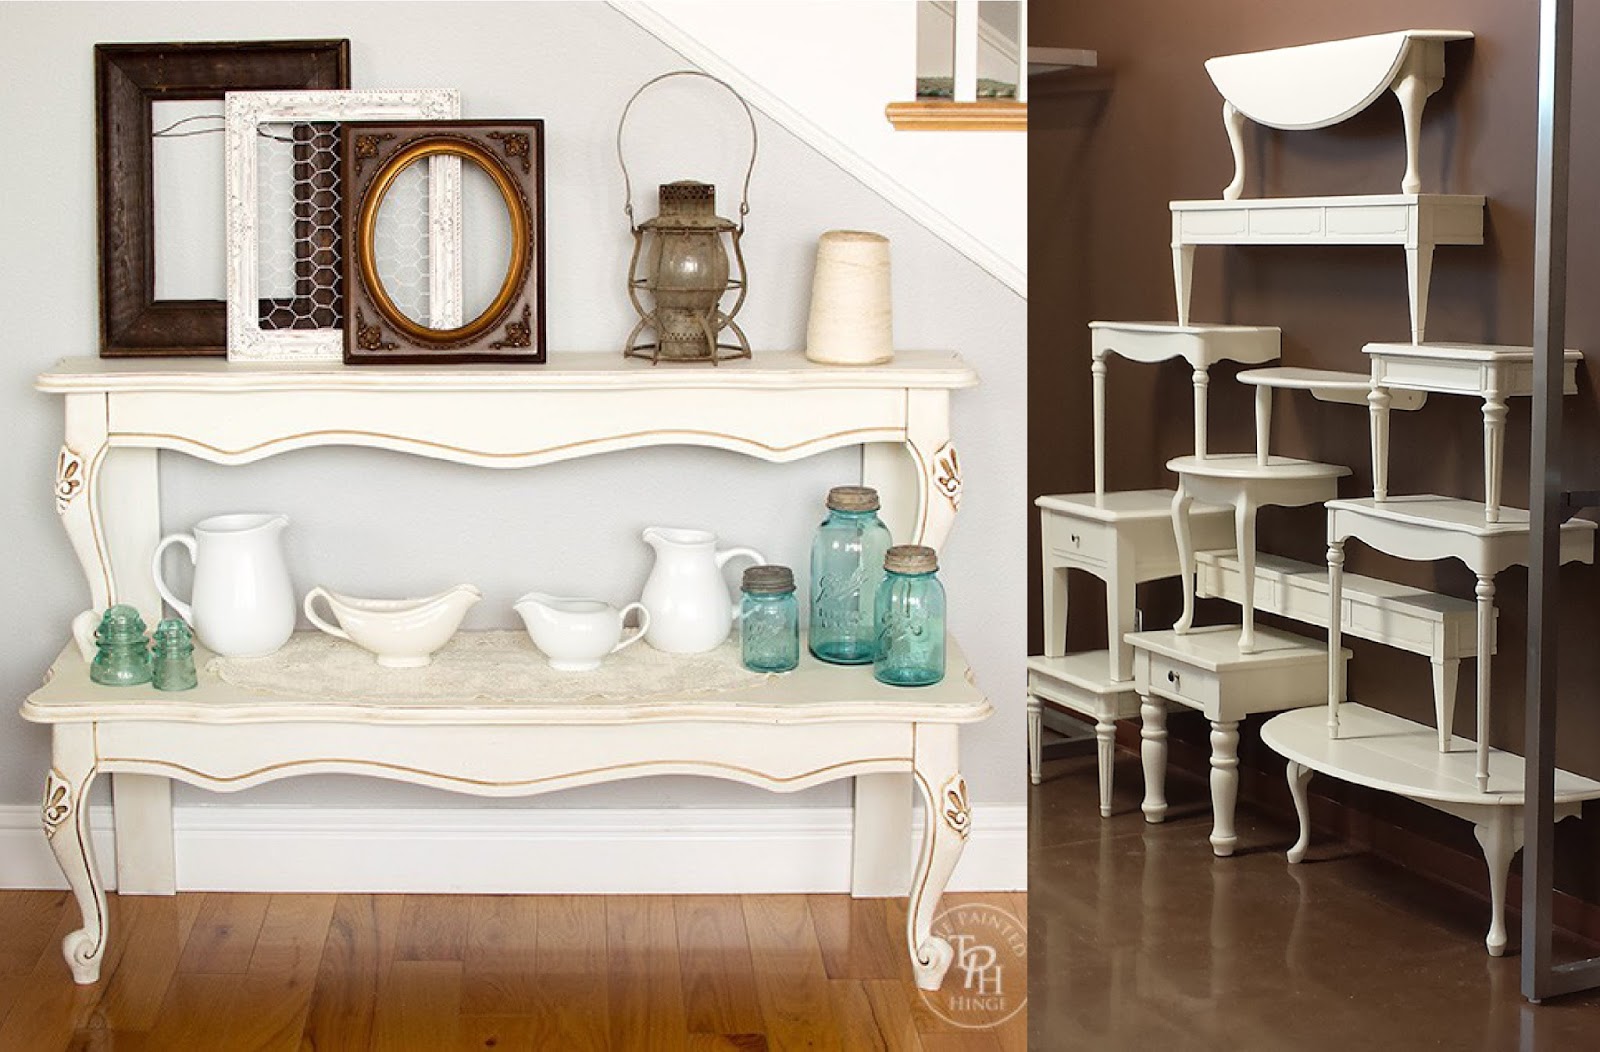
Upcycle tired tables with vibrant paint to create an asymmetrical balance display, like the ones fromresene.compictured above.
|
- Pyramid Merchandising – This principle is achieved by creating a pyramid of product, with the top being the focal point that attracts attention. This is a very effective and foolproof merchandising technique.
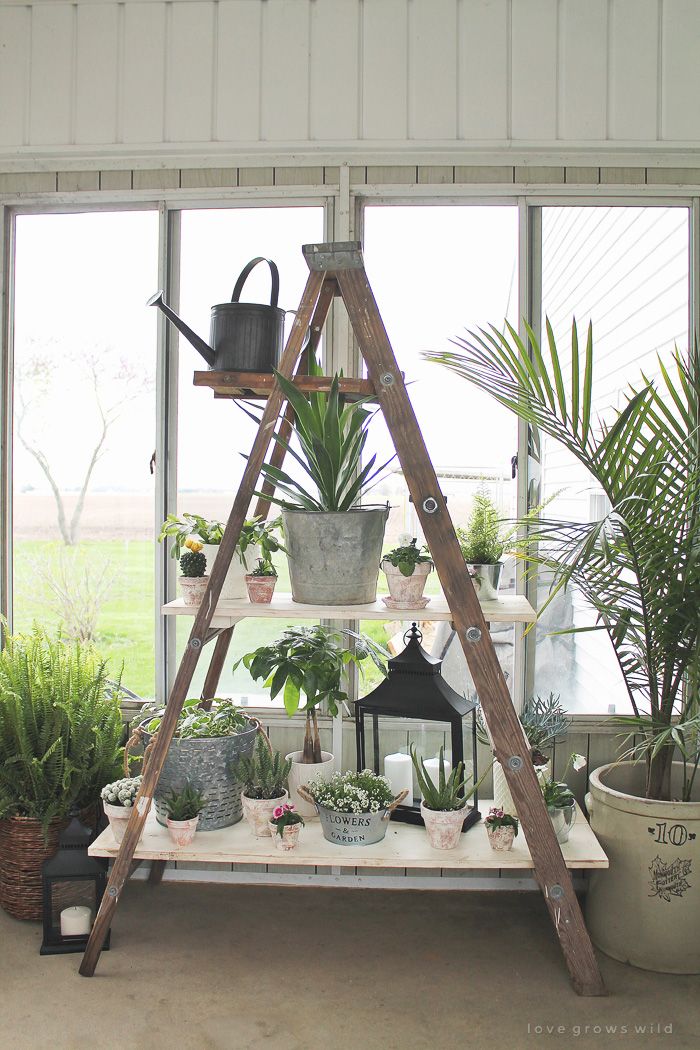
Here's an example of pyramid merchandising created by repurposing an old ladder as a shelf. Learn how to build your own by viewing a tutorial at lovegrowswild.com
- Repetition - Create a striking and clean display through the repetition of many of the same or similar products.
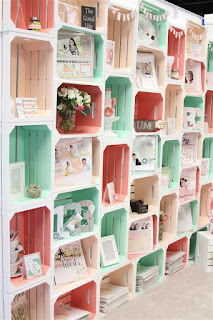 |
The repetition of inexpensive, painted wooden crates used bychickaniddy.commakes an impact as a wall display.
|
- Harmony – A pleasing combination or arrangement of different things will make your customer feel comfortable and at ease.
With an open mind and a little elbow grease, you can breathe new life into old furniture and flea market finds to create merchandising displays that will get your customers saying “WOW!” without breaking the bank.
Tags:
Budget
Creativity
Displays
Ideas
Merchandising
Permalink
| Comments (0)
|
|
|
Posted By RCI,
Friday, January 6, 2017
Updated: Wednesday, April 29, 2020
|
As we welcome the New Year at RCI, we welcome the opportunity to celebrate RCI’s 100th anniversary. During our year-long celebration of this association’s rich history, we aim to reflect on the past, while looking to the future of this sweet industry.
In thumbing through historical RCI documents, we discovered an article from one of RCI’s monthly newsletters that is surprisingly fitting for kicking off 2017!
In this excerpt from event speaker and vice president of ad agency Batten, Barton, Durstine and Osborn, Inc. (BBDO), Whit Hobbs reflects on the 1950s and helps his audience of candy makers look to the “sizzling sixties” to inspire fresh, new ideas.
Notice the date: it’s Thursday, June 11, 1959, which means that you are standing on the threshold of a new decade and a new world, the Sizzling Sixties. Behind you lie nearly all of the fabulous rapidly fading fifties.
The decade of the superhighway and the super market. The family room and the TV dinner. The Sputnik and the Beatnik. The greatest decade of CHANGE that there has ever been in the history of the world. Every day during this decade, this whirling-dervish world of ours has made another complete revolution around the sun. Day after day, revolution after revolution. Revolutions in the way people live. In the way they shop. In what they buy. And what they eat. And what they drink. And what they think.
Look around you. Notice how completely the world has changed. Markets have changed. Diets have changed. Habits have changed. And money is in new pockets.
Most of all people have changed. Notice that people are taller than they used to be. And healthier. And smarter. And savvier. And more sophisticated. With more varied appetites. And more cultivated tastes. People are growing up faster. And staying young longer. They’re becoming harder to satisfy. Harder to fool. Easier to bore. Hungrier for novelty and news. They’re constantly reaching for something better. Something fresh. Something new. And they’re constantly finding it.
My point is this: your customers have changed more than you and your products have changed. What an opportunity you have in the next few months and in the next few years to throw away the old rules and the old yardsticks…in favor of new appeals and new looks and new products and new ideas. WHAT AN OPPORTUNITY TO STOP PLAYING FOLLOW THE LEADER. To stop “doing it this way because this is the way we’ve always done it.” What an opportunity to reach for something better – something fresh and new – and find it.
You know what I’d do if I were you?
I’d make candy that you LOVE to make. And I’d sell it the same way. With pride. With conviction. With enthusiasm. And, most of all, with imagination. And with every piece of candy I sold, I would also sell the IDEA of eating candy. The REWARDS OF CANDY. The fun, the energy, the nutrition, the convenience.
If I were a candy manufacturer heading into the 1960s, I’d make my products timely and talked about and tantalizing. Candy is strictly for pleasure, and I’d have fun with my products and with my customers. I’d tie in with every fad and fancy I could find.
- Everybody is on a fortune cookie kick these days. I’d bring out Fortune Candies, with corny, crazy fortunes on them.
- I’d do what the cosmetic people are doing. They bring out shade promotions: Rue de la Pink and French Spice and Red Tape. I’d bring out taste promotions: exciting one-shots that are here today and eaten up tomorrow.
- I’d bring out special summer candy…to be chilled and served ice cold. Bought in the freezer department in a supermarket.
- Why isn’t candy on every restaurant menu as a dessert? Why isn’t it packed in TV dinners? Why isn’t there dry candy, like dry wine and dry beer?
- I’d find candy boxes that turn themselves into toys or lunch boxes or something. Inventive packaging has sold my wife one helluva lot of (ugh) cottage cheese. And she buys vitamins the same way: to end up with a handsome jar. She buys soap in plastic bags just to wind up with the bags. You’d like my wife.
- Give her Monday bars and Tuesday bars and Wednesday bars to put in lunch boxes and she’ll buy a whole mess of ‘em.
- Give her a box of candy for a long motor trip: each kid gets one of the small pieces every 50 miles, a larger piece for every 100 miles and a special red piece every time you cross a state line.
- Give her a big bag of un-birthday candy to serve tonight at an un-birthday party…just for the fun of it, because it isn’t someone’s birthday.
These are just some of the things I might possibly do, if I were you. Time to think big and be big. Time to think new and be new.
Tags:
Creativity
Ideas
Marketing
Merchandising
New Year's
Packaging
Permalink
| Comments (0)
|
|
|
Posted By RCI,
Tuesday, October 18, 2016
Updated: Wednesday, April 29, 2020
|
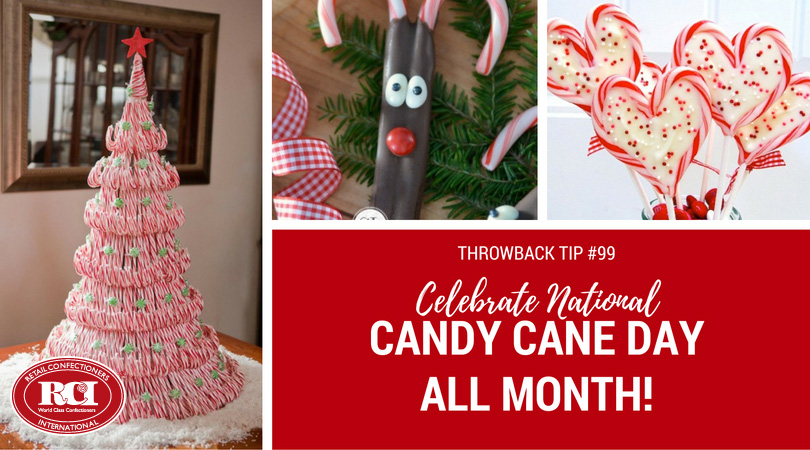
Did you know the day after Christmas is National Candy Cane Day? But don’t wait until December 26, celebrate this iconic holiday treat all month! In this throwback tip from 2013, we’ve shared five creative and easy ways (plus a couple new ideas) to incorporate candy canes into your product mix and presentation for the holidays.
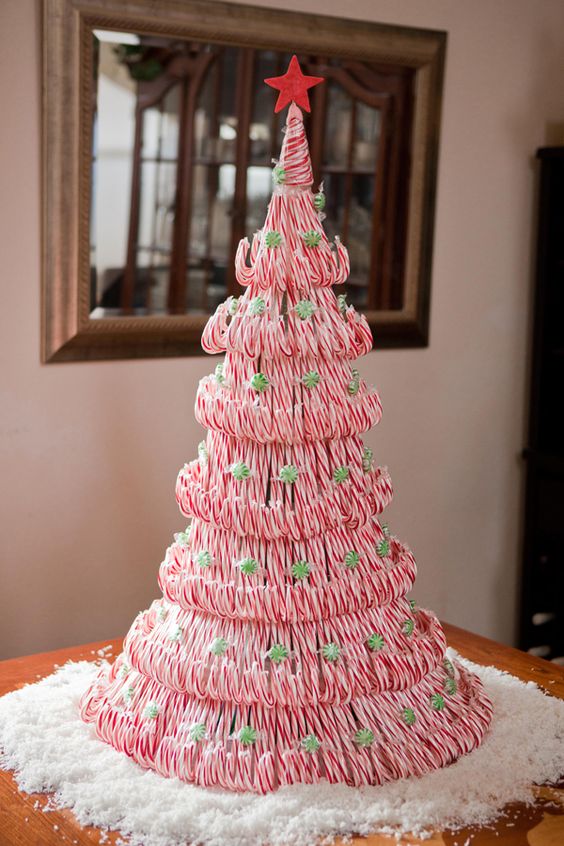
Candy Cane Tree
Forty-four boxes of candy canes were used to make this impressive candy cane tree! Make an impact in your holiday window display or size it down for an eye-catching centerpiece for a tabletop display. Click here to view a step-by-step tutorial.
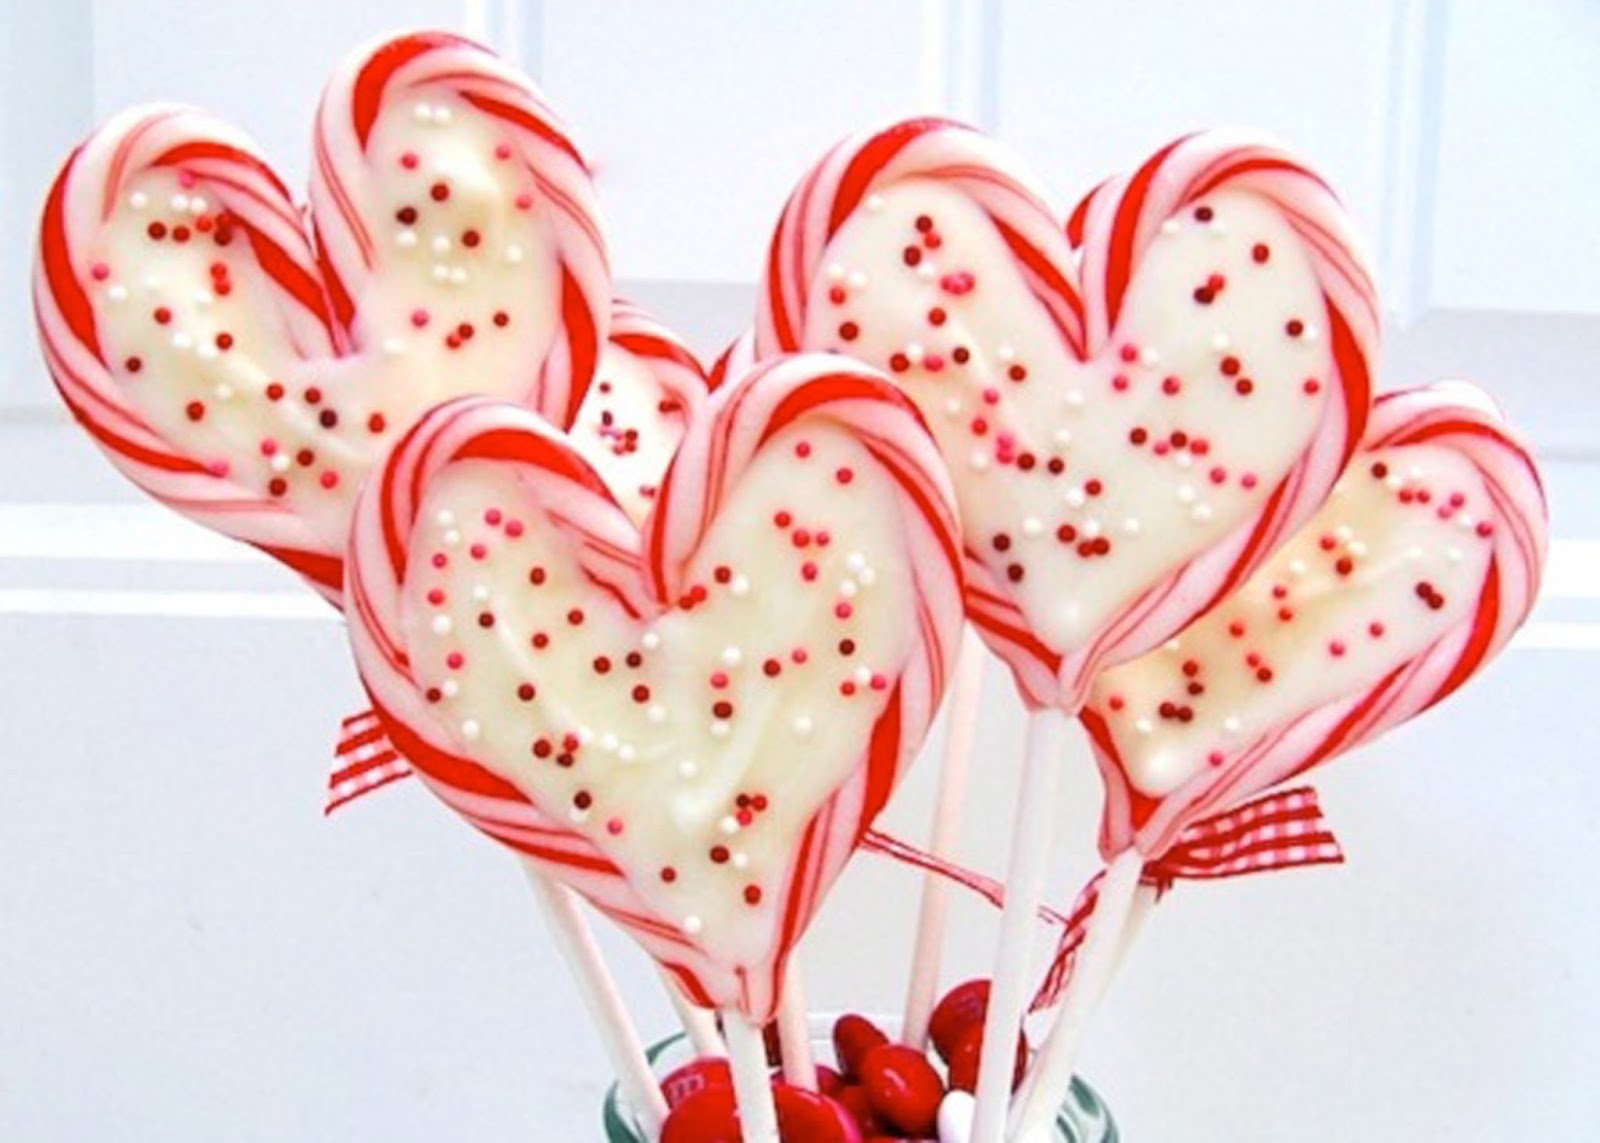
Candy Cane Sweetheart Pops
With a box of mini candy canes, a lollipop stick and a bit of added heat, mould candy canes into hearts to frame your favorite holiday bark or dark chocolate. Plus, with the right color ribbon, this could easily double as a Valentine treat and a good way to use up leftover candy canes. Click here to view recipe.
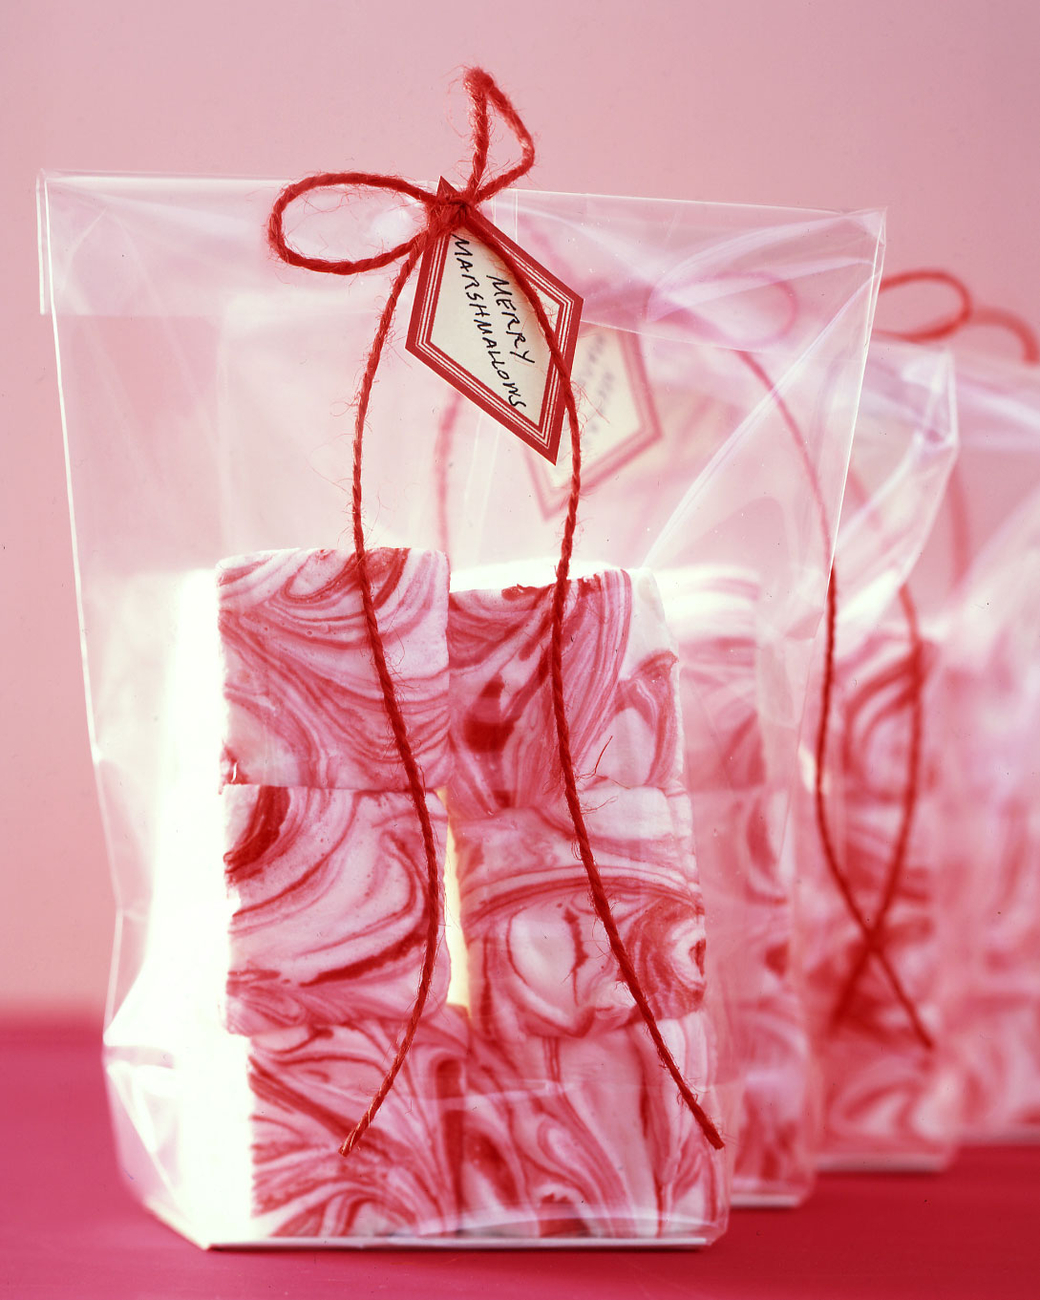
Candy Cane Marshmallow
Sold separately or aside your own blend of hot cocoa mix, these festive peppermint marshmallows would add a pop of color to your shelf when packaged in clear candy bags. Click here to view recipe.
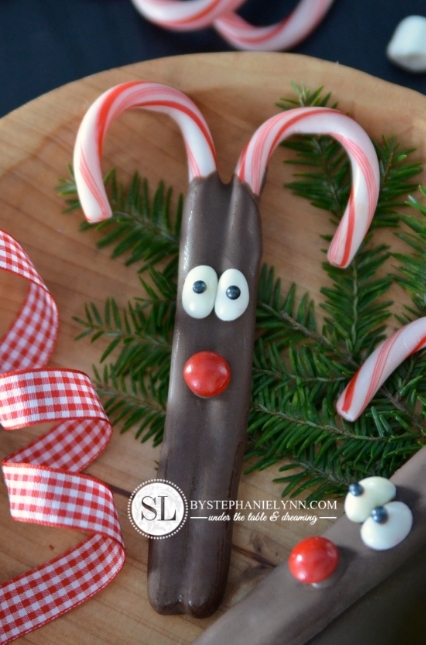
Candy Cane Rudolph
Embellish these antlered treats with white jelly beans and black sugar pearls for eyes and red Skittles for Rudolph’s signature red nose.
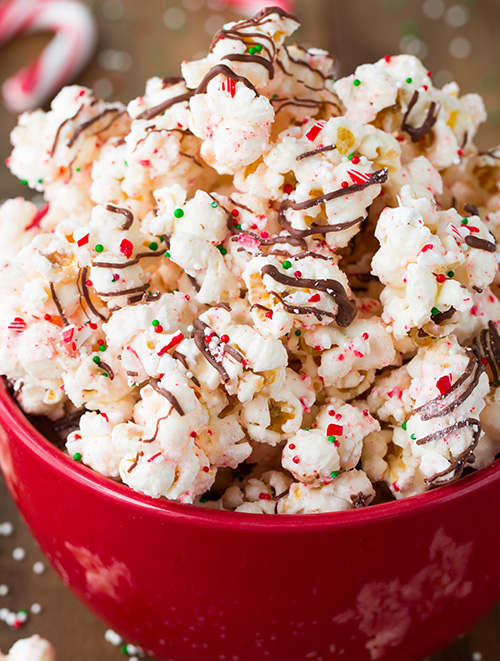
Candy Cane Bark Popcorn
Save the plain popcorn for decorating the Christmas tree! Give out samples of candy-sweet popcorn bark to your guests and watch it pop off the shelf! Click here for more details.
If you have creative candy cane ideas to share, leave us a comment below!
Tags:
Bark
Candy Canes
Candy Holidays
Candy Making
Chocolate
Creativity
Displays
Holidays
Ideas
Marshmallow
Merchandising
Peppermint
Popcorn
Recipe
Seasonal
Permalink
| Comments (0)
|
|
|
Posted By RCI,
Tuesday, October 11, 2016
Updated: Wednesday, April 29, 2020
|
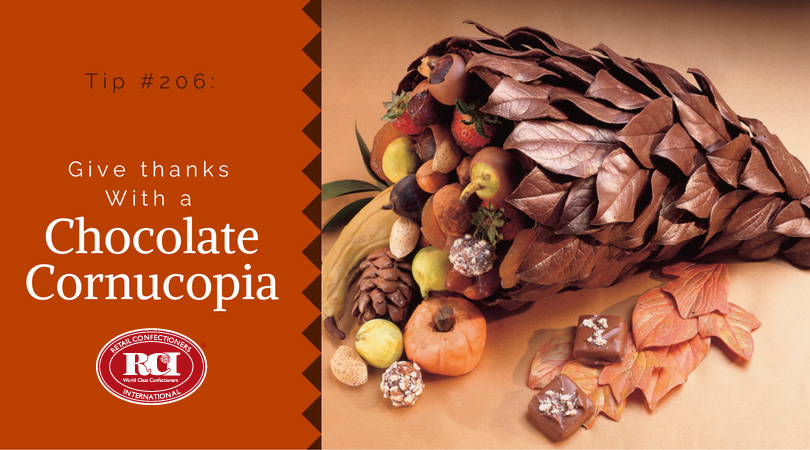
Turn heads with this bountiful display, which can be filled with chocolates, chocolate-dipped fruits and other fall favorites. Remind shoppers through merchandising that this tasteful cornucopia would make for the perfect dressing for their holiday table or a welcome and thoughtful hostess gift.
Chocolate Cornucopia
Materials needed:
• (1) 12” wicker cornucopia
• (1) one-gallon plastic storage bag
• roll of tape
• pastry brush or latex glove
• vegetable brush
Ingredients:
• Peter’s Lenoir™ semisweet chocolate
• non-toxic, fresh salal leaves*
• gold and copper luster dust (optional)
*Commonly known as lemon leaves. Available through floral supply shops.
Directions:
Cornucopia
Cover outside of 12” wicker cornucopia with a one gallon plastic storage bag, fitting snugly; secure with tape. Using a pastry brush or latex-gloved hand, apply three thick coats of Peter’s Lenoir™ semisweet chocolate over the surface, allowing each application to dry before adding the next. Remove wicker cornucopia; peel away and discard bag.
Chocolate Leaves
Scrub non-toxic fresh salal leaves* with vegetable brush; rinse thoroughly and air dry. Use a small metal spatula to coat the back side of leaves with Peter’s Lenoir™ semisweet chocolate. Clean edges of excess chocolate. Chill until dry. Grasp leaf near the stem, gently pulling it away.
Decorating the Cornucopia
Trim ragged edge of the open end. Attach large chocolate leaves along open end, overlapping and extending them slightly over the edge. Use increasingly smaller leaves until entire top and sides of cornucopia are covered. Brush with gold and copper luster dust (optional).
Learn techniques like this and others at RCI’s Chocolate Boot Camp in Waterbury, Connecticut February 20-23, 2017. Register now at retailconfectioners.org/bootcamp.
Tags:
Chocolate
Chocolate Boot Camp
Creativity
Displays
Education
Fall
Holidays
Ideas
Merchandising
Photos
Recipe
Seasonal
Thanksgiving
Permalink
| Comments (0)
|
|
|
Posted By RCI,
Wednesday, July 6, 2016
Updated: Wednesday, April 29, 2020
|
A tower of truffles or “truffle tree” is a stylish way for your customers to serve truffles to a large group. The Truffle Tree also makes for an eye-catching merchandising display for your retail shop. It is a big ticket item that can add nice revenue to your store’s sales. With a little advance planning, building the tree can be relatively easy to execute.
Here you will find a list of materials needed and step-by-step instructions for creating this showpiece as provided by RCI member, Annedore's Fine Chocolates. RCI members: Click here to log on to RCI’s member site and view three variations of ganache recipes on page 9 of 2014’s 3rd quarter issue of Kettle Talk.
For ease of construction, un-dipped ganache balls may be stored in the freezer. Simply follow the instructions below for thawing and dipping the ganache balls and you are ready to build a tree on demand.
Materials Needed:
- Truffles (see recipes below)
- Silicone mats
- Plastic wrap
- Foam block
- Parchment paper or aluminum foil (optional)
- Round toothpicks
- Tempered chocolate
- Foam cone
- Wrapping paper or fabric (preferably coordinating with the color of your truffles)
- Flathead pins
- Scissors
- Ribbon or tree topper (optional)
Step-By-Step Instructions
- Prepare truffle centers using your own ganache recipe or see recipes below. Pipe ganache onto silicone mats. Cover the mats with plastic wrap and refrigerate for 12 hours. Transfer mats to the freezer for 12 hours. Remove mats from the freezer and pop out ganache balls (Note: Balls may be returned to the freezer for future use). Cover balls with plastic wrap and allow them to come to room temperature.
- Cover a foam block with parchment paper or aluminum foil, so it can be reused. Glue a toothpick into each ganache ball by, first, dipping one end of the toothpick into tempered chocolate and then inserting that end into the center of the flat side of the ganache ball. Allow toothpick to set up firmly in the ganache ball.
- Once the toothpick is firmly set in the ganache ball you are ready to dip each ganache ball in tempered chocolate. Dip each ball carefully and then insert tooth-picked end of the ball into the block of foam. This will allow for perfect-looking, uniform truffles to create your truffle tree. Allow chocolate to set up. Truffles may be decorated while standing in the block of foam.
- Before you begin to build your tree, first, wrap the foam cone completely with wrapping paper or fabric – secure with flathead pins, as needed.
- Beginning at the bottom of the cone, push the tooth-picked truffles into the cone working your way around the cone to create the first row. On the second row, stagger the truffles by placing them in the open spaces created by the first row. Carefully work your way up the cone row by row until the entire cone is covered in truffles. Toothpicks may need to be cut as you reach the top of the cone.
- Crown the top of your tree by inserting a tooth-picked truffle vertically on the top of the cone. Experiment with different tree toppers, such as a large bow or a chocolate initial or number (birthday idea). Use your imagination.
Tags:
Candy Making
Chocolate
Creativity
Displays
Idea Sharing
Ideas
Merchandising
Photos
Trends
Truffles
Tutorial
Permalink
| Comments (0)
|
|


